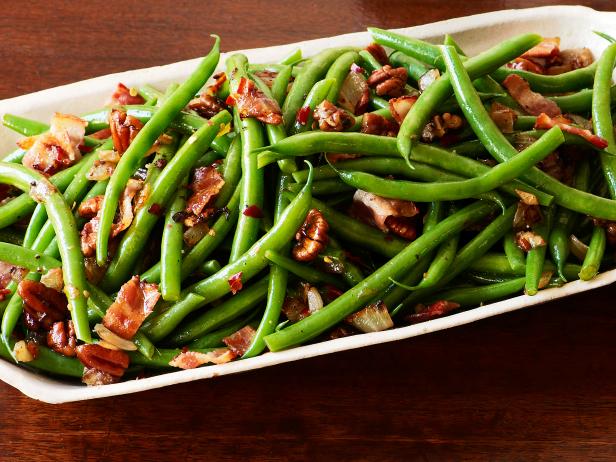
This is the best recipe for canned green beans. The bacon flavor goes well with these soft vegetables, making a tasty and easy side dish.
If you need a quick, easy way to make the best canned green beans recipe, this is it!
Canned vegetables are a quick, budget-friendly way to serve vegetables. But sometimes, the flavor can be a little lackluster.
Enter this canned green bean recipe. It’s the perfect side for a quick dinner that’s on the table in under 30 minutes.
And as Rebecca from Good Things Baking, I love giving my family a vegetable I know they’ll like.
The same goes for my recipe for canned corn; it’s a cheap staple that tastes great and only takes a few easy steps.
Canning fresh green beans is a great way to preserve your garden bounty for enjoying year-round While plain canned beans are nice, adding crispy bacon pieces takes them to a whole new level of delicious! The smoky, salty bacon perfectly complements the fresh, green flavor of the beans.
Canning green beans with bacon is safe and easy. The process is very similar to water bath or pressure canning regular green beans. You just add cooked, crumbled bacon before sealing the jars. Then you can enjoy bacon-y beans as side dishes, in casseroles and more all year!
Ingredients Needed
To can green beans with bacon you will need
- Fresh green beans, washed and trimmed
- Bacon (about 1 lb per 3-4 lbs beans)
- Canning salt (optional)
- Water
- Canning jars, lids and rings
For best flavor, use a thick-cut, wood smoked bacon. Cook until just crisp then crumble into small pieces after cooling. Canning salt is optional for flavor only, not food safety.
Prep Steps Before Canning
Before packing the jars, you’ll need to prep the green beans and bacon:
Green Beans:
- Rinse beans and trim ends. Remove any blemished beans.
- Cut beans into 1-2 inch pieces. This allows them to pack nicely into the jars.
- Leave beans raw – no blanching needed. Helps them stay crisper once canned.
Bacon:
- Cut bacon into 1 inch pieces. Fry in a skillet over medium heat until crispy.
- Drain bacon on paper towels to absorb excess grease.
- Let bacon cool completely before crumbling into small bits.
How to Pack the Canning Jars
There are two options for packing the green beans and bacon into the jars:
Option 1: Layered
- Add 1-2 tbsp bacon pieces to the bottom of each jar.
- Pack raw cut green beans into each jar as tightly as possible, leaving 1/2 inch headspace.
- Top beans with another 1-2 tbsp bacon bits before sealing.
Option 2: Mixed
- In a large bowl, mix together cut green beans and crumbled bacon pieces.
- Evenly distribute bean-bacon mix between jars, packing down tightly and leaving 1/2 inch headspace.
Add Liquid and Process Jars
After packing the bean-bacon mix into the jars, add liquid:
- For raw pack, cover beans with water, broth or juice leaving 1/2 inch headspace.
- Optionally add 1/4 tsp canning salt to each pint or 1/2 tsp per quart before sealing.
- Wipe jar rims, apply lids and rings and tighten to fingertip tight.
- Process in a water bath canner or pressure canner according to the below times for your jar size and canning method.
Recommended Process Times:
- Water bath canner – quarts 75 min, pints 65 min
- Pressure canner – quarts 25 min, pints 20 min at 10 lbs pressure
Once cooled, test jar seals. Any unsealed jars should be refrigerated for use within days or reprocessed. Properly sealed bacon green bean jars can be stored up to 1 year.
Serving Canned Bacon Green Beans
Now comes the fun part – enjoying your canned bacon green beans! Try them:
-
As a side dish – drain liquid and heat beans in a skillet with butter.
-
In casseroles like green bean casserole.
-
In soups and bean salads for added protein.
-
Mixed into pasta dishes and stir fries.
-
Pureed into a smoky dip or spread.
The possibilities are endless with these flavor-packed canned veggies on hand! Be sure to label jars with the date canned for easy reference.
Canning green beans with bacon is an easy way to preserve fresh beans from the garden or farm stand to savor all year long. The added smoky bacon flavor takes this classic side to the next level.
Variations for Canned Green Beans with Bacon
— Add a new dimension of flavor with red pepper flakes. Just a sprinkle will do.
— Add minced garlic for an extra boost of flavor. Make small pieces of garlic so that it spreads out evenly and doesn’t take away from the other flavors in the dish.
— Green beans (steamed) from frozen
— Balsamic vinegar can be added to create a unique flavor.
— Instead of using bacon strips, you can use bacon bits. They’ll add a delicious savory flavor without the hassle of cutting up bacon strips.
Making Canned Green Beans Southern Style
Southern-style green beans are unique in that they’re cooked until very soft and tender.
There’s no crunch or snap left, which means that they’re a perfect way to use canned green beans!
To make Southern-style green beans, don’t drain off the liquid. Add them to a pot with all of the canning liquid and season with salt and pepper.
Add 1/4 cup of diced onions and 1 clove of crushed fresh garlic instead of garlic and onion powder.
Over high heat, bring to a boil.
Once they’ve boiled, reduce heat to medium-high, and cook them until the liquid has evaporated.
Cooking times will vary depending on how many cans of beans you make. But it should take 15-20 minutes.
Once all of the liquid has cooked off, remove the green beans from the heat.
Stir in the bacon pieces.
Serve the southern-style green beans immediately.