Slaughtering a turkey yourself can seem daunting, but with proper preparation and tools, it is an achievable task that provides high-quality, homegrown meat for your family. In this comprehensive guide, I will walk you through the entire turkey slaughter process from start to finish
Why Slaughter Your Own Turkey?
There are several benefits to slaughtering your own turkey rather than buying one
-
Quality – You control the quality of the meat completely. Turkeys raised on pasture and natural feeds are much more flavorful than commercial birds.
-
Humane Treatment – You can ensure the turkey lives a good life and is slaughtered humanely. Commercial facilities prioritize efficiency over welfare.
-
Cost Savings – Raising and processing your own turkey is much cheaper than buying an organic or free-range one.
-
Sustainability – It reduces your carbon footprint by eliminating transportation and packaging.
-
Self-Sufficiency – It’s rewarding to provide your own food and learn essential homesteading skills.
Step 1: Choose and Raise Your Turkey
First, select the right turkey breed and raise it to slaughter weight:
-
Heritage breeds like Bourbon Red and Narragansett offer the best flavor. They reach target weight around 28 weeks.
-
Commercial breeds like Broad Breasted White grow faster but lack flavor. They’re ready by 20 weeks.
-
Allow access to pasture and supplement with grain for optimal health and growth.
-
Target 20-30 lbs for hens and 30-40 lbs for toms as ideal processing weights.
-
Withhold food for 12-24 hours pre-slaughter to empty the crop and intestines. Keep providing water.
Step 2: Prepare Your Processing Area
Slaughtering can get messy, so set up an efficient processing area:
-
Choose a level, shaded outdoor spot safe from pests. Near a water source is ideal.
-
Have a large container of ice water to chill the carcass afterwards.
-
Set up tables for slaughtering, scalding, and plucking. Stainless steel or plastic work best.
-
Organize knives, gloves, scalding pot, pliers, and other supplies nearby.
-
Place trash cans nearby for offal, feathers, feet, etc.
-
Display anatomy diagrams for quick reference.
Step 3: Stun and Bleed
Now it’s time to slaughter the turkey humanely and quickly:
-
For minimal stress, transfer the calm turkey in a basket or crate from its pen.
-
Hang upside down by legs or place head down in a killing cone to sedate it and drain blood from brain.
-
Firmly pull the head down to expose the throat and neck vertebrae.
-
Use a very sharp knife to deeply slice both carotid arteries on either side of the neck.
-
Cutting both arteries ensures rapid blood loss for a quick, humane death usually within 10 seconds.
-
Allow the turkey to bleed out for 1-3 minutes before scalding. Save blood for cooking.
Step 4: Scald and Pluck
Scalding helps loosen feathers for easier plucking:
-
Heat water to 150°F in a large pot with room to submerge the turkey.
-
Dunk the carcass and swirl for 45-90 seconds until feathers pull out easily.
-
Avoid overscalding which can tear the fragile skin.
-
Immediately start plucking on a clean surface while skin is still hot.
-
Pluck against the grain of feather growth. Rubber gloves help grip.
-
Remove even the tiniest pinfeathers. Singe later if any remain.
-
Rinse the carcass occasionally to wash away feathers and gunk.
Step 5: Eviscerate the Turkey
Removing innards is the messiest part. Follow these tips:
-
First cut off the head and feet. Discard with feathers.
-
Make an incision around the anus without cutting into intestines.
-
Carefully cut abdominal skin and muscle to expose innards.
-
Reach inside and scoop everything out in one piece if possible. Cut membranes to free.
-
Keep heart, liver, gizzard for eating. Discard lungs and intestines.
-
Thoroughly rinse the body cavity of any blood, bile, fecal matter, etc.
Step 6: Chill and Clean
Proper chilling preserves freshness and flavor:
-
Immerse the just-slaughtered turkey in an ice bath for 1-2 hours until completely chilled, rotating occasionally.
-
Remove turkey and rinse again under cold water. Pat dry.
-
Inspect the carcass closely and clean off any remaining feathers, organs, blood clots, etc.
-
Chilling makes pinfeathers easier to see and remove. Singe if needed.
Step 7: Cut and Package
You can leave the turkey whole or cut into parts:
-
Whole turkeys are easiest to freeze and thaw. Truss legs and wings tightly.
-
Halves or quarters save freezer space but won’t roast as evenly.
-
Separate thighs, drumsticks, wings, and breast meat for maximum versatility.
-
Wrap all cuts very tightly in freezer paper or vacuum seal with minimal air.
-
Label packs with contents and date before freezing. Use within 9-12 months for best quality.
Step 8: Clean Up
Don’t let potentially contaminated items spread bacteria:
-
Immediately dispose of all feathers, heads, feet, innards, etc.
-
Hose down all surfaces and tools with very hot, soapy water.
-
Scrub tables and sanitize with bleach or vinegar.
-
Thoroughly wash hands, gloves, aprons, and shoes with hot, soapy water.
-
Shower and change clothes immediately after processing.
-
Keep raw turkey completely separate from other kitchen surfaces and utensils.
Nutrition Info (Per 100 grams)
- Calories: 141
- Protein: 22g
- Fat: 15g
- Carbs: 0g
- Vitamin B6: 30%
This recipe makes 1 serving. Get this recipe on myfitnesspal.com.
What Do You Need Before Attempting to Butcher a Turkey?
The reason I choose to not cook a whole turkey is because, for starters, my oven can barely fit the bird. Most Indian folk don’t own an oven, let alone use it. If you notice there are hardly any bakes or casseroles or any oven dishes in Indian cooking. If there are it’s mostly giant clay ovens like the tandoor. So for starters it’s not a common appliance to own. Those who do own it, like myself will generally have at best a small one or in my case a 52 liter one which still isn’t big enough. That’s because most of us living in cities live in apartments which aren’t built with massive kitchens.
Now technical and cooking apparatus aside, the cooking time. White meat and dark meat, the two sides of any poultry. When you roast a whole bird, it’s inevitable to not have perfect cooking. How is it possible? Dark meat, legs and thighs cook differently than the breast (the white meat). Breaking down the bird allows us to cook them separately resulting in a better final cooked product. And that is why I’m butchering this turkey before cooking it.
Before we start on how to butcher a turkey at home, you need to grab the following:
- A sharp butchering knife
- Sharp kitchen scissors
- Roasting tray with a wire rack
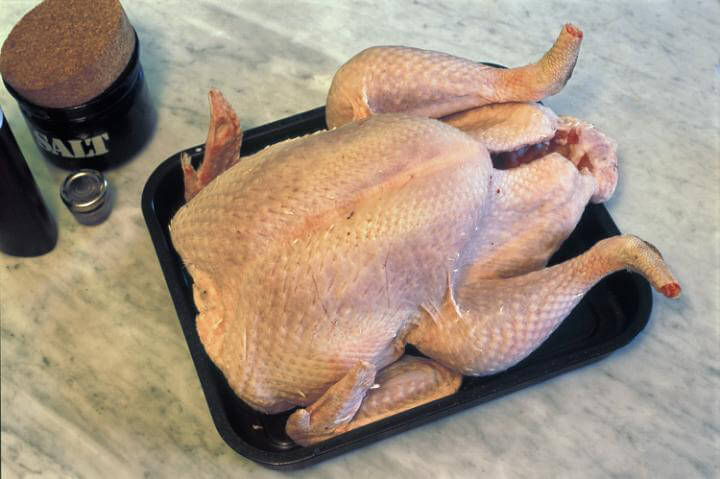
I sourced my turkey online from Sweet Stuff, weighing 5 kg.
You can also try the local supermarket to grab yours.
Butchering Turkeys For the First Time ||How to Process a Turkey & Supplies Needed||
FAQ
How do you slaughter turkey?
You put the bird in upside down, pull its head through a hole cut in the bottom, and then cut through the arteries in its neck. After a few (admittedly, long) seconds, the turkey stops struggling, bleeds out, and is ready to be processed.
How long do you let a turkey rest after butchering?
About 45 minutes or so gives it time to reabsorb the juices; otherwise they’ll dribble out when you slice, and the meat will be dry. Don’t tent the turkey with foil to keep it warm while it’s resting; it’s unnecessary and will make the skin soggy.
How old do turkeys need to be to butcher?
Turkeys can live over a decade in the wild. But on farms, they’re slaughtered as young as 12 weeks old.Nov 27, 2024