Cooking a whole turkey in the Ninja Foodi may seem intimidating, but it’s actually pretty straightforward once you know the basics. As a passionate home cook and Ninja Foodi user, I’ve perfected the technique over the last few years.
In this comprehensive guide, I’ll walk you through everything you need to know to cook a moist, flavorful turkey in your Ninja Foodi multi-cooker.
Benefits of Cooking Turkey in the Ninja Foodi
Before we get into the step-by-step instructions, let’s go over some of the main benefits of using the Ninja Foodi to cook your turkey:
-
Cooks faster – The pressure cooking function slashes cooking time significantly compared to roasting in the oven. A 10 lb turkey cooks in just over an hour!
-
Infuses flavor – The closed environment infuses moisture and flavor into the meat
-
Self bastes – No need to manually baste The turkey essentially self bastes in its own juices
-
Crispy skin -Finish with the air crisp function to make the skin crispy.
-
Frees up oven space – You can use your oven for side dishes instead of the turkey.
-
Juicy meat – Pressure cooking results in very moist, tender meat.
-
Less active cooking time – Set it and forget it! More time to relax with family.
-
Beginner friendly – With some simple guidance, anyone can make a great turkey.
Turkey Size Guide for Ninja Foodi
To start, you’ll need to make sure you have the right size turkey for your model of the Ninja Foodi:
-
5 quart – Stick with just a turkey breast or small boneless turkey roast. A whole turkey likely won’t fit.
-
6.5 quart – Aim for an 8 lb turkey or less.
-
8 quart – Can accommodate up to a 10 lb turkey.
For the crispiest skin, I recommend an 8 lb turkey for the 8 quart Foodi. This ensures the turkey isn’t touching the lid so steam can escape.
Brining is Highly Recommended
While optional, I highly recommend brining your turkey before cooking. Brining keeps the meat incredibly moist, tasty, and seasoned throughout.
It’s simple to do in the Ninja Foodi using my quick brine method:
-
Combine water, salt, sugar, and aromatics like garlic, citrus, or herbs in the pot.
-
Place seasoned turkey in pot, breast side down. Cover with more brine if needed.
-
Pressure cook on high for 0 minutes to fully infuse brine into turkey.
-
Chill turkey in brine 12-24 hours.
-
Rinse turkey, pat dry, and rub with seasoning.
Figuring Out Cook Time
Cooking time can vary based on the specific turkey, but here is a general guideline:
-
8 lb turkey – Pressure cook 15 minutes
-
10 lb turkey – Pressure cook 19 minutes
-
12 lb turkey – Pressure cook 23 minutes
Adjust time down if turkey seems overcooked. Increase time if undercooked. Use a meat thermometer to confirm doneness.
Step-by-Step Cooking Instructions
Now let’s walk through the full cooking process from start to finish:
-
If brining, rinse off all brine and pat turkey completely dry.
-
Generously coat turkey all over with olive oil and dry seasoning rub. Get under the skin too.
-
Add 1/2 cup liquid (broth, wine, or water) to pot.
-
Place seasoned turkey breast side up on a sling or on the pot insert.
-
Pressure cook using cook time guidelines based on turkey weight.
-
Allow pressure to natural release 10-15 minutes before quick releasing.
-
Check internal temp with a meat thermometer. Breast should be 165°F.
-
Crisp up the skin using the air crisp function at 400°F for 10-15 minutes.
-
Let turkey rest 10 minutes before slicing and serving.
Be sure to make gravy from the flavorful turkey juices!
Cooking Just the Breast
To cook just a turkey breast in the Ninja Foodi, use the same timing formula but subtract 2 minutes per pound.
For example, a 6 lb turkey breast would pressure cook for 10 minutes (6 lbs x 2 = 12 minutes – 2 minutes = 10 minutes).
Adjust time as needed based on size and whether bone-in or boneless.
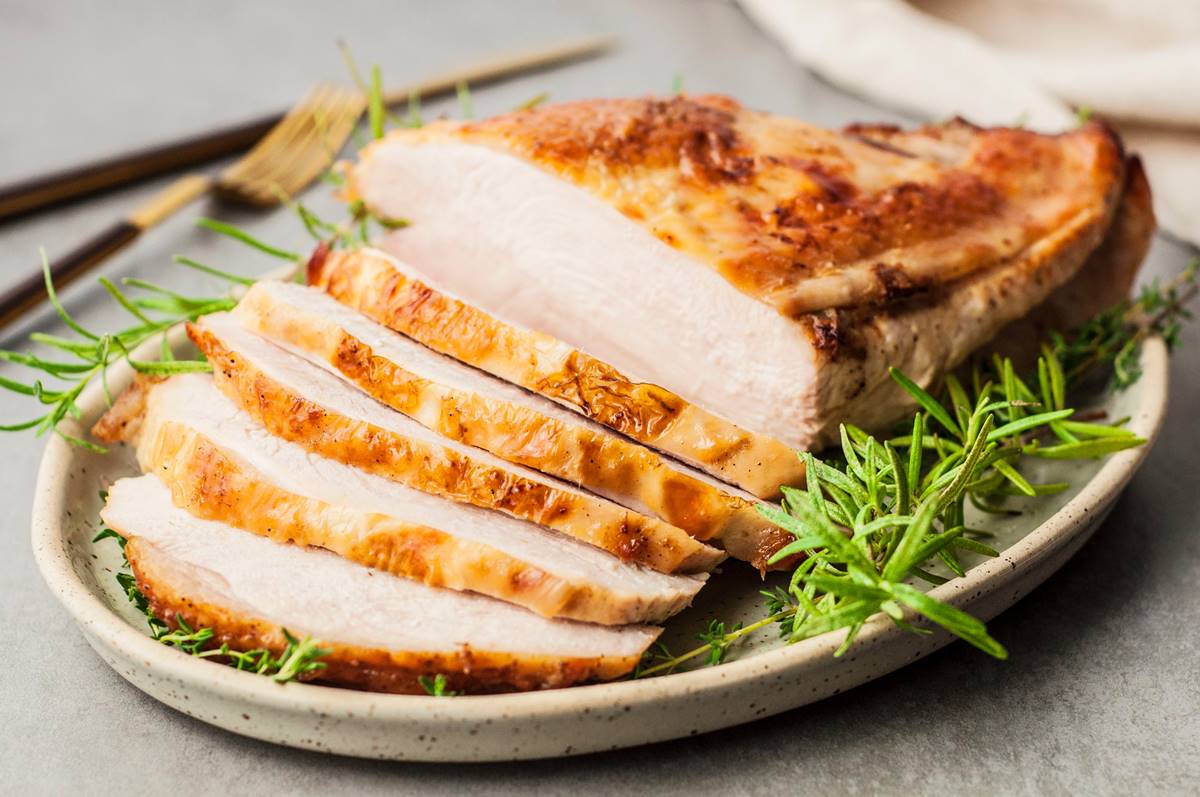
Carving the Turkey Like a Pro
Carving the turkey can be intimidating, but it’s easier than you think using this method:
-
Step 1: Slice vertically along one side of the breastbone to remove the entire breast half.
-
Step 2: Find the thigh joint and slice through it to remove the leg quarter.
-
Step 3: Separate the thigh from the drumstick at the joint.
-
Step 4: Slice the breast meat across the grain into slices.
-
Step 5: Repeat steps on the other half of the turkey.
Check out YouTube for helpful visual tutorials on the proper turkey carving technique.
FAQs
Should I stuff the turkey?
I don’t recommend stuffing the turkey, as it can lead to uneven cooking. Cook stuffing separately for food safety.
Can I cook a frozen turkey in the Ninja Foodi?
Yes, but you’ll need to thaw it first. Thaw turkey in the fridge 1-2 days before cooking.
Do I need to flip the turkey?
No flipping required! Turkey self bastes in the Ninja Foodi.
Can I use oven bags?
Oven bags are not recommended. Turkey may not brown evenly.
Can I crisp the skin right after pressure cooking?
Yes, but pat turkey dry first or skin may not crisp up.
What finish temp for dark vs white meat?
Cook until breast is 165°F and thighs 175°F for food safety.
Tips for the Best Results
Here are a few extra tips to ensure perfect turkey success:
-
Monitor pressure build closely and adjust time down if coming to pressure faster.
-
Use a leave-in thermometer to monitor breast temp.
-
Add a drizzle of oil before crisping for ultra crispy skin.
-
Let turkey rest at least 10 minutes before slicing for juiciest meat.
-
Make gravy from the flavorful turkey drippings.
-
Reserve excess seasoned rub to use on vegetables.
-
Cook stuffing, mashed potatoes, or mac and cheese in pot after.
-
Freeze leftovers like turkey tetrazzini for quick future meals.
The Takeaway
As you can see, cooking turkey in the Ninja Foodi is totally doable for home cooks with some simple guidance.
The most important things to remember are:
-
Properly size your turkey to your Foodi model
-
Figure cook time based on weight
-
Brine for flavor and moisture
-
Use a thermometer for doneness
-
Air crisp for crispy skin
-
Let rest before carving
Master these steps, and you’ll have juicy, delicious Ninja Foodi turkey worthy of any holiday table. Trust me, you’ll never go back to the oven after cooking turkey this way!
5-Minute Gravy From Scratch
Gravy doesn’t have to be complicated or intimidating! This quick, no-fuss recipe is my go-to when I want a rich, flavorful gravy that’s done in minutes. Whether you’re working with chicken stock, bouillon, or drippings from a roast, this method will have your family asking for seconds (and maybe thirds!).
- Butter: Butter makes everything better, especially gravy! Use unsalted butter so you can control the saltiness—it’s a lifesaver since stocks and bouillons can vary a lot in salt content.
- Flour: Good ol’ all-purpose flour is all you need to make that velvety smooth roux that thickens the gravy perfectly.
- Chicken Stock or Broth: Use a flavorful stock—low-sodium is my favorite because you can season it just right. Bonus points if you’ve got drippings from a roast!
- Bouillon: This is my secret weapon for extra flavor when using just stock. Skip it if you’re using rich turkey or beef drippings, though—you’ve already got plenty of flavor!
- Spices: Keep it simple with your favorite herbs and a sprinkle of onion powder for that cozy, savory kick.
- Warm Up Your Stock: Heat your stock and bouillon (if using) in the microwave until hot. Stir to dissolve the bouillon—it should smell amazing already!
- Make Your Roux: In a saucepan, melt your butter over medium heat. Whisk in the flour and spices, and let it cook for about a minute. You want a golden, bubbly roux—not too dark!
- Add the Stock: Slowly pour the hot stock into the roux while whisking. Take your time here—whisk, whisk, whisk! This keeps your gravy lump-free and silky smooth.
- Thicken It Up: Keep stirring as the gravy comes to a boil and thickens to your desired consistency. This step is quick, so don’t walk away!
In just five minutes, you’ll have a luscious, homemade gravy that takes any meal to the next level. Serve it with mashed potatoes, roasted meats, or even just a spoon—no judgment here!
- Use high-quality stock: The better the stock, the better your gravy!
- Drippings are gold: If you’re roasting a turkey or chicken, don’t skip the drippings! Strain them, skim off the fat, and mix them with your stock for incredible flavor.
- Bouillon adds magic: If you’re using plain stock, bouillon is your best friend. If you’ve got drippings, feel free to skip it.
- Irish butter = no extra salt: If you’re lucky enough to have Irish butter, it’s already wonderfully salted—no need to add more.
That’s it—dinner is served! Pair this boneless turkey breast cooked in a Ninja Foodi with your favorite sides (hello, mashed potatoes and green beans!), and enjoy a meal the whole family will love. Let me know how it turned out in the comments!