Turkey is easy to can and will last for months on the shelf, so it’s always available when you need a quick meal. Learn how to pressure can turkey with this tutorial.
Around the holidays, turkeys can be purchased at reduced prices from stores and butcher shops. I like to grab an extra bird or two with the purpose of preserving it for later meals. Since freezer space is an issue this time of the year, I can it so it can be stored on the shelf.
Home canned turkey is a convenient option for those days when you need quick meal option. You can use it in chili and soups, tacos, enchiladas, sandwiches, and casseroles.
Canning turkey at home is a great way to preserve meat for future meals Having shelves stocked with home-canned turkey means you can quickly make dishes like turkey tetrazzini, turkey chili, casseroles, sandwiches, and more Canned turkey will keep for 1-2 years on the shelf, ready whenever you need it.
This article provides a step-by-step guide to safely canning turkey using a pressure canner, with tips for delicious results.
Overview of Canning Turkey
Here are the basic steps to canning turkey:
- Debone turkey and cut meat into chunks.
- Make turkey stock from the bones.
- Partially cook the turkey pieces.
- Pack hot turkey pieces and hot broth into jars.
- Process the filled jars in a pressure canner.
Pressure canning is necessary to safely can low-acid foods like meat. The high heat kills any bacteria including botulism that could be present
Step 1: Debone the Turkey
You can can whole turkey pieces or use boneless turkey breast or thighs Remove any stuffing and pull all meat off the bones.
Cut the turkey into 1-inch chunks or cubes. Smaller pieces will allow heat to fully penetrate during processing.
Step 2: Make Turkey Stock
Place the turkey bones, skin, pan drippings, and giblets in a large pot. Add enough water to cover and simmer for 30-60 minutes to extract flavor.
Strain the stock through a fine mesh sieve or cheesecloth. Chill overnight so the fat can be removed before canning.
Step 3: Par-cook the Turkey
In a large skillet, sauté the turkey pieces over medium-high heat for 5-7 minutes until lightly browned but still undercooked inside.
This step removes excess moisture that could prevent heat penetration during canning.
Step 4: Pack Jars
Working with one jar at a time, ladle hot turkey pieces into clean, hot pint or quart jars, leaving 1-inch of headspace.
Add hot turkey stock to cover meat while maintaining headspace. Use a bubble tool to release any trapped air. Wipe rims clean.
Center lids and apply bands fingertip tight. Place filled jars in canner keeping them hot.
Step 5: Pressure Can the Jars
For pint jars, process at 10 PSI for 75 minutes. For quart jars, process at 10 PSI for 90 minutes. Consult a canning guide for adjustments at higher elevations.
When time is complete, allow canner to depressurize naturally. Remove jars and let cool 12-24 hours. Check seals, label, and store.
Tips for Delicious Canned Turkey
Follow these tips for the best results when canning turkey:
- Use homemade turkey stock for the best flavor.
- Mix light and dark meat when packing jars.
- Avoid adding salt before canning as it can turn bitter. Season later.
- Refrigerate after opening for maximum freshness and use within 4 days.
- Stir turkey cubes into soups, salads, rice dishes, and casseroles.
Ensuring Safe Home Canned Turkey
Always follow research-tested canning methods to prevent botulism and other harmful bacteria. Key safety tips:
- Use a pressure canner, not a water bath.
- Check dial gauges annually for accuracy.
- Let pressure drop naturally before opening canner.
- Verify jar seals are concave and do not move when pressed.
- Discard any food from unsealed jars.
- Store jars in a cool, dark place without temperature fluctuations.
Canning turkey requires time and effort, but it is gratifying to see those jars lining the pantry shelf. The convenience of home-preserved turkey is worth the work.
Follow the steps above for perfectly canned turkey every time. Share your favorite recipes using canned turkey in the comments!
Ingredients for Canning Turkey
- Turkey breasts – One turkey breast will yield four to five pint jars. Prepare five or six breasts at a time.
- Water – Start with a medium saucepan of water and bring to a boil. This will be poured into the jars.
Don’t add any seasoning to the turkey before canning. Keep it plain so you can season it later depending on the recipe.
Using Canned Turkey
When ready to eat, remove the ring and open the jar lid using a manual can opener. Drain the liquid and shred the meat with a fork. It’s ready to use!
Once canned, turkey is shelf stable. Wipe jars clean and store in a cool, dry place. Restock the pantry from long-term storage as needed.
Once opened, turkey must be refrigerated and used within three days. Transfer any leftovers to a storage container.
FAQs
What’s the best way to can turkey?
Pack hot meat loosely into hot jars leaving 1-inch headspace. Fill jars with boiling broth, drippings, or water to 1 inch from top. Remove bubbles, wipe rims, adjust lids and process in a pressure canner.
How long does canned turkey last on the shelf?
Properly canned turkey will last 12-24 months stored in a cool, dark place. For best quality, use within 1 year.
How long should I process turkey in a pressure canner?
Process pint jars for 75 minutes, quart jars for 90 minutes at 0-1,000 ft altitude. Adjust pressure and time for higher elevations.
Can I can leftover turkey?
Only can fresh turkey meat, raw or partially cooked. Leftover cooked turkey isn’t suitable for canning. Wash equipment and jars well first. Chop turkey into 1-inch pieces.
Is canned turkey healthy?
Yes, properly home-canned turkey is a healthy, nutritious option to have on hand. It contains protein, vitamins, and minerals. Avoid adding extra salt when canning.
Canning turkey at home provides a convenient source of cooked meat for quick meals all year long. Follow these safe, detailed steps for perfect results every time.
Allow for Plenty of Time
Canning turkey is a pretty big project. It does take some time to prepare, cook, debone and separate the meat, make the stock, prepare the jars, and process in a pressure canner.
I like to break the project up over two days. On day one, I cook the bird, let it cool, remove the meat from the bones, turn the bones into stock, and pop everything into the refrigerator.
The following day, I get my canning equipment set up, skim the fat off the broth, heat the meat and stock, fill the jars, and process the jars in the pressure canner.
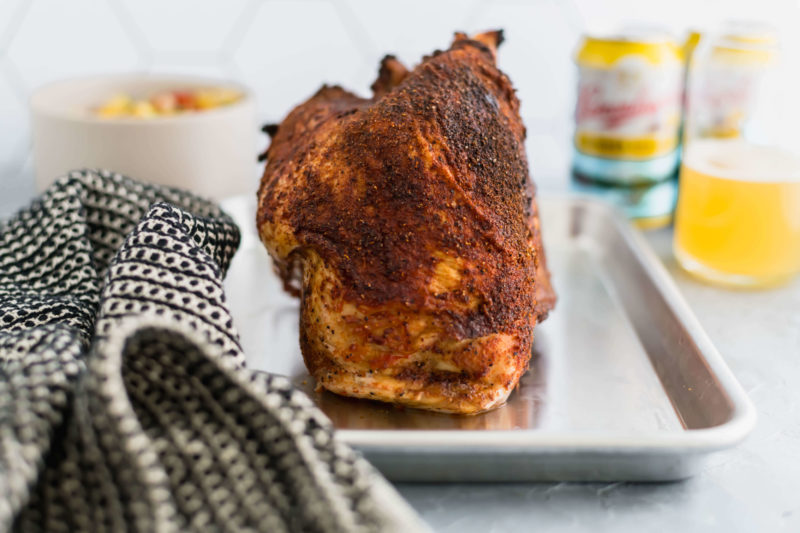
Step 1: Prepare the Turkey
If you are preparing a whole bird for canning, you don’t have to cook it completely. The pressure canning process will finish cooking the meat and kill any bacteria that may be present. Both Ball and the National Center for Home Food Preservation say to cook until about two-thirds done.
Roast the unstuffed bird in an oven until the internal temperature is at least 115˚F. If you are more comfortable dealing with a fully cooked bird, continue roasting until the internal temperature is 165˚F.
Let the turkey rest until it is cool enough to handle, then remove the meat from the bones. Cut the meat into chunks, cubes, or strips. Do not shred the meat because it may compress in the jar and prevent the heat from penetrating properly.
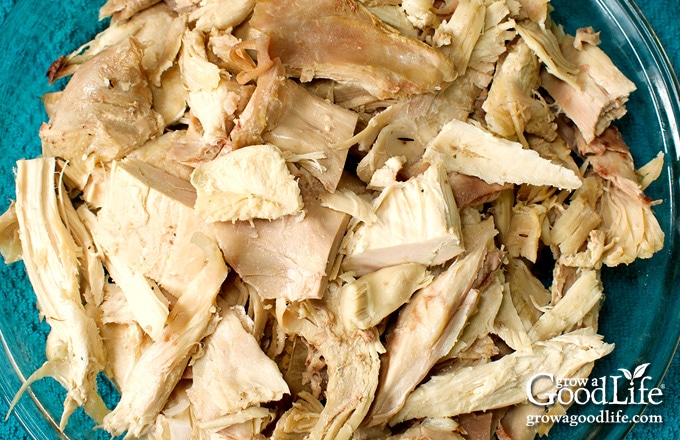
Save the carcass, skin, and pan drippings to make stock. I like to do this right away since the roasting pan is already out.
If you have stock made and ready to use, continue to the canning process. If you need to make the stock first, place the meat into the refrigerator, make your stock, chill it over night in the refrigerator so the fat can be removed easily, and proceed with canning the following day.