Smoking a turkey produces incredibly moist, tender and flavorful meat when done right. However, an often overlooked but critical step is letting the turkey rest before carving and serving. Resting gives time for juices to redistribute and allows smoky flavor to permeate the meat fully. But exactly how long should you let a smoked turkey rest?
Why Resting a Smoked Turkey is So Important
After spending hours carefully smoking a turkey at low temperatures it may be tempting to dive right in and start carving as soon as it comes off the smoker. However this is a big mistake if you want juicy, tender meat. Smoked turkey needs adequate time to rest properly. Here’s why
-
During smoking, heat causes the proteins in the meat to tighten, squeezing out moisture and juices. Resting allows them to relax and reabsorb the juices back into the meat.
-
If sliced immediately the built up juices will run out onto the cutting board instead of staying inside the turkey where they belong.
-
Resting gives time for the wonderful smoky flavor imparted during smoking to distribute evenly throughout the entire turkey.
-
It allows for carryover cooking to finish without drying out the meat The internal temperature will continue rising 5-10°F after being removed from the smoker,
-
Short rest times often result in disappointingly dry meat, especially on the breast.
So it’s clear that resting is absolutely vital for maximizing moisture and enhancing the flavor in smoked turkey. But exactly how many minutes should you let that smoked bird rest for best results?
Recommended Resting Time for Smoked Turkey
The recommended resting time for smoked turkey is:
- 20 minutes minimum
- Up to 40 minutes for very large birds over 18 lbs
A good rule of thumb is to allow at least 20 minutes rest time per 5 pounds of turkey weight. Smaller 10-12 lb turkeys need a shorter rest of just 20-30 minutes. For a big 18-20 lb turkey, extend the rest to 35-40 minutes for optimum moisture.
Always let the turkey rest breast-side down directly on a cutting board. The thick breast meat benefits most from juices redistributing back into it during resting.
Step-By-Step Guide to Properly Resting Smoked Turkey
Follow these simple steps for perfectly rested, juicy smoked turkey:
-
When the internal temperature in the thickest part of the thigh reaches 165°F, transfer the turkey from the smoker to a cutting board or platter, breast-side down.
-
Loosely tent with aluminum foil if desired, but leave completely uncovered for the crispiest skin.
-
Let rest for 20-40 minutes depending on the turkey’s size. The meat will continue cooking 5-10°F during this time.
-
After resting, remove any foil and carefully slice the turkey against the grain of the meat. Serve immediately for maximum juiciness.
-
If needed, turkey can rest up to 2 hours when wrapped in foil and towels then placed in a dry cooler or insulated bag. Check temperature occasionally and reheat if under 140°F before serving.
Should You Cover the Turkey While Resting?
For best results, allow the turkey to rest completely uncovered. This helps preserve the crispy, amazing smoked skin you worked so hard to achieve. Lightly tenting some foil over the top can help retain heat if resting for longer periods or if outdoor conditions are cold or windy.
However, fully wrapping in foil traps steam which will undo your crispy skin making it unappetizingly soggy. Only tightly wrap in foil if you won’t be serving the turkey right away and need to hold it hot after the initial resting time.
What Happens If You Skip Letting Smoked Turkey Rest?
Skipping the crucial resting period after smoking can lead to incredibly disappointing, dry turkey. Without time to relax and reabsorb juices, the proteins will squeeze precious moisture out as soon as the meat is sliced. This moisture loss causes:
-
Dry, stringy meat texture lacking juiciness
-
Less tender and mouthwateringly juicy meat
-
Loss of juices pooling on the cutting board instead of inside the meat
-
Less smoky turkey flavor evenly distributed throughout
-
Overcooked breast meat that is dried out
Letting the turkey rest sufficiently gives you phenomenally succulent, deeply smoked turkey that your guests will rave about. Don’t cut corners on resting when you’ve invested so much time into low and slow smoking for hours!
Tips for Even Better Smoked Turkey Resting Results
Follow these useful tips for superior rested smoked turkey:
-
Always rest breast-side down to allow juices to redistribute back into the breast.
-
Use a wooden cutting board which will wick away any escaping moisture.
-
Keep rested turkey in a warm spot like near a heating vent to prevent cooling.
-
Lightly tent foil to retain heat if resting longer than 30 minutes.
-
Leave turkey uncovered for crispiest skin possible.
-
Carve across the grain for most tender slices.
-
Serve immediately after resting for best texture and flavor.
The Takeaway – Let That Bird Rest!
Allowing your smoked turkey ample resting time is just as crucial as the actual smoking when cooking the perfect holiday bird. Follow the guidelines of resting breast-side down for 20-40 minutes uncovered for ideal results. This gives the proteins and juices a chance to relax and redistribute evenly.
A little patience goes a long way for tremendously moist, smoky flavor in every bite of your smoked turkey. Don’t let your hard smoking work go to waste by immediately slicing into the meat. Let it rest first, then carve and enjoy this delicious smoked turkey masterpiece immediately!
Most Common Turkey Smoking Questions
Start by obtaining a turkey, preferably 12 lbs or lighter. A larger bird will be older and therefore less tender, not to mention that cook time increases with size. Because you’re aiming to smoke your turkey at low temperatures, you want something with a manageable cook time. Whether it’s fresh or frozen is purely a matter of preference, but be aware that a frozen turkey will take 3–4 days to thaw in the refrigerator.
Once thawed or when brought home fresh, unwrap your turkey from the packaging and remove the giblets from its internal cavity. Use paper towels to dry your turkey as much as possible, including in the cavity and under the skin. If time permits, put your turkey in the fridge overnight (uncovered) to air-dry.
It’s best to start off with a fairly simple, basic brine. The first step of brining a turkey is figuring out how much solution you need. To do that, you’ll need a bowl or container that’s large enough to hold your turkey and then some. Place your still-wrapped turkey in the container and fill it with enough water to cover the turkey by about an inch or so. Remove the turkey from the container but leave the water — that’s the necessary amount for your brine.
Now, for some science! Because the amount of salt needed is a percentage of the water content, you need to weigh exactly how much water is left in the container. (As a point of reference, a gallon of water weighs a bit more than 8 lbs.) Once you know the weight of the water, it’s time to measure out the weight of the salt for your brine. The salt should measure about 1–2% of the water’s weight, and we recommend keeping it around 1–1.2% for first-time turkey-smokers. The saltiness may not land exactly where you want it, but it’s better for beginners to play it safe and get a feel for flavor.
After weighing out the salt, dissolve it in the water to complete your brine. You can cut the saltiness with a bit of sugar, but make sure it’s no more than 1% of the brine’s weight. Feel free to throw in the same amount of herbs and spices you’ll use for seasoning the turkey — it never hurts to get an extra boost of flavor in there.
The last part might be the hardest: finding a pot or food-safe bucket that can both hold your submerged turkey and fit in the fridge. You can also set your bird to brine in an ice chest, though it’s best done in the fridge to ensure it’ll remain cold overnight. Your best bet might be a food-grade brining bag, which can lie flat in the fridge to save space. Regardless of your method, place your unwrapped and dried turkey in the pot or bag before pouring your brining solution on top. You turkey should be left in the solution for about 12–24 hours the day before the cook, but the minimum amount of time for a successful brine is about 4 hours.
When the brining is complete, remove your turkey from the solution and rinse it off to remove excess salt and prevent oversalting. Pat the entire bird dry (inside, outside, and under the skin) just like you initially did after taking it out of the packaging. This will remove any lingering salt from the bird and clear the way for your seasoning blend.
The best method is with a butter paste that includes your herb blend of choice. There’s one catch, though — if you brined your turkey or injected it with marinade (see below), don’t include salt in your butter paste (doing so will give you an overly salty bird). If you skipped the brine or marinade, however, your butter paste should have some salt to help with dry-brining. Rub your seasoned butter paste all over the exterior of the turkey, inside the cavity, and under the skin to the best of your ability. Then place it in the fridge for at least 4 hours, but preferably overnight.
As far as the specific seasonings, you can’t go wrong with a poultry blend you’ve gotten good results from before. It’s all about preference, though you can take a page from Chef Tony’s book and incorporate either rosemary or sage — but not both, because each provides a high note — into your butter paste. Just remember that seasoning should be done the day before your smoke session.
For best results, prepare your marinade a few hours in advance of injecting. This will give the flavors time to meld at room temperature. You may notice the marinade gel over a little bit, at which point you should run the mixture through a blender and filter it through a fine mesh sieve to leave behind any gel. That way, the marinade can pass through the syringe of the marinade injector without clogging the needle, which would force you to take the whole thing apart and clean it. Trust us, you don’t want to stop what you’re doing to clean out the syringe multiple times.
When you’re making injections, the goal is to puncture the turkey skin as few times as possible. We recommend that, after you pierce the skin for an injection, you draw the needle out of the meat but leave it inside the skin and make a few more injections before moving to a different spot. Keep in mind that if you brine your turkey beforehand, an injectable marinade won’t be necessary.
It’s truly a matter of personal preference. The difference in taste is marginal at best, though there are specific considerations regarding prep time. You can obviously begin preparing a fresh turkey the moment you get home from the store, whereas a frozen turkey takes about 3–4 days to fully thaw in the fridge. Plan accordingly.
Here’s another one that totally depends on your preferences. The difference in flavor is once again marginal, and it’s really more about convenience than anything else. If you and, say, 5 guests all prefer turkey legs, then it’s in your best interest to cook pieces lest a fight break out over the dinner table. Other reasons to smoke turkey pieces instead of a whole bird are if you’re cooking for a small group and don’t want tons of leftovers, or if you’re more of a novice who isn’t comfortable breaking down or carving a whole turkey. Other than that, do what works best for you!
Start with the turkey facing breast-side down, then cut along the backbone so you can remove it. From there, flip the turkey over and press down on the breastbone until it lies flat. With your bird butterflied and lying flat, it’ll cook faster and a little bit more evenly. This technique is great when you’re short on time or you have a larger turkey (14 lbs and up) that would take entirely too long to smoke at low temperatures. For more information, check out our guide to spatchcocking poultry.
Your smoker should be set between 250 and 325 degrees Fahrenheit, with higher temperatures for cooks when you might be on a tighter schedule to get dinner served or when you want crispier skin.
The short answer: very carefully. The slightly longer answer: every 30-40 minutes, but with different mixtures depending on what you hope to achieve. If you’re aiming for crispy skin, your basting fluid should consist of melted butter and herbs that pair well with poultry, and maybe even a bit of palm oil. If crispy skin isn’t as much of a concern, baste your turkey using some fat mixed with red wine or apple cider vinegar. The most important thing, though, is to get in and get out when basting. Have the basting mixture in hand when you lift the lid, then close your smoker ASAP.
We recommend using a digital, dual-probe thermometer. One of the probes should be placed in the thickest part of the turkey breast, with special care taken to ensure it’s not touching bone, which will throw off the temperature readout. The other probe is for tracking ambient temperature within the smoker. For best results, position the ambient probe right next to the bird on a clip so it’s raised slightly above grate level, or hang it from the inside of the lid so it dangles beside the turkey. With this setup, you can accurately measure the temperature inside your smoker as well as within the turkey itself.
The USDA recommends cooking all poultry to an internal temperature of 165 degrees Fahrenheit.
Let your turkey sit for about 20–30 minutes after cooking, depending on its size. The only caveat is if you were shooting for crispy skin and achieved it, in which case you should carve and serve it within 10-15 minutes of completion. This is because the longer your bird rests, the more soggy the skin will become. Keep in mind that the turkey will still be quite hot 5 or even 10 minutes out of the smoker, so take extreme caution when carving and let it sit for longer if you’re not totally comfortable with its temperature.
This is all about preference and the flavor profiles you prefer, so we’ll toss out what our experts like and let you experiment from there. Chef Tony uses a blend of roughly half hickory and half oak, supplemented by just a bit of pecan and cherry. Grill Master Randy, meanwhile, usually rolls with pecan and some apple, which pairs well with any poultry. Though these are smoking woods, the same flavors and mixing potential exist with wood pellets when cooking on a pellet smoker. Try both blends, see which you prefer, and make any adjustments you see fit!
Our experts agree that a kamado is the ideal cooker for smoked turkey. In Chef Tony’s words, “the depth of flavor you get from a kamado is hard to beat using any other method.” There’s a bit more to it than that, though — kamados allow you to easily dial up the temperature toward the end of your cook, resulting in crispier skin. Compare that with a vertical cabinet smoker, which stays humid by design and therefore has a much harder time producing a crispy outer layer. That being said, electric smokers require less monitoring than kamados, making them ideal cookers when you’re facing an extreme time crunch or juggling multiple dishes at once. Their construction also enables you to fit multiple turkeys at once, should you be cooking for extended family. Just be aware that the results will differ depending on the type of smoker.
Our customer service reps are real people offering great service, backed by 8 weeks of hands-on training with all of our products.
Founded in Baton Rouge in 1998, BBQGuys is proud to call South Louisiana home (yes, the foods as good as they say it is).
If you can dream it, we can design it. Our outdoor kitchen design experts have helped thousands of customers transform their backyards at no extra cost.
Great innovations build great products. Our R&D department develops high-quality, fairly priced grilling equipment.
BBQGuys does more than test and sell grills — we show you how to use them, too. Our experts provide the recipes and skills you need to be a grill master.
From food drives to historical preservation, were passionate about lifting up and giving back to our community.
We strive for the perfect balance of workplace and community to create a fun, enjoyable environment for all of our employees.
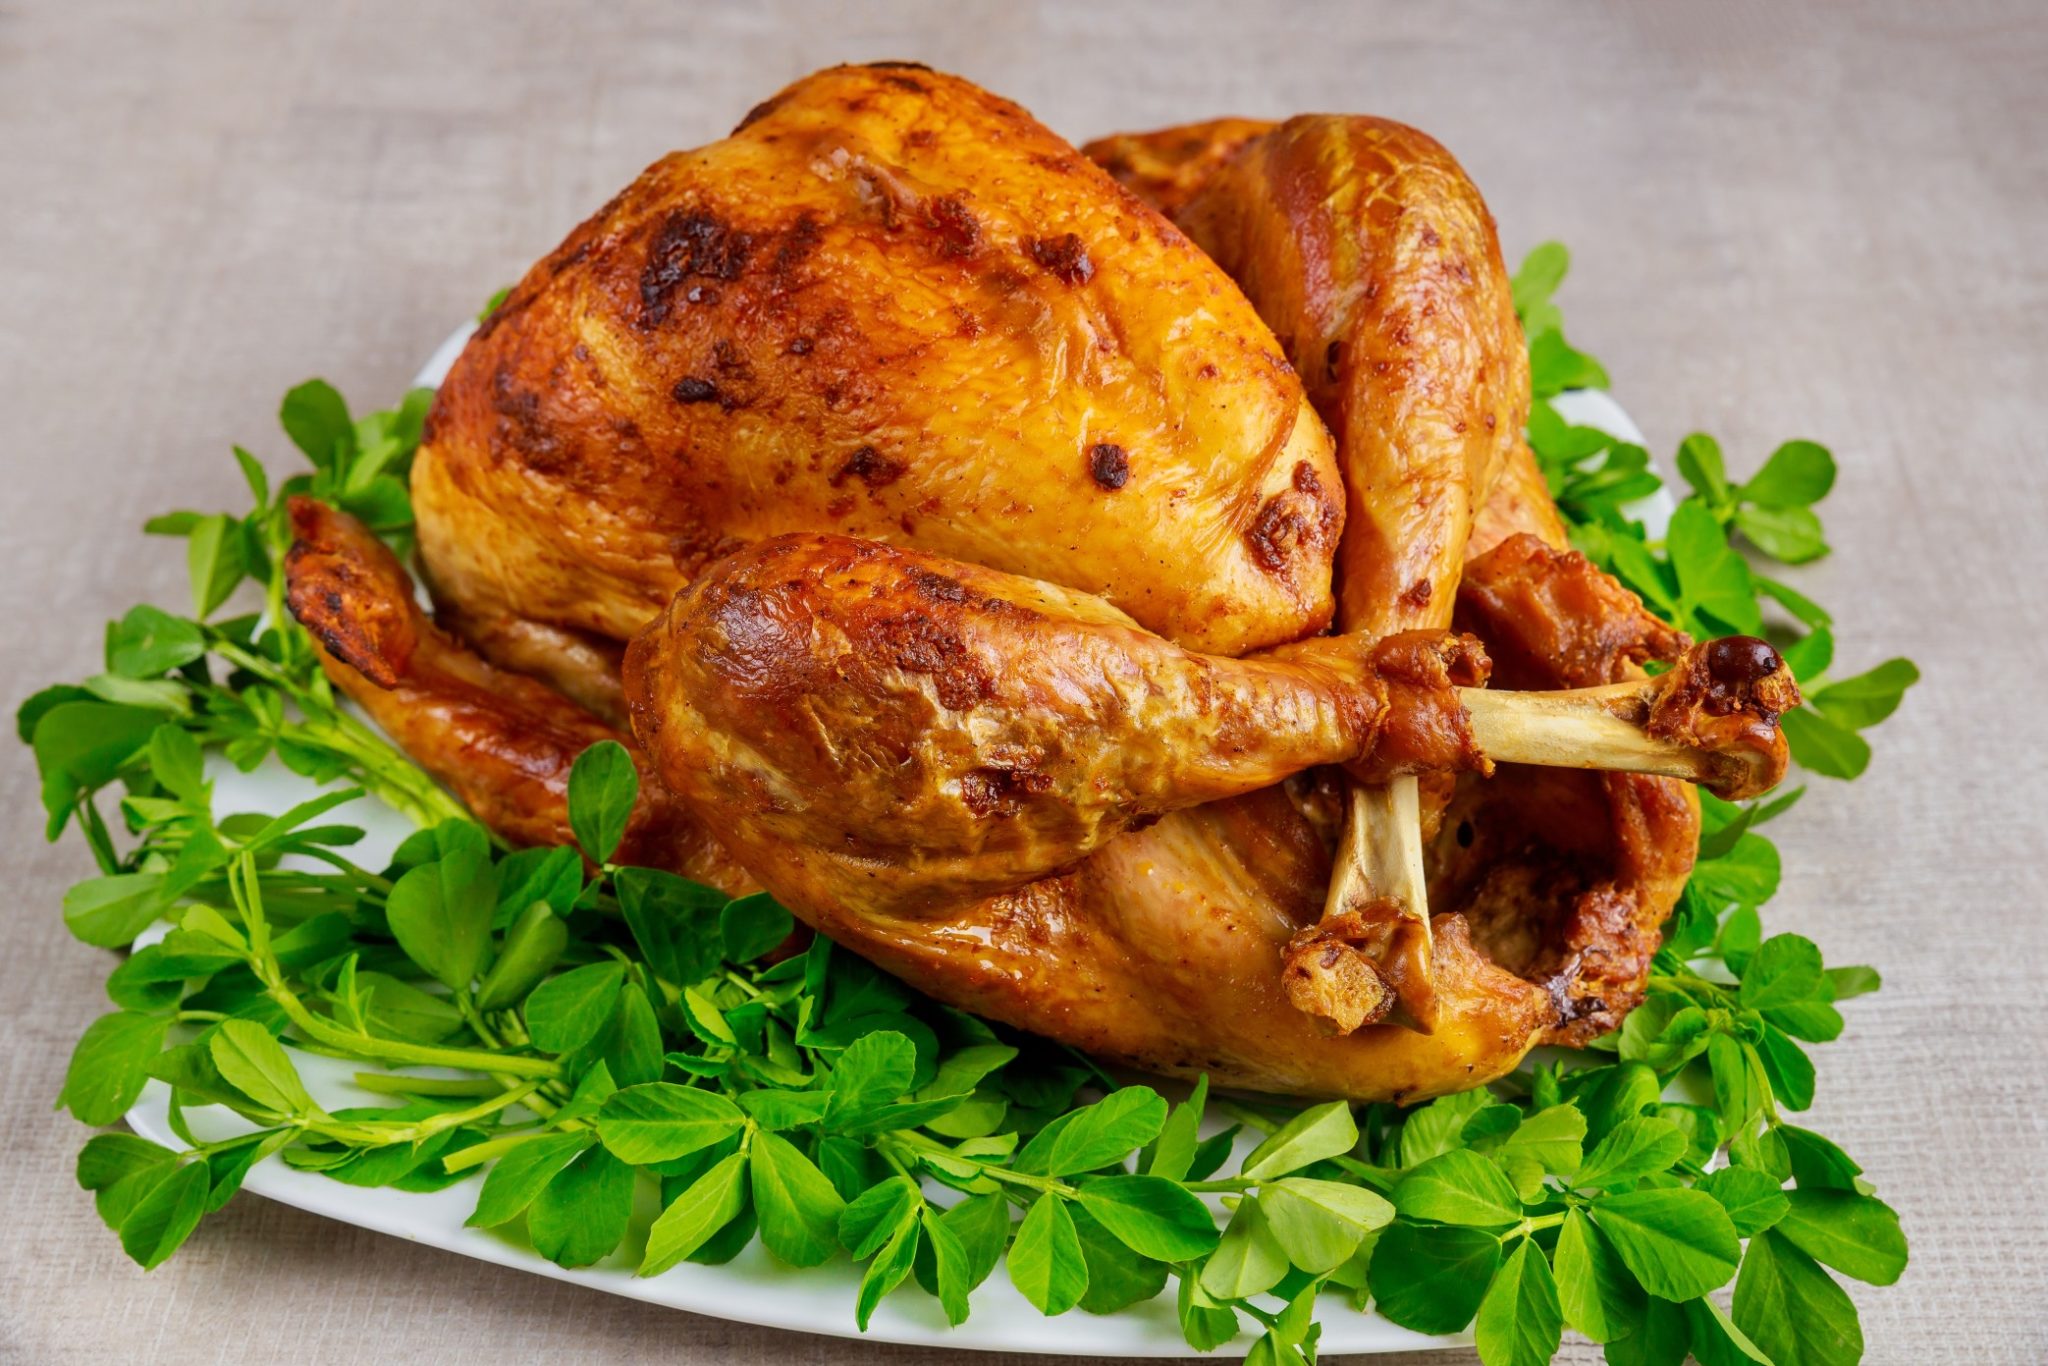
How to Rest Your Turkey Before Carving
FAQ
How long do you rest a turkey after smoking?
How long should you rest the turkey after smoking and before serving? Let your turkey sit for about 20–30 minutes after cooking, depending on its size.
How long to let turkey rest after roasting?
About 45 minutes or so gives it time to reabsorb the juices; otherwise they’ll dribble out when you slice, and the meat will be dry.Nov 27, 2024
How long should turkey sit out before cooking?
-
Food safety:Do not leave the turkey out for longer than an hour, as leaving it out too long can increase the risk of bacteria growth.
-
Even cooking:Bringing the turkey closer to room temperature before cooking helps it cook more evenly.
-
Check the temperature:Always use a meat thermometer to ensure the turkey reaches a safe internal temperature of 165°F.
Can you pull turkey off a smoker at 155?
Smoked turkey breast temperature
In fact, skinless turkey breast reaches the same kill-off at only 157°F (69°C) in only 47.9 seconds. It will have the same safety at 155°F (68°C) in 1.2 minutes!