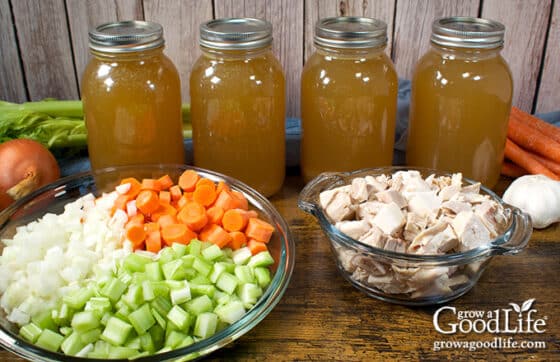
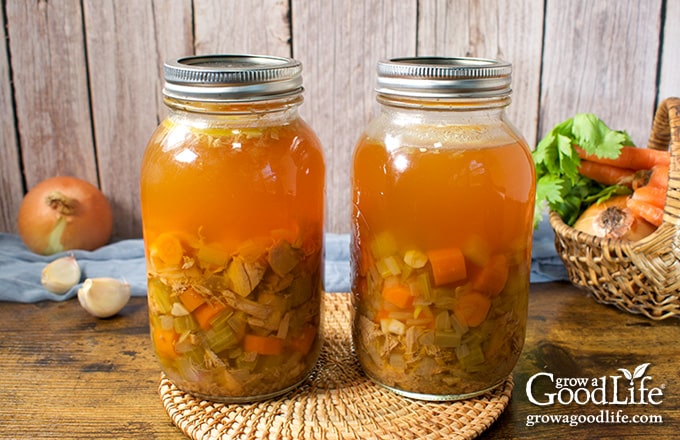
Our guide on how to can turkey soup will help you keep the comfort of home-cooked meals for longer. Stock your pantry and enjoy the ease of home-cooked soup whenever you want with this safe canning recipe.
Some people find comfort in a hot bowl of homemade soup, especially if it was made with care and stored so they can enjoy it whenever they want. This recipe will show you how to safely can Turkey Soup, which is a healthy and hearty food that you should always have on hand.
The turkey that is left over after Thanksgiving is one of the best parts of the meal. One of my favorite ways to use up leftovers is to can them and have turkey soup all winter. Actually, I buy an extra turkey so I can roast it and can the meat. I then use the meat to make plain turkey soup, turkey stock, and turkey meat in a can.
Not only does making your own turkey soup save you time and effort at mealtime, but it also guarantees a flavorful soup that tastes better than store-bought versions and doesn’t have any added chemicals or unknown ingredients.
Canning turkey soup is a great way to preserve leftovers and make quick, hearty meals for your family all year long. Homemade turkey soup loaded with chunks of turkey, vegetables, and broth is so much tastier and better for you than store-bought soups. With this comprehensive guide, you’ll learn everything you need to know to safely can high-quality turkey soup at home.
Why Can Turkey Soup?
Canning turkey soup provides numerous benefits
-
Convenience – Canned turkey soup is a handy shelf-stable pantry item. You can quickly heat up a jar whenever you need a comforting meal on busy weeknights.
-
Cost savings – Home canning allows you to prepare turkey soup in bulk after holiday meals for mere pennies per serving. Store-bought canned soups cost much more.
-
Control ingredients – When you make homemade turkey soup you control what goes into it. No mystery ingredients preservatives or MSG like store-bought soups.
-
Flavor – The taste of homemade soup is far superior to anything from a can You can customize it to suit your family’s preferences,
-
Nutrition – Home-canned turkey soup retains more nutrients than commercial soup products that undergo high heat processing for long shelf life.
-
Food safety – Following proper canning techniques allows you to safely store turkey soup at room temperature for up to a year.
Step-by-Step Guide
Canning turkey soup requires a pressure canner, canning jars, lids and bands. Be sure to use new lids each time you can. Follow these steps:
-
Prepare the turkey – Cook fresh turkey or use roasted turkey leftovers. Remove skin, bones, and fat then cut meat into bite-size pieces.
-
Prepare the aromatics – Chop onions, carrots, celery and garlic. Sauté in olive oil if desired. You’ll need about 2 cups each of onions, carrots and celery for every 6 quarts of soup.
-
Prepare the broth – Turkey broth, chicken broth or vegetable broth may be used. For best flavor, make broth using the turkey carcass.
-
Prepare soup – Combine turkey, aromatics, seasonings, herbs and broth in a large pot. Simmer 15 minutes. Avoid thickening agents like flour or cream.
-
Fill jars – Leave 1 inch of headspace. Release air bubbles by sliding a bubble tool along the inside of the jar. Wipe rims clean.
-
Seal jars – Center lids on jars and screw bands on fingertip tight. Do not over tighten.
-
Process jars – Place jars in pressure canner with 2-3 inches of water. Process pints for 60 minutes, quarts for 75 minutes at 10-11 PSI adjusted for your altitude.
-
Cool and store – Allow jars to cool undisturbed for 12-24 hours. Test seals, remove rings and wash jars. Label and store in a cool, dark place up to one year.
Tips for Delicious Turkey Soup
-
Use homemade turkey stock rather than plain water for the best flavor.
-
Add garlic, bay leaves, thyme, sage and other herbs for seasoning.
-
Try combinations like turkey sausage, kale and white beans or turkey with wild rice.
-
Sautee vegetables like onions, celery, carrots, mushrooms and peppers before adding to soup.
-
For creaminess without using actual cream, puree some of the cooked vegetables before adding to soup.
-
Cook pasta, rice or other starches separately and add to individual portions when serving.
-
Garnish bowls of soup with fresh parsley, green onion, Parmesan cheese or croutons.
-
For spiciness, add red pepper flakes, cayenne pepper or hot sauce.
Serving Canned Turkey Soup
When ready to serve, open jar and pour contents into saucepan. Heat soup, stirring occasionally, until steaming hot throughout. Add any additional vegetables, cooked pasta or rice as desired. Taste and adjust seasonings if needed. Ladle piping hot soup into bowls and enjoy!
Canned turkey soup will keep up to a year in a cool, dark place. Once opened, store leftovers in the refrigerator and use within 3-4 days. Reheat thoroughly before serving.
With this handy guide, you’ll be well on your way to stocking your pantry with delicious and nutritious home-canned turkey soup to enjoy all year long.

Step 1: Gather and Prepare Your Canning Equipment
Before you begin, make sure you have the necessary kitchen tools and canning equipment ready to go. Here’s a list of what you’ll need:
- Pressure Canner with canning rack
- Jars for Canning: 12 pint-sized jars or 6 quart-sized jars if you’d like bigger portions.
- Bands and lids: For each jar, you’ll need a new lid, but the bands can be used again and again.
- Canning Tools: a jar lifter to make handling jars safer, a canning ladle to fill jars without spilling, a funnel to pour without spilling, and a bubble popper to get rid of any trapped air and check headspace.
- Basic Tools: a big pot made of stainless steel, a good knife and cutting board, measuring cups, a slotted spoon, and lots of clean kitchen towels.
Wash your canning jars, lids, bands, tools, and equipment in hot, soapy water, followed by a thorough rinse. Then, set everything aside on clean kitchen towels to air dry.
The pressure canner should be put on a large stove burner and filled with water. The jar rack should then be added. Refer to your canner manufacturer’s guidelines for the correct water amount. For example, a Presto canner needs 3 quarts of water, a Mirro canner needs 2 quarts, and an All American canner needs to be filled 2 to 3 inches deep.
Preheat the jars by filling them halfway with water and arranging them upright in the canner. Set the canner on low heat (180°F) and cover it. Let it cook for at least 10 minutes. Keep the jars warm until you are ready to fill them. You can get the soup ingredients ready while the canner is warming.
Step 4: Process the Jars in a Pressure Canner
Check the instructions that came with your pressure canner for how to seal, vent, and heat the jars, and then follow the steps in the recipe below.
Once the processing time completes, turn off the heat and allow the pressure to return to zero. Remove the jars and place them on a dry towel to cool, ensuring they remain upright. Don’t change the rings or test the seals yet; the jars need to cool down without being touched in order to seal properly. Let them cool completely for 12 to 24 hours.
After the cooling phase, test the seals. Refrigerate any jars that didn’t seal properly and consume them within a few days. Before putting the sealed jars away, take off the rings and wash them well with soapy water to get rid of any leftover food. Then label, date, and find a cool spot to store the canned turkey soup. For optimal flavor, consume within 12 to 18 months.

Canning Turkey Soup
FAQ
Can homemade soup be canned?
How long is canned turkey soup good for?
Do you have to cook turkey before canning it?
