A miraculous way to roast a turkey that uses butter-covered aluminum foil to protect the breast from the high heat while basting it. The foil is removed at the end so that the skin can crisp up. This article also talks about brining and whether or not you should do it. It also has a lot of tips for roasting a turkey perfectly.
You probably know that my parents owned and operated restaurants when I was growing up. What you might not know is that they also did a lot of catering. We estimate that they’ve catered over a thousand turkey dinners, with each dinner requiring numerous turkeys. Their dinners have always gotten great reviews, and now I’m going to show you how my mom roasts a turkey perfectly. We will first talk about what size turkey you need, and then we will talk about how to cook it (basting and crisping the skin with butter!) so that the meat is perfectly cooked and juicy. Even the breast meat is juicy.
Covering your turkey with aluminum foil while it roasts in the oven is a common technique used by many home cooks. But is it really necessary? Does the foil actually help keep the turkey moist and tender or is it an unnecessary step? In this article we’ll take an in-depth look at the pros and cons of using foil when cooking a turkey to help you decide if you should cover your bird or not.
The Purpose of Using Foil
The main reason foil is used when roasting a turkey is to prevent it from drying out. Turkey meat is naturally lean and can easily become dried out and tough if overcooked. Covering the turkey with foil helps trap moisture and steam inside so that the meat stays tender and juicy.
The foil essentially creates a barrier between the turkey skin and the hot, dry air of the oven. This allows the turkey to gently cook in the steam and juices that collect under the foil rather than completely exposing the meat to the drying effects of the oven heat.
Should You Always Cover Your Turkey with Foil?
While using foil can definitely help keep your turkey moist, it’s not necessarily required in every case. Here are some things to consider when deciding if you should cover your turkey or not:
-
Turkey size – Smaller turkeys and turkey breasts generally don’t need to be covered the entire time since they cook faster and are less prone to drying out. Larger turkeys benefit more from foil since the meat is thicker and takes longer to roast.
-
Roasting method – If you rub butter or oil directly on the turkey skin, covering it with foil can lead to soggy skin. Skip the foil if you want ultra crispy skin.
-
Moisture content – Brined or deep fried turkeys already have extra moisture infused into the meat so foil is less necessary An unbrined turkey benefits more from foil’s moist heating environment
-
Oven temperature – Cooking at a lower temperature (325°F or less) means the turkey is exposed to less intense dry heat making foil less critical. High oven temps make foil more useful for moisture retention.
-
Desired skin crispiness – If you prefer softer, more flexible turkey skin, keeping it covered in foil is fine. For super crisp, crackly skin, uncover the turkey for the last 30-60 minutes.
Covering Technique and Timing
If you do want to use foil when cooking your turkey, proper technique is important to get the moisture benefits without creating issues. Here are some tips:
-
Loosely tent the foil over the turkey rather than sealing it tightly. This allows steam to escape so the skin doesn’t get soggy.
-
Use multiple sheets of foil if needed to fully cover the turkey while still keeping it loose.
-
Cover any exposed bone ends with small foil balls to prevent burning.
-
Wait until the last 30-60 minutes of cooking time before removing the foil if you want crispy skin.
-
Check the turkey periodically to make sure the foil isn’t touching or pressing on the skin, which can make it soggy.
-
Let the turkey rest for 15-30 minutes after removing it from the oven before carving to allow juices to reabsorb. Keep it tented with foil as it rests.
Alternative Methods to Keep Turkey Moist
If you choose not to use foil when roasting your turkey, there are some other techniques you can use to keep the meat tender and juicy:
-
Brining – Soaking the raw turkey in a saltwater brine solution infuses moisture and seasons the meat.
-
Basting – Frequently spooning pan juices, broth, or butter over the turkey adds back moisture lost during cooking.
-
Aromatics – Placing lemons, onions, herbs inside the cavity or under the skin flavors the meat and provides moisture.
-
Low oven temp – Cooking at 300-325°F keeps the turkey from overcooking too quickly. Monitor temperature closely.
-
Let rest – Allowing the cooked turkey to rest under foil for 15-30 minutes gives juices time to redistribute.
The Best Approach for Perfectly Cooked Turkey
After looking at the pros and cons, most experts recommend using foil when roasting a turkey but removing it toward the end for crispy skin. Here is a great technique:
-
Tent turkey loosely with foil, leaving some openings for steam to escape.
-
Roast turkey covered with foil for about 2/3 of the stated cook time.
-
Remove foil during the last 30-60 minutes so the skin can crisp up. Watch closely to prevent burning.
-
Let turkey rest about 20 minutes under loose foil before carving.
This allows you to get the benefits of moist heat cooking under foil while also crisping up the skin at the end. For best results, use an instant read thermometer to ensure the turkey reaches a safe 165°F in the thickest part of the breast and thigh.
Following this tried and true method will help ensure your holiday turkey or anytime turkey turns out perfectly cooked with tender, juicy meat and deliciously crisped, golden skin. So go ahead and cover that bird with foil to start for a Moist and delicious feast!

Brine Or No Brine?
We never brined the turkeys when catering. And if you think about it, that makes sense. There needs to be a lot of cooler space to keep 10 turkeys in cold water for hours. So, I will say that you absolutely do not have to brine your turkey. Also, the recipe below assumes you didn’t brine the bird. If you did brine it, it will still work; just leave out the salt that you added before roasting.
If you’re trying to decide whether to brine or not, I have a bit to say. First, you can find out more about what brining is and how it works over here. When you brine your turkey, you put it in a solution of water and salt. The turkey’s meat soaks up the liquid, making it more juicy and seasoning it all over.
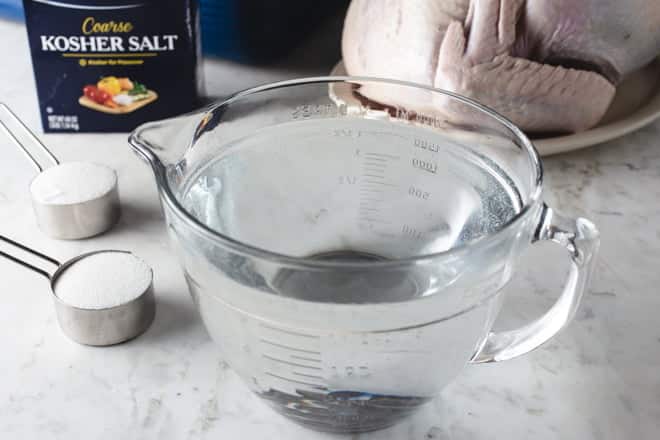
It can be a bit of a pain to brine a turkey though. When someone tells you how to brine a turkey, the most important thing is usually that you keep the turkey and the solution cold the whole time. This can take hours. People do things like this with a big cooler and ice because it’s hard to fit a container big enough to hold a turkey in your fridge.
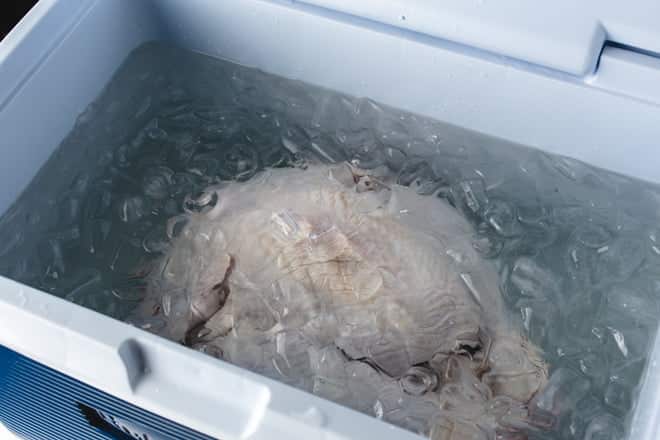
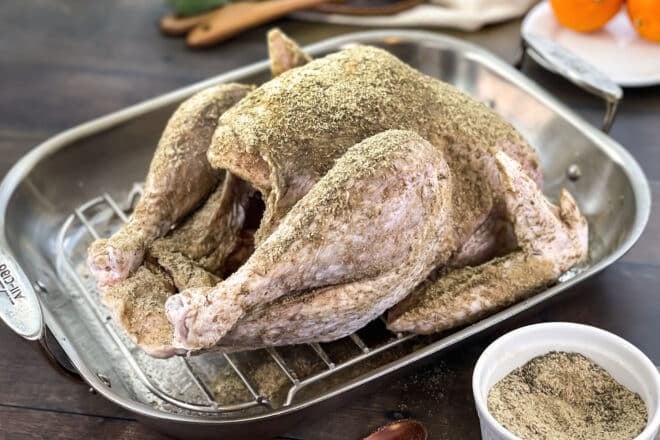
That’s seriously overkill to me. My preference is to therefore do a dry-brine. For this, you’re mixing salt and other seasonings together and rubbing them directly onto the turkey. That goes into the fridge for a day or two. Turkey juices are drawn out by the salt and then reabsorbed, but with the salt and seasonings’ flavor added. So the flavors and the tenderizing properties of the salt get right into the meat. Putting the salted turkey in the cool fridge also makes the outside dry, which makes the skin extra crispy when you roast it. You can learn more about how to dry-brine a turkey over here.
If you really want to make a wet brine, I suggest one that has a lot of flavor and a lot of salt. This allows you to cut the brining time down by quite a bit, making it more convenient. This is the best turkey brine recipe I know of.
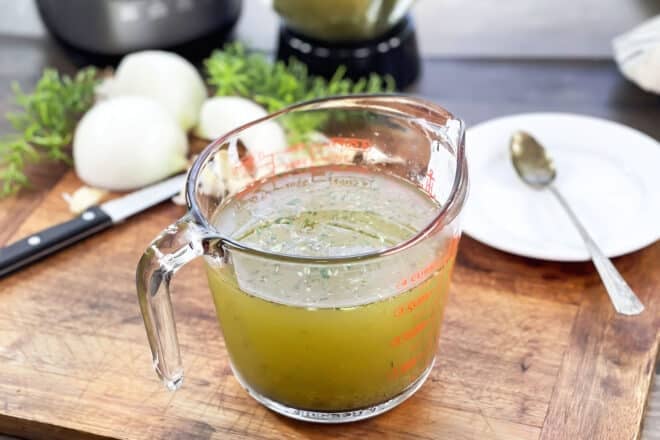
A special method is used to make a flavor slurry in a blender or food processor. This really pulls the flavors out of the ingredients (onion, garlic, and herbs), making it easier for the turkey to take them in faster. It also has that high concentration of salt that I was talking about.
A final thing about brining. You can brine and then roast turkey parts instead of a whole turkey if you really want to wet brine but don’t have enough room. You can even just roast boneless turkey breasts if that’s what works best for your family.
You can buy more of the parts you want and skip the ones you don’t want. This way, the turkey takes less time to thaw and brine, takes up less space in the fridge and the oven, and the skin gets crispier because it’s more exposed. Plus, no more fighting over the drumsticks! The only major con is that you don’t have a turkey to carve at the table. But if you don’t already carve at the table, that won’t matter. You can try this by following these steps: how to roast turkey parts and how to brine them.
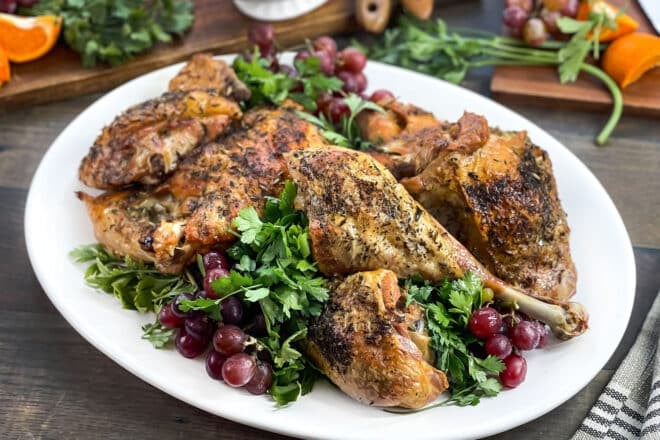
Now that we’ve talked about whether to brine a turkey and how to do it, let’s talk about how to roast the turkey. This technique is really unique and involves topping the turkey with some aluminum foil spread with butter. That buttered foil keeps the breast meat moist while basting the turkey as it cooks. You remove the foil at the end and then that exposed buttery skin crisps up to perfection. Let’s learn how to do it!.
Instructions For Roasting Turkey
Take the turkey out of the fridge 30 minutes before you cook it. This will make it less cold and help it cook more evenly. If you haven’t brined your turkey, just take it out of the box and pat it dry with paper towels. Don’t rinse it off since that only sprays potential bacteria around your kitchen. If you wet-brined your turkey, also just pat it dry, no need to rinse it. If you dry-brined your turkey, don’t do anything. It looks like a lot of seasoning is about to fall off in the picture above, but that was just the start of the process. By then end, it’s the finest of layers and you want to leave it on there.
If your turkey has giblets inside, you can do one of three things:
1) You can discard them;
2) You can make turkey broth with them to add to the beef drippings when you make gravy. This is a great idea if you’re brining the turkey because the turkey juices might get too salty. You can use this broth instead. To do this, put the giblets (removed from any packaging) into a medium saucepan. You can also remove any extra skin or fat from the turkey and add that. You can even add the wing tips, which don’t have much meat on them and often turn too dark when roasted. Only add enough water to the pan to barely cover the meat. In this case, less is more, since less water means the flavor will stay strong. Sage, thyme, rosemary are some of the fresh herbs that you can add. You can also use dried herbs or poultry seasoning, as well as raw onion, garlic cloves, carrots, and celery. You don’t have to peel the carrots or celery, and you can leave the peels on the onions and garlic. Just give everything a good rinse. Don’t add salt because that will make it harder to get your gravy seasoning right later. Give it all a stir, some items might be sticking out and that’s actually ideal. Bring the pot to a boil over high heat, stirring occasionally, and then reduce it to a simmer. Let it sit there simmering for 30 minutes to an hour, stirring every now and then. Remove from the heat and strain away the aromatic pieces. Those can be discarded so that all is left is the broth.
3) Add them to the roasting pan, putting them around the turkey as it roasts. This will add extra flavor to your gravy. They will be strained out and thrown away before the gravy is served. Just mush them up a bit before you make the gravy.
Should I cover the turkey with foil while it cooks in the oven?
FAQ
Is it better to cook a turkey covered or uncovered?
Do you cover a turkey with aluminum foil while cooking?
Is it better to cook a turkey at 325 or 350?
Are turkey bags better to use rather than covering turkey with foil?
Should I Cover my Turkey with aluminum foil?
Using aluminum foil to cover your turkey remains a highly debated topic in the world of cooking. Some swear by it, while others find the practice unnecessary. Here are some pros and cons of using aluminum foil to cover your turkey. One of the main benefits of using aluminum foil to cover your turkey is that it helps to lock in moisture.
What happens if you cover a Turkey with foil?
Can Cause Uneven Cooking: Certain parts of the turkey like the breast and thighs can end up cooking at different rates when covered with foil. Uncovered promotes even browning and cooking throughout. Steams the Turkey: Trapping moisture under foil leads to wet heat and turkey that steams rather than roasts.
Why do I need to remove foil when cooking a Turkey?
Foil can prevent the skin of the turkey from browning evenly. This is because the foil acts as a barrier between the turkey and the heat. If you want to ensure that the skin of your turkey browns evenly, you will need to remove the foil for the last 30 minutes of cooking time. * Can make it difficult to check the internal temperature of the turkey.
Should you wrap a Turkey in foil?
Firstly, don’t wrap the turkey too tightly in aluminum foil, as this can prevent heat and steam from circulating around the meat, causing it to dry out. Leave some space between the foil and the bird, or just cover the breast area. Secondly, consider adding some moisture to the turkey before wrapping it in foil.
Should you cover a turkey breast with foil?
Simply tent the foil so that it loosely covers the whole turkey. Some recipes suggest only covering the breast as this is the part prone to dryness, but it can’t hurt to make sure the rest of the turkey is tented with foil, too.
Do you need a foil for roasting a Turkey?
But if you are roasting the turkey, be it whole turkey, breast, or leg on a regular roasting pan, foil is a good option. Basically the foil works in the same way a lid works—by trapping steam so the turkey stays moist throughout the roasting process. Simply tent the foil so that it loosely covers the whole turkey.
