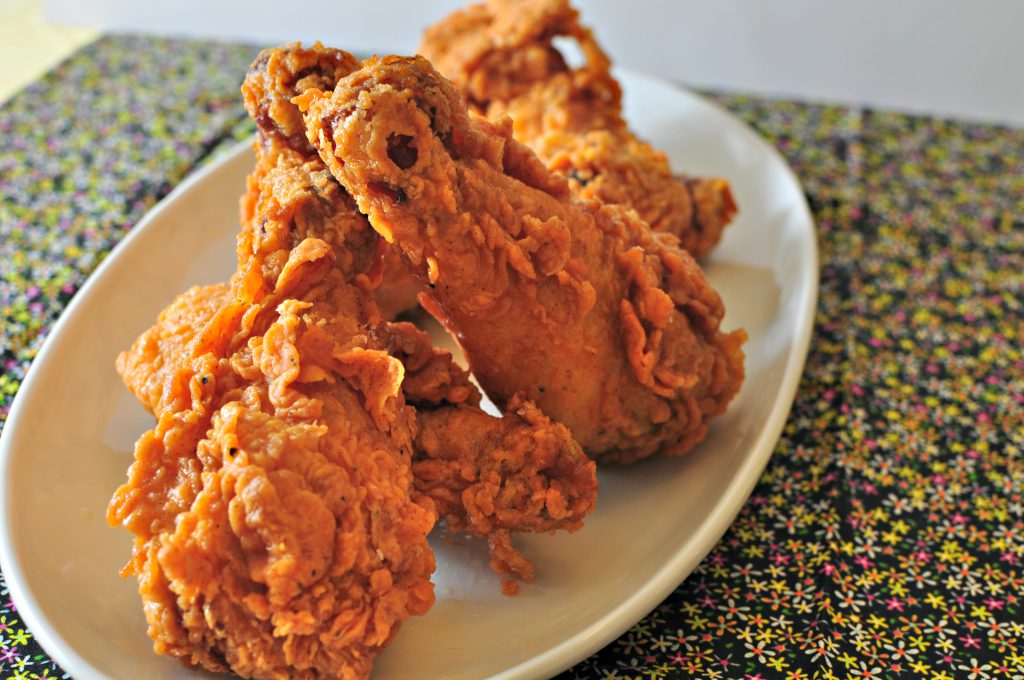
Who doesn’t love crispy, juicy fried chicken? I’ve made tons of different variations over the years and this Easy Fried Chicken is simply that – the easiest way to make juicy, crispy fried chicken with only one simple seasoning mix (no need to do all the separate dredging steps with egg)! And the best part is – it’s super delicious! Pair it with your favorite sauce, like my Raising Cane’s Sauce!.
Crispy fried chicken is one of life’s greatest pleasures. That satisfying crunch followed by soft, juicy meat is pure bliss. But achieving that perfect crispiness takes skill and know-how.
In this comprehensive guide we’ll share all the secrets to making fried chicken with an ultra-crispy exterior. From mastering the coating technique to controlling moisture and temperature during cooking we’ve got you covered. Let’s crunch into it!
The Key Factors for Crispiness
Crispiness in fried chicken depends on optimizing these key factors
-
Moisture control—Getting rid of extra surface water is important for making chicken crispy. Thoroughly drying the chicken before coating helps significantly.
-
The coating – A light, seasoned coating promotes crunchiness. The double-dredge technique gives better adhesion and coverage.
-
Frying temperature – Maintaining the oil between 325-350°F enables rapid moisture evaporation and browning reactions.
-
Oil quality – Choosing an oil with a high smoke point (like peanut or canola oil) allows it to withstand frying temperatures without breaking down.
-
Avoiding overcrowding – Frying chicken in batches prevents the oil temperature from dropping too much.
Get these elements right, and you’ll be rewarded with fried chicken that boasts an incredibly crisp, flavorful crust.
Step 1: Prepare the Chicken
Proper chicken prep lays the foundation for crispy fried chicken:
-
Trim excess fat and skin – This minimizes popping and splattering during frying.
-
Cut it up into pieces. Smaller pieces have more surface area to crisp up. Aim for a uniform size for even cooking.
-
Pierce the meat – Poking holes helps expedite moisture release when frying.
-
Dry well—Use paper towels to pat the chicken dry very well. Even more surface moisture is taken off by letting it dry in the fridge overnight.
-
Brine if desired – Although optional, brining makes the meat juicier. Be sure to fully dry the chicken after brining.
Step 2: Season and Coat the Chicken
The coating plays a leading role in creating a crispy crust. Follow these tips:
-
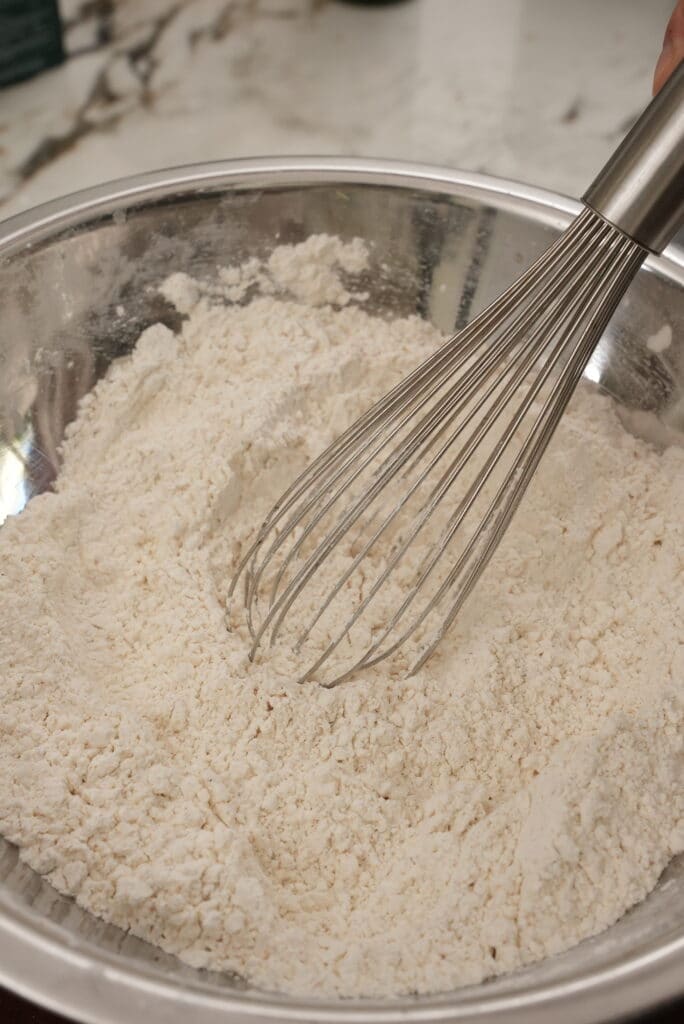
Use a flour-starch blend – Flour lends structure, while starch (like cornstarch) crisps up nicely. Aim for a 1:1 ratio.
-
Season generously – Salt, pepper, spices like paprika and cayenne pepper build flavor.
-
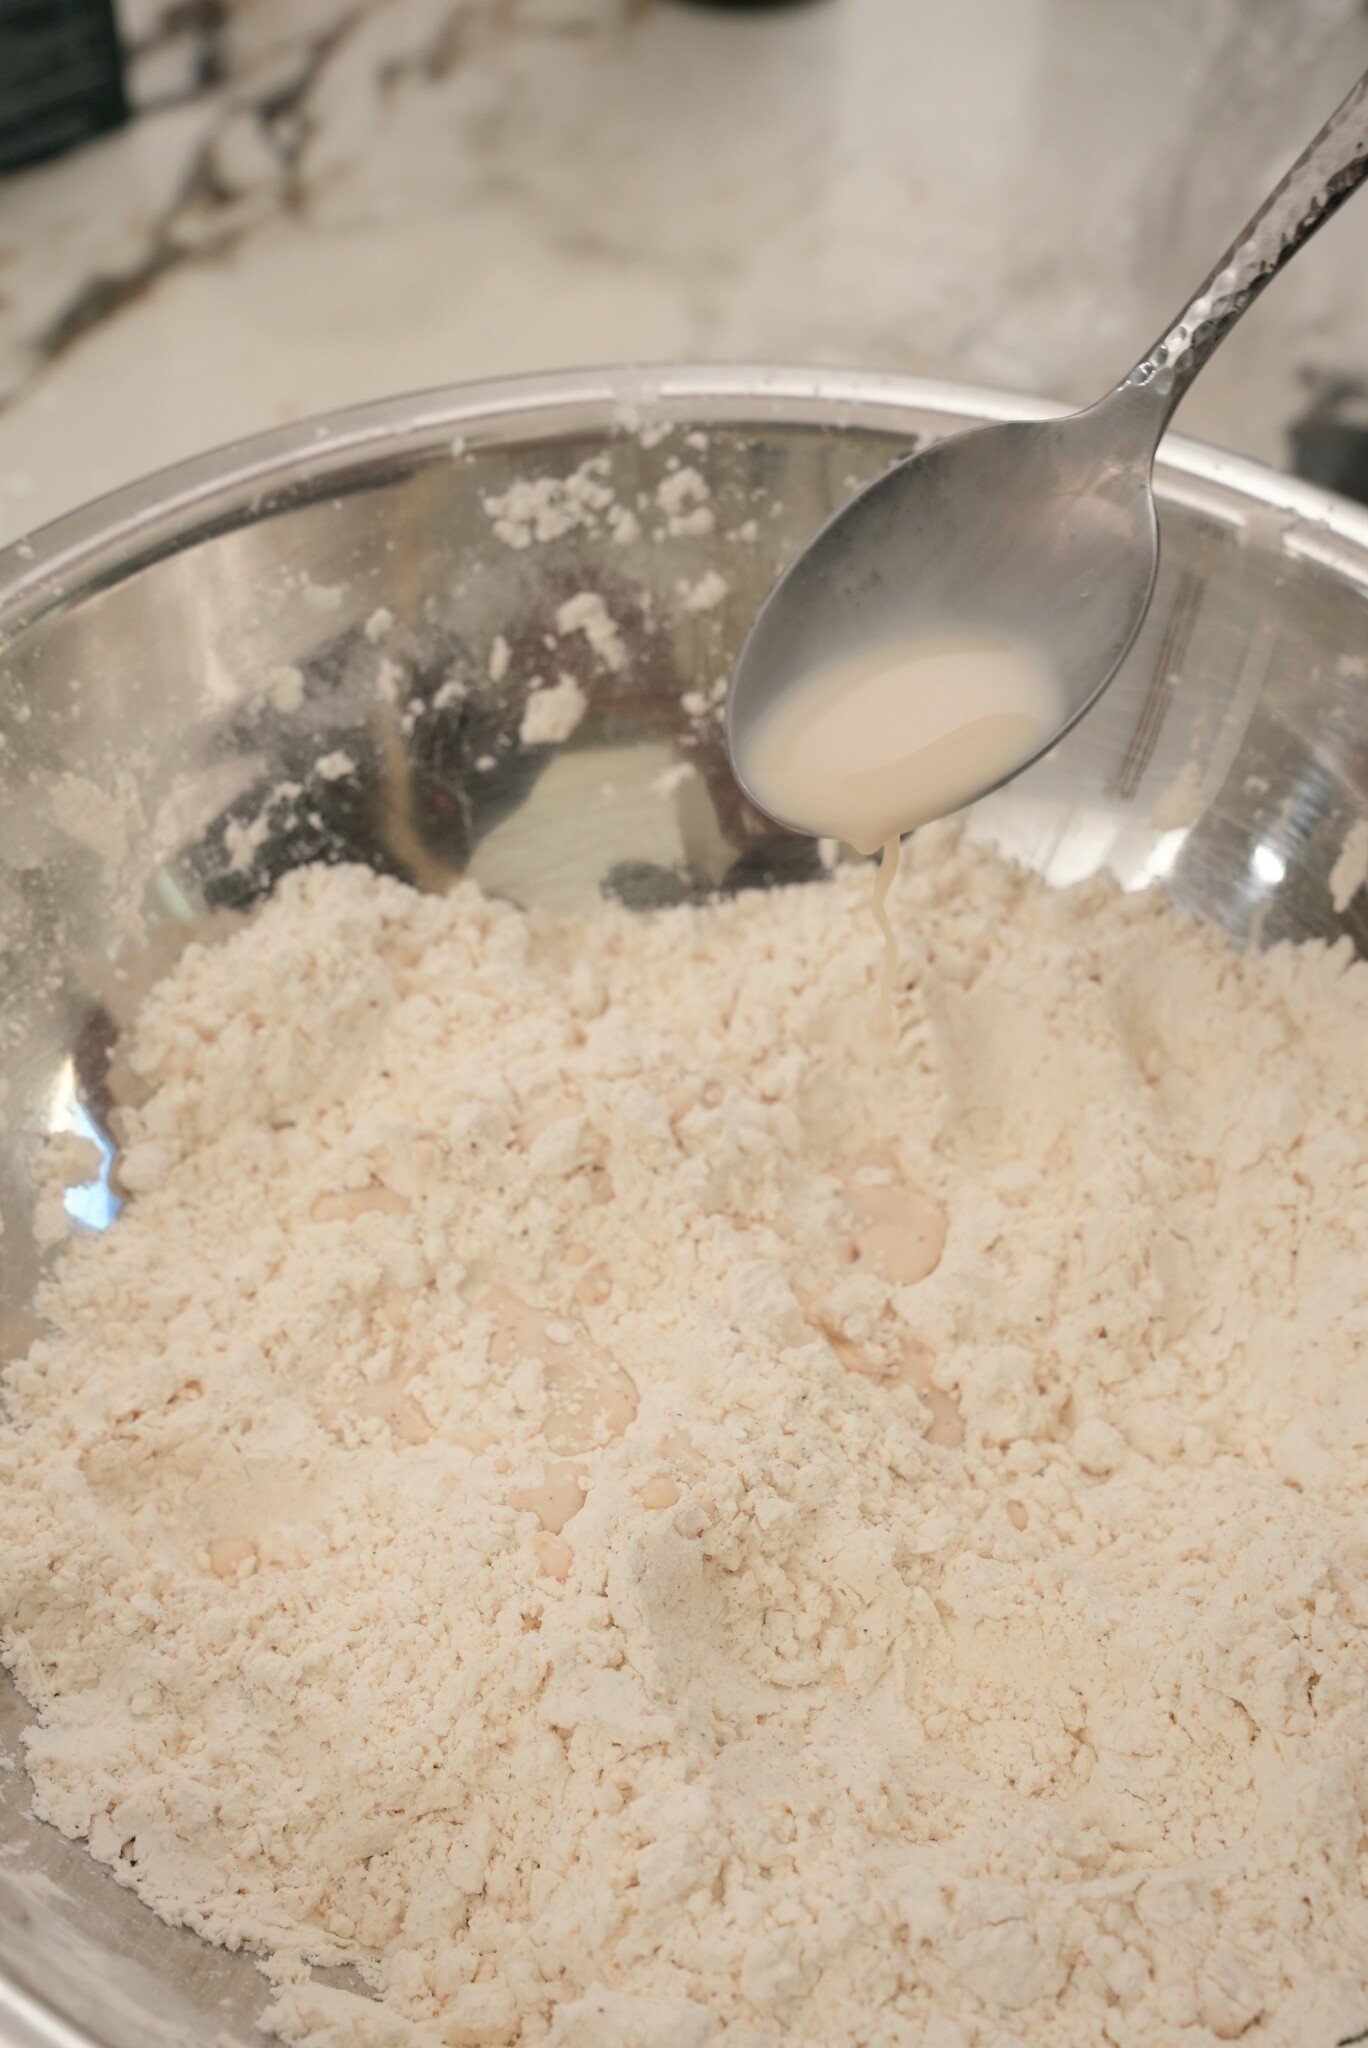
Use the double-dredge method – Dredge in seasoned flour, dip in buttermilk, then dredge again in flour. The extra layer means extra crunch!
-
Press coating on firmly – Packing the coating onto the chicken helps it adhere and yields a thicker crust.
-
Work in small batches – Prevent clumping by coating just a few pieces at a time.
Step 3: Fry the Chicken Skillfully
Mastering the frying technique ensures ideal crispiness:
-
Use a thermometer – Maintain oil between 325-350°F. The temperature can make or break the crust.
-
Choose a suitable oil – Opt for peanut, canola or vegetable oil for their high smoke points and neutral flavors.
-
Use heavy bottomed cookware – Thick pans conduct heat evenly and keep the oil temperature stable.
-
Fry in batches – Avoid overcrowding to prevent the oil temperature from dropping drastically.
-
Flip halfway – This allows even browning and cooking on both sides.
-
Monitor color – A light golden brown indicates perfect crispiness. Darker means overdone.
-
Check internal temperature – Chicken should reach 165°F. Use a meat thermometer for accuracy.
Step 4: Drain and Cool Properly
The final steps ensure your crispy chicken stays crispy:
-
Drain on a wire rack – Allowing air circulation prevents moisture from re-softening the crust.
-
Resist stacking – Piling hot chicken pieces leads to sogginess. Keep them spread out.
-
Eat immediately – Fried chicken is best consumed straight out of the fryer! The crust retains maximum crispness.
-
Keep warm in the oven – If not eating right away, hold chicken in a 200°F oven on a rack over a baking sheet.
Follow these tips, and you’ll be rewarded with fried chicken boasting an incredibly crisp exterior enveloping moist, flavorful meat. Just be prepared for demands for second helpings!
Frequently Asked Questions
Still have some questions about achieving ultimate crispiness? Here are answers to some common fried chicken FAQs:
Does brining make fried chicken less crispy?
Brining can indirectly improve crispiness by helping the coating stick better. Just be sure to thoroughly dry the chicken after brining to prevent sogginess.
Should I use cornstarch or flour in the coating?
A blend provides the best texture. Flour lends structure and binding power. Cornstarch crisps up nicely during frying. Aim for a 1:1 ratio.
Is buttermilk necessary for crispy fried chicken?
Buttermilk isn’t mandatory, but it does make the chicken more tender and helps the coating adhere better. Substitute milk mixed with lemon juice if needed.
What is the best oil temperature for frying chicken?
Aim to maintain the oil between 325-350°F. Investing in a thermometer helps monitor the temperature accurately throughout frying.
How can I keep fried chicken crispy after cooking?
Cool the chicken on a wire rack instead of stacking. Keep the chicken warm in a 200°F oven placed on a rack over a baking sheet. Avoid steam and moisture.
Why is my fried chicken burnt outside but raw inside?
This happens when the oil temperature is too high. Lower the heat and monitor the temperature closely. You may need to fry in smaller batches to prevent drastic drops in oil temperature.
Can I reuse frying oil?
Yes, oil can be reused a few times if strained after each use to remove food particles. Discard if it becomes dark, cloudy or has an off smell.
Watch the Easy Fried Chicken Recipe Video Below!
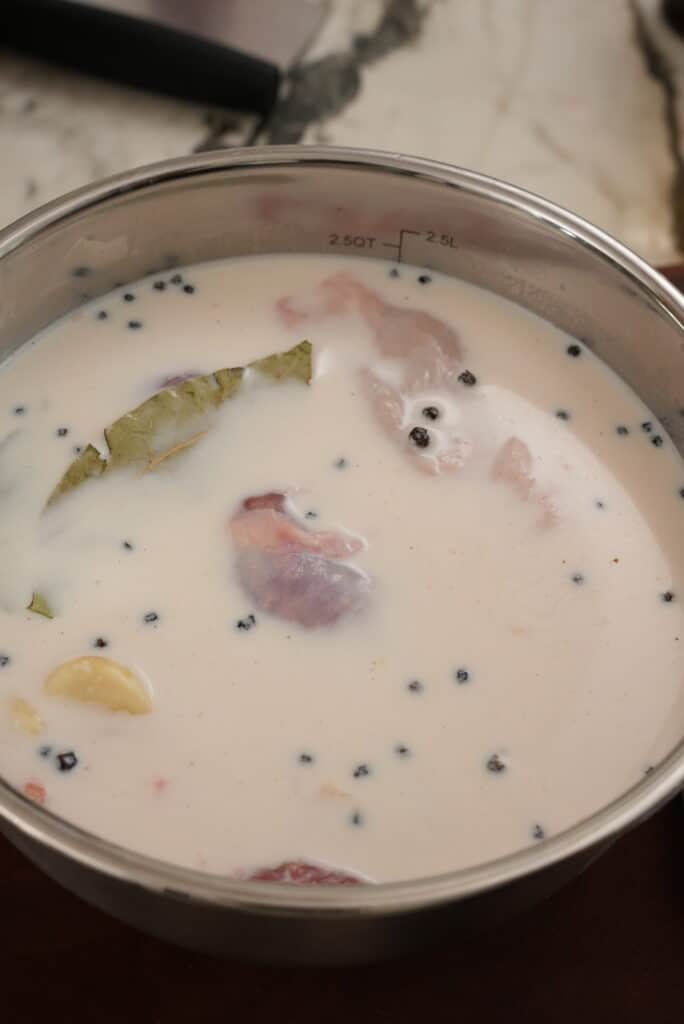
Brining for Juicy, Tender Chicken
MILK BRINE The lactic acid in dairy breaks down the proteins and collagen in the chicken, which softens the flesh and will make it more tender when cooked. You can get more tender meat from the dairy by poking holes in the chicken. If you don’t have milk, adding salt water is still better than nothing. (Brining is optional but I always recommend it, if you have the time!).