There really is nothing exciting about eating a chicken breast, let’s just be clear here. But the great thing about chicken, especially white meat, is that it can be used to add new flavors and make things really interesting. It can take a pretty bland protein and turn it into something new and tasty.
I’ve been grilling for the past two years plus and eating a variation of a whole 30, paleo, or keto low carb diet for even longer. Chicken is a great staple for any diet or busy weeknight meal prep, but I often hear or see (on social media) way too many overcooked chicken breasts rolling off people’s grills! So no more!.
This is a quick and easy guide to everything you need to know about grilling chicken, including marinades, brining, rubs, charcoal and gas grilling, indirect and direct heat, and more! Read through it to become a grilling master!
Love a good grill guide? Grab this guide for 5 tips to making the best rotisserie chicken too!
Supplies may vary based on the cut of chicken you’re using, but generally you need the following-
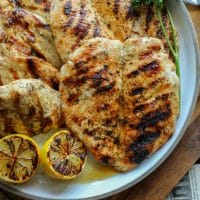
Ever stared at a flattened chicken breast on your grill, wondering if it’s done yet? I’ve been there too! After years of both successes and failures (let’s be honest, we’ve all had those hockey puck chicken disasters), I’ve figured out the perfect timing for grilled flattened chicken breasts that are juicy, flavorful, and perfectly cooked every single time
In this comprehensive guide I’ll share everything you need to know about grilling flattened chicken breasts from preparation to that perfect juicy bite.
Why Flatten Your Chicken Breasts Anyway?
Before diving into cooking times, let’s talk about why flattening chicken breasts is a game-changer:
- Even cooking: Creates uniform thickness so all parts cook at the same rate
- Faster cooking: Reduces overall cooking time significantly
- Better flavor absorption: Increases surface area for marinades and seasonings
- Juicier results: Prevents overcooking of thinner parts while waiting for thicker parts
The first time I properly flattened a chicken breast before grilling it, it was like finding a whole new kind of meat! The edges were no longer dry and the middle was perfectly cooked.
The Perfect Grilling Time for Flattened Chicken Breast
Here’s the short answer: Flattened chicken breasts typically need about 4-6 minutes per side on a medium-high heat grill (350-400°F or 175-205°C).
But there’s a little more to it than that, as with most things in cooking. The exact time depends on several factors:
| Thickness | Cooking Time Per Side | Total Cooking Time |
|---|---|---|
| 1/2 inch | 4-5 minutes | 8-10 minutes |
| 3/4 inch | 5-6 minutes | 10-12 minutes |
| 1 inch | 7-8 minutes | 14-16 minutes |
Remember that these times are for a properly preheated grill at medium-high heat. If your grill runs hotter (425-450°F), you might need to reduce cooking time slightly.
Preparation: Setting Yourself Up for Success
Flattening Techniques
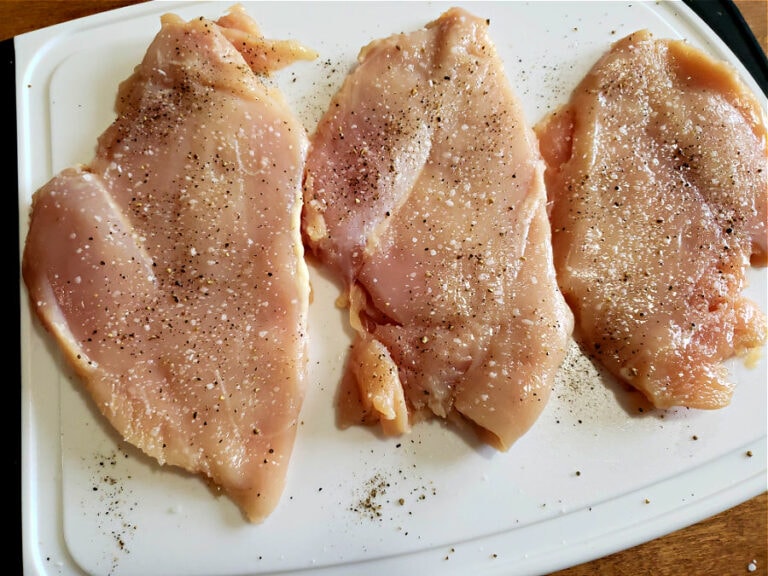
Before we even get to the grill, it’s important to get everything ready. Here’s how I flatten chicken breasts:
- Place chicken between plastic wrap: This contains any mess and prevents sticking
- Use the right tool: A meat mallet works best, but a rolling pin or heavy pan works too
- Pound evenly: Start from the center and work outward using even pressure
- Aim for uniformity: Try to achieve a consistent thickness of about 1/2 to 3/4 inch
I once tried to flatten chicken without plastic wrap. BIG mistake! Had chicken bits stuck all over my kitchen. Learn from my fail!.
The Magic of Brining
Want to take your chicken to the next level? Try brining! This is something I started doing recently and wow, what a difference.
Simple Brine Recipe:
- 1/4 cup kosher salt
- 6 cups water
- Optional: garlic cloves, peppercorns, herbs
Dissolve the salt in water, add your flattened chicken breasts, and refrigerate for 30-60 minutes. This simple step adds incredible moisture and flavor.
Mastering the Grill
Temperature Matters
For perfectly grilled flattened chicken breast, temperature control is crucial:
- Preheat thoroughly: Allow your grill to preheat for 10-15 minutes
- Medium-high heat: Aim for 350-400°F (175-205°C) for standard grilling
- Hot zone/cool zone: Create temperature zones for better control
I use a grill thermometer to make sure I’m in the right range. Before I started using one, my “medium-high” was actually “surface of the sun” hot!
The Grilling Process
Here’s my step-by-step process for perfectly grilled flattened chicken:
- Oil the grates: Use tongs and an oil-soaked paper towel to prevent sticking
- Place chicken on the hot grill: Listen for that satisfying sizzle
- Resist the urge to move it: Let it cook undisturbed for 4-6 minutes
- Flip once: Turn when grill marks appear and edges start to look opaque
- Continue cooking: Another 4-6 minutes on the second side
- Check temperature: Use a meat thermometer to confirm 165°F (74°C)
- Rest before cutting: Give it 5-10 minutes off the grill
That resting period is non-negotiable! It allows juices to redistribute throughout the meat instead of spilling out when you cut into it.
How to Know When It’s Done
The most reliable way to check for doneness is with a meat thermometer. Chicken is safe to eat at 165°F (74°C).
Don’t have a thermometer? Look for these signs:
- Clear juices (not pink) when pierced
- Firm but slightly springy when pressed
- No pink meat when cut into the thickest part
- Grill marks on both sides
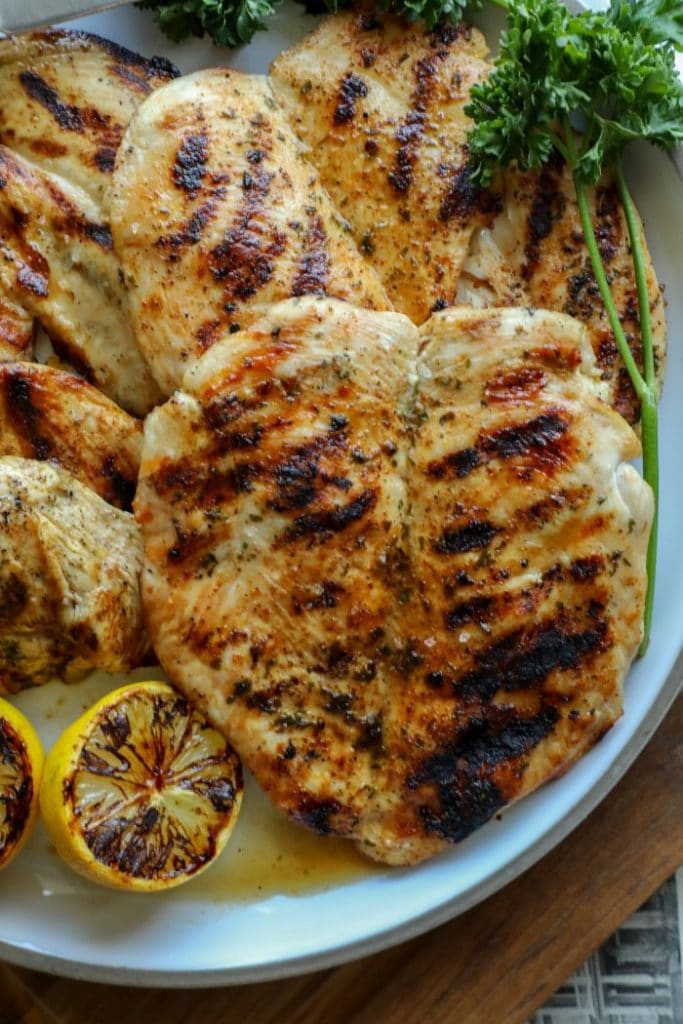
Flavor Boosters: Marinades and Seasonings
A flattened chicken breast is the perfect canvas for flavors. Here are some of my favorite ways to season:
Quick Marinades (30 minutes minimum)
- Classic: Olive oil, lemon juice, garlic, herbs
- Asian-inspired: Soy sauce, honey, ginger, garlic
- Tangy: Yogurt, lime juice, cumin, coriander
Simple Dry Rubs
- Basic: Salt, pepper, garlic powder, paprika
- Smoky: Chili powder, cumin, brown sugar, salt
- Herby: Italian seasoning, salt, pepper, garlic
For weeknight dinners, I often just use salt, pepper, garlic powder and paprika. Simple but always delicious!
Common Mistakes to Avoid
Through many grill sessions, I’ve made plenty of mistakes. Learn from them:
- Skipping the preheating: Always preheat your grill thoroughly
- Constantly flipping: Flip just once for best results
- Pressing down with spatula: This squeezes out precious juices
- Skipping the rest period: Always let your chicken rest before cutting
- Using high heat: Medium-high is perfect; too hot will burn the outside before the inside cooks
Troubleshooting Tips
Sometimes things don’t go as planned. Here’s how to handle common issues:
- Chicken sticking to grill: Make sure grates are clean and oiled before cooking
- Charred outside, raw inside: Your heat is too high; lower temperature and move to indirect heat
- Chicken too dry: You’ve overcooked it; use a thermometer next time and remove at 165°F
- Flare-ups: Keep a spray bottle of water handy to tame flames
Serving Suggestions
Grilled flattened chicken breast is incredibly versatile:
- Slice for salads or grain bowls
- Serve whole with your favorite sides
- Use in sandwiches or wraps
- Dice for pasta dishes
Final Thoughts
Grilling flattened chicken breasts doesn’t have to be complicated. With the right preparation, temperature, and timing, you’ll have juicy, flavorful chicken every time. Remember the basics: flatten evenly, preheat properly, grill for 4-6 minutes per side, check temperature, and don’t forget to rest!
We’d love to hear about your experiences grilling flattened chicken breasts. Drop a comment below with your favorite marinades or techniques!
FAQ Section
Q: Can I flatten and grill frozen chicken breasts?
A: It’s not recommended. Always thaw chicken completely before flattening and grilling for even cooking and food safety.
Q: What if I don’t have a meat mallet?
A: A rolling pin, heavy skillet, or even a wine bottle works well for flattening chicken breasts.
Q: Can I use this technique for bone-in chicken?
A: This technique works best for boneless chicken. Bone-in pieces require different cooking methods.
Q: How do I prevent my chicken from drying out?
A: Brining, monitoring cooking time carefully, and using a meat thermometer to avoid overcooking are your best defenses against dry chicken.
Q: Can I grill flattened chicken breasts indoors?
A: Absolutely! A grill pan on the stovetop works great. Follow the same timing guidelines, adjusting as needed for your specific equipment.
Charcoal Grill VS Gas Grill:
Honestly, both are great. This is 100% preference regarding speed of cooking, desired flavor, and the tools you have. General rule of thumb is to utilize two zone cooking (indirect and direct heat). If you master the two concepts below, you can gill on either!.
Cooking with lean meat like poultry or fish (even steak to be honest), you can never go wrong with the indirect heat cooking method! This method is a way to essentially bake your food on the grill instead of cooking it directly over the flame.
I prefer this method when cooking a whole chicken, chicken thighs, sometimes even chicken wings. It’s a great way to get crispier chicken skin, and slowly cook a thicker cut piece of poultry.
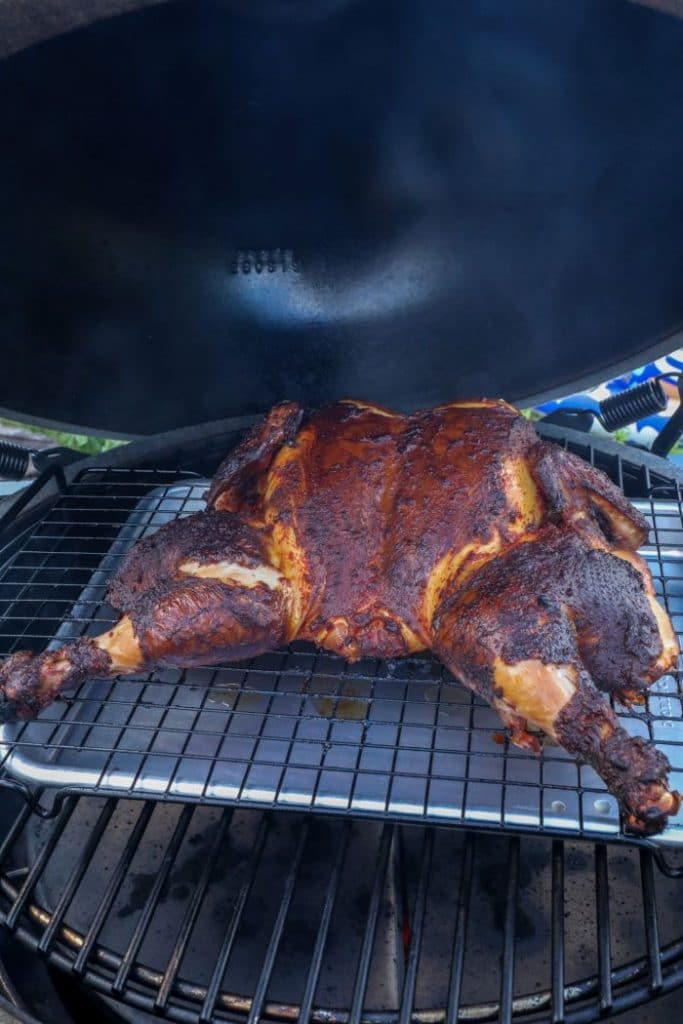
Finish the chicken off on indirect heat to an internal temperature of 165 F or remove them closer to 145 F and sear them over direct heat, flipping the chicken as needed until you hit that 165 F temp!.
This is pretty self explanatory, cooking the chicken directly over the flame. The best advice here is to carefully grease your grill grates prior to help prevent the chicken from sticking. Be sure to grill your chicken 2-3 minutes per side and flip when it easily comes away from the grate (don’t rip it off).

Grill with the lid closed in between flips. The heat stays inside longer, and this cooks the bottom and moves the heat to the top. Get the nice grill marks by flipping twice per side, cooking around 7-8 minutes on a medium heat. Use a thermometer to reach that internal temperature of 165F.
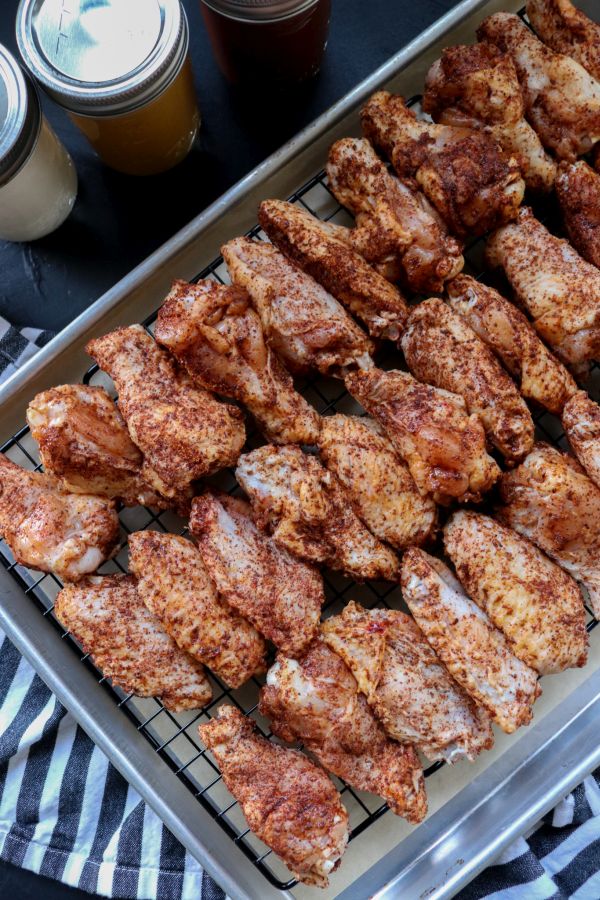
Dry Rubs and Spices:
If you’re really in a pinch or you just want more of a dry rub for things like grilled chicken wings, crispy chicken quarters, or these oven baked BBQ chicken drumsticks. then there are a few things to definitely make note of.
First, moisture is your enemy! Remove excess moisture by patting your chicken dry with a paper towel. Coat or toss your chicken in a little olive oil or any other oil of your choice. Then, season it well with your favorite dry rub or this keto all-purpose BBQ rub. Fire up a gas or charcoal grill and put your chicken breasts over medium-high heat. This will make them taste great.