I have a confession to make (I wonder how many blog posts I’ve started with that statement–I always feel like I’m confessing something here).
In fact, I used to let my cat eat them (I think at least a hundred of you just unsubscribed from my blog–Uh oh). Well, not the actual bones, but the carcass. In college, my cat and I used to split a rotisserie chicken. Just giving this explanation doesn’t seem to help, does it? I feel like I can’t help but sound like a really gross cat lady. To be fair, I was nineteen and lived alone with a slightly bossy (and always hungry) feline roommate. This isn’t making anything better. At all. I should probably erase this entire paragraph, but I shall leave it in the spirit of truth telling and friendship. This girl, on the other hand, didn’t save the bones and make her own broth. She used to split a store-bought rotisserie chicken with her cat while watching Sex in the City. She was more like the kind of girl who lived on Quiznos sandwiches and cheap vodka. Yeah, baby. We’ve come a long way. I wish I could go back and gift my nineteen year old self a crock pot. Oh, and maybe tell her to lay off the gluten. Also, wear crop tops. You’ll wish you had later. That crop top wearing season of life is short. Be naked. Love yourself. Stop eating full meals with your cat. Also, those jeans you just bought are kinda tacky. Oh, when you turn 21, you’re going to be tempted to mix liquor and beer–this won’t end well. But… seriously, use this crock pot. Make your own chicken broth. It’s easy. It’s good for you. The end.
Well, that was a serious digression. I will keep the rest of this post all informational and business-y.
You’re probably thinking “What’s so great about homemade broth anyway?” No prob. I’ll give you a short rundown.
Have you ever wondered how to make that rich, gelatinous chicken bone broth that seems to heal everything from the common cold to a broken heart? I’ve spent years perfecting my bone broth technique, and I’m excited to share the optimal cooking time and some game-changing tips that’ll transform your homemade broth forever.
The Ideal Cooking Time for Chicken Bone Broth
To get right to the point, the best amount of time to cook chicken bone broth in a slow cooker is 12 to 24 hours. This long simmering time is important for getting all of those good nutrients out of the bones.
Why so long? Well, good things do come to those who wait! The slow, gentle heat lets the collagen, gelatin, amino acids, and minerals in the chicken bones come out as much as possible. These chemicals are what give bone broth its healing power and that rich, delicious taste we all love.
Why Making Bone Broth in a Slow Cooker Is Superior
I’ve tried making bone broth many ways, but the slow cooker method is hands-down my favorite for several reasons:
- Consistent temperature: The gentle, steady heat coaxes out nutrients without scorching
- Hands-off approach: Set it and forget it (almost)
- Safety: Modern slow cookers are designed to be left on for extended periods
- Better nutrient extraction: The slow, sustained simmer breaks down bones more effectively
Essential Ingredients for the Best Chicken Bone Broth
For a nutritious, flavorful broth, you’ll need:
- 2-3 chicken carcasses (approximately 2 pounds of bones)
- Unpeeled onions (quartered)
- Unpeeled garlic head (cut in half crosswise)
- Unpeeled carrots (chunked)
- Celery with leaves (chunked)
- Apple cider vinegar (1-2 tablespoons)
- Fresh herbs (thyme, parsley)
- Bay leaves
- Black peppercorns
- Water (enough to cover everything)
Notice I said “unpeeled” for many vegetables? That’s not a typo! Those peels contain valuable nutrients that will enhance your broth
Step-by-Step Guide to Perfect Slow Cooker Bone Broth
1. Prepare Your Bones
For the richest flavor, roast your bones first. Preheat your oven to 400°F (200°C), place the bones on a baking sheet with some vegetables, drizzle with olive oil, and roast for about 30 minutes, stirring halfway through.
2. Set Up Your Slow Cooker
Transfer the roasted bones and vegetables to your slow cooker (at least 6-quart capacity for a full batch). Add the remaining ingredients, including apple cider vinegar, which helps extract minerals from the bones.
3. Add Water and Cook
Add enough water to completely cover the ingredients (about 2-2.5 quarts). Set your slow cooker to LOW and let it simmer for 12-24 hours. The longer it cooks, the richer and more nutritious it gets!
4. Strain and Store
After it’s done, use a fine-mesh strainer to get rid of all the solids in the broth. For a fat-free broth, either:
- Refrigerate overnight and scrape off the hardened fat from the top, OR
- Use a fat separator while the broth is still warm
The broth can be kept in the fridge for four to five days or frozen for up to three months. I like to freeze mine in amounts of 1 or 2 cups so that they are easy to use in recipes.
The Science Behind the Simmer: Why Time Matters
I’m not just making you wait for no reason – the extended cooking time is crucial for:
- Converting collagen to gelatin: This gives broth its healing gut properties
- Extracting minerals: Calcium, phosphorus, and magnesium become more bioavailable
- Developing flavor: Those deep, complex flavors only develop with time
- Creating that gel: A properly made bone broth should gel when refrigerated (that’s the gelatin!)
Tips for Maximizing Nutrient Extraction
After making countless batches of bone broth, I’ve discovered these game-changing tips:
- Use collagen-rich bones: Include chicken backs, feet, or wings for maximum gelatin
- Don’t forget the vinegar: 1-2 tablespoons of apple cider vinegar helps leach minerals from the bones
- Keep bones submerged: Add water as needed during cooking
- Roast bones first: This deepens the flavor significantly
- Don’t peel your veggies: Onion skins, garlic peels, and carrot peels add nutrients and color
- Skim occasionally: For a clearer broth, skim off any foam that rises to the surface
Common Questions About Chicken Bone Broth
Can I cook bone broth for longer than 24 hours?
You can cook it up to 48 hours, but the benefits diminish after 24 hours, and the broth might start tasting bitter. I usually stick to the 24-hour mark for the best flavor-to-effort ratio.
Is it safe to leave my slow cooker on overnight?
Yes! Modern slow cookers are designed for extended cooking times. Just make sure your slow cooker is in good working condition and follow the manufacturer’s instructions.
Why isn’t my broth gelatinous?
If your broth doesn’t gel when refrigerated, you might have:
- Used too much water
- Not included enough collagen-rich bones
- Not cooked it long enough
- Used bones from conventionally raised chickens (which tend to have less collagen)
Can I use a rotisserie chicken carcass?
Absolutely! I often save carcasses from store-bought rotisserie chickens in the freezer until I have enough to make a batch. It’s a great way to get more value from your chicken purchase.
What makes bone broth different from regular chicken broth?
The main difference is cooking time. Regular chicken broth cooks for 1-2 hours, while bone broth simmers for 12-24 hours. This extended cooking extracts significantly more nutrients and creates that distinctive gelatinous texture.
Health Benefits of Chicken Bone Broth
One of the reasons I’m obsessed with bone broth is its incredible health benefits:
- Gut healing: The gelatin helps repair gut lining
- Joint support: Contains glucosamine and chondroitin
- Immune boosting: Rich in amino acids that support immune function
- Skin health: Collagen promotes skin elasticity
- Better sleep: Contains glycine, which can improve sleep quality
As my grandma used to say, “Chicken soup heals what ails you” – turns out she was scientifically correct!
Ways to Use Your Bone Broth
Now that you’ve spent all this time making liquid gold, here’s how to use it:
- Sip it straight from a mug (my favorite on cold mornings)
- Use as a base for soups and stews
- Cook grains in it instead of water
- Make gravies and sauces
- Use in place of water when making rice
- Add to mashed potatoes for extra flavor
Final Thoughts
Making chicken bone broth in a slow cooker isn’t complicated, but it does require patience. The 12-24 hour cooking time is essential for creating a nutritious, gelatin-rich broth that’s worth the wait.
I’ve been making bone broth this way for years, and I can honestly say it’s transformed my cooking and my health. There’s something deeply satisfying about creating something so nourishing from ingredients that might otherwise be discarded.
So dust off that slow cooker, save those chicken bones, and give yourself the gift of homemade bone broth. Your taste buds (and your body) will thank you!
Have you tried making bone broth before? What’s your favorite way to use it? I’d love to hear about your experiences in the comments!

Benefits of Bone Broth {The Short List}:
- It saves money: I’ve paid $4 to $5 a quart for organic broth. I paid $15 for a whole organic chicken in this case. I cooked it to serve four people. After that, I used the bones to make about three quarts of organic broth. This was something that would have cost me an extra $15 that I made from dinner scraps.
- It’s High in Nutrients: It’s full of minerals! Making bone broth this way is a great way to get more calcium, magnesium, phosphorous, and other trace minerals in your diet.
- The food is a great source of proline. The amino acid proline helps keep your bones, ligaments, and joints healthy. The amino acid glycine cleans out your liver and helps make the powerful antioxidant glutothione.
- How Does It Help Your Gut? Have you heard of leaky gut syndrome? Bone broth is full of gelatin and collagen, two important nutrients for gut health. It’s also good for your bones, hair, nails, joints, and skin. What if you want your broth to have more gelatin? Add some chicken feet!
And, like I said… that’s just a short list. Ready to get down to broth business? Cool.
Remember that Roasted Chicken that we made earlier this week? Don’t throw away the bones. It’s going to make amazing, cheap and nourishing chicken stock. In fact, you can make this stock with any ol’ leftover chicken carcass. It’s not particular. 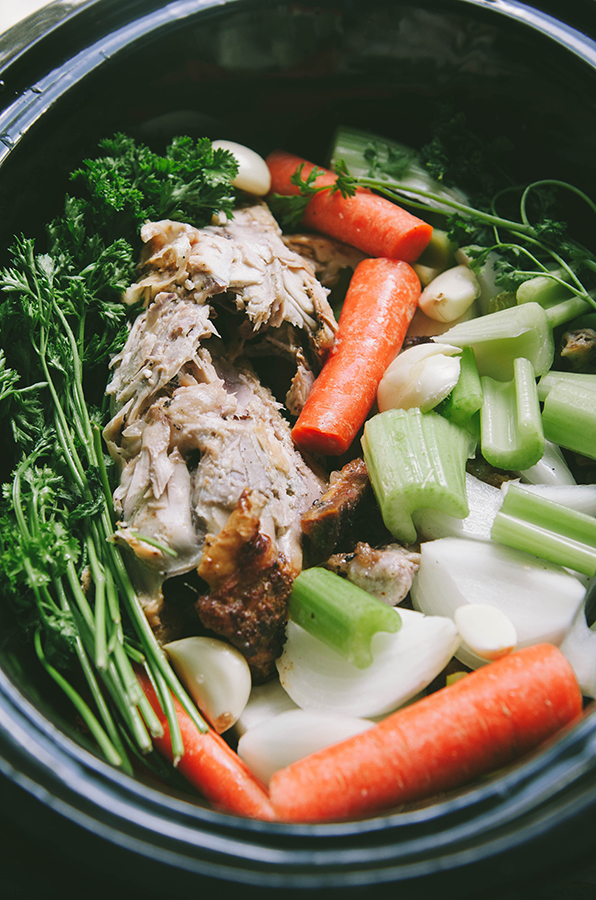 Once you’re finished with your whole chicken, simply add the carcass and any remaining bones to your crock-pot. Pour in a little apple cider vinegar –this is going to help leach more calcium out of the chicken bones which adds a lot of nutritional benefit to the broth. Add in some onions, garlic and veggies. Throw in some herbs to your liking. If I’ve roasted a chicken with veggies I might add the remainder of those into the pot as well. It all adds to the flavor. Fill the crock pot with water (so that it covers the bones). Put the lid on your crock pot and set it on low for 12-24 hours. I tend to like my broth a bit darker, so I allow to to cook overnight. After simmering away all night this is what’s left waiting for you in the morning! A mineral rich chicken broth that’s ready to be strained and stored for use. I might have also just ladled a cup for sipping straight out of the slow cooker. What can I say? I’m an eager beaver.
Once you strain your broth you can bottle it up in mason jars and refrigerate it for up to a week. If you can’t use it all up in that time, put it in freezer safe containers (if you’re using mason jars make sure they are FREEZER SAFE or they will crack and explode) and freeze the broth for up to six months.
I also like to make little broth cubes. I pour the broth in a silicone mold (in this case in the shape of tiny people because…why not) and allow it to freeze solid. I then add them to a ziplock bag. This way if I need just a little bit of stock or want to heat a mug for sipping I don’t have to defrost a whole jar. I simply add a couple of these broth cubes to a pot or pan and it adds instant flavor!