Whether you’re cooking low and slow or trying to whip up a weeknight meal, we have you covered.
Chicken is something almost every home cook is familiar with preparing. You probably have your own set of recipes and cooking methods that you either got from your family or picked up along the way. But do you ever wonder if you’re doing it right? In this article, we talk about our two favorite ways to cook chicken: one with the bone in for when you have more time, and one boneless for faster meals.
We spoke with Ibraheem Basir, founder of A Dozen Cousins, which makes high-quality sauce, rice, and beans. He shared his two favorite ways to prepare chicken using his Peruvian Pollo Ala Brasa and Jamaican Jerk Seasoning.
Have you ever struggled with dry, flavorless chicken? I sure have! After years of kitchen disasters, I’ve finally mastered cooking bone-in chicken breasts on the stovetop Today, I’m sharing all my secrets so you can enjoy juicy, flavorful chicken every single time!
When it comes to cooking, bone-in chicken breasts are truly underrated heroes. They’re cheaper than boneless cuts and taste so much better because they have both bone and skin on them. But how long should you cook them on the stove? Let’s find out!
Why Choose Bone-In Chicken Breasts?
Before we talk cooking times, let’s quickly cover why bone-in is sometimes better:
- More Flavor: The bone and skin contribute to a richer taste
- Juicier Meat: Cooking with the bone helps retain moisture
- Cost-Effective: Generally cheaper than boneless, skinless options
- Built-in Protection: The skin and bone act as barriers against drying out
As America’s Test Kitchen puts it, “Choosing boneless, skinless chicken breasts over less expensive bone-in breasts is like paying extra for a car that has had its air bags removed.” Pretty strong statement, but I kinda agree!
How Long to Cook Bone-In Chicken Breasts on the Stovetop
Of course, that’s the million-dollar question! Here’s how long I usually cook bone-in chicken breasts on the stove:
| Cooking Method | Approximate Time |
|---|---|
| Searing then reducing heat | 25-35 minutes total |
| Initial sear (skin side down) | 5-7 minutes |
| Covered cooking (medium-low heat) | 20-30 minutes |
But remember, these are just guidelines! The actual time depends on several factors:
- Thickness of the chicken: Thicker pieces need more time
- Your stove’s heat level: Gas vs electric can affect cooking times
- Size of the chicken breasts: Larger pieces take longer
- Starting temperature: Room temperature chicken cooks more evenly than cold
Step-by-Step Guide to Perfectly Cooked Bone-In Chicken Breasts
Let me walk you through my foolproof method for cooking bone-in chicken breasts on the stovetop:
What You’ll Need:
- Bone-in chicken breasts (2-4 pieces)
- Salt and pepper (be generous!)
- 1-2 tablespoons olive oil or butter
- Your favorite herbs (rosemary and thyme work great)
- Large skillet with lid (cast iron is ideal)
- Meat thermometer (seriously, get one!)
Preparation Steps:
-
Pat the chicken dry with paper towels. For a good sear, DO NOT skip this step! If you do, your chicken will just steam instead of sear.
-
Season generously. I like to carefully peel back the skin (without detaching it), sprinkle about 1½ teaspoons of kosher salt over the meat, then smooth the skin back in place. Add pepper and any other seasonings you like.
-
Poke holes in the skin’s fat deposits using a metal skewer or paring knife. This helps the fat render better, giving you crispier skin.
-
Heat your pan. Place a large skillet over medium-high heat and add your oil. Let it get hot enough that it shimmers but doesn’t smoke.
-
Sear the chicken skin-side down first. This is crucial! Place the chicken in the hot pan and DON’T MOVE IT for about 5-7 minutes. You want that skin to get nice and golden.
-
Flip and reduce heat. Once the skin is crispy and golden brown, flip the chicken and reduce the heat to medium-low.
-
Cover and continue cooking for another 20-30 minutes. Cover keeps heat inside, so the chicken cooks all the way through without getting burned on the outside.
How to Know When It’s Done
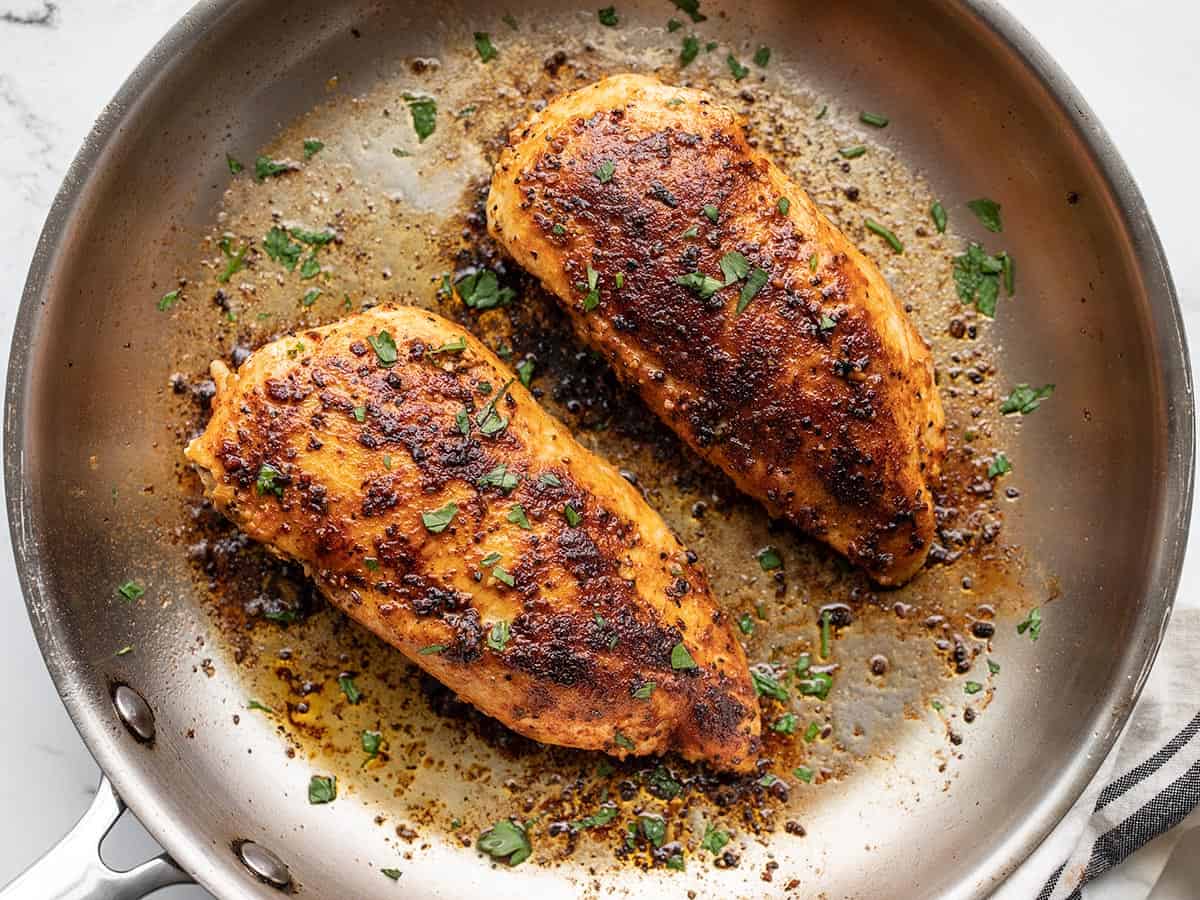
The most reliable way to check for doneness is with a meat thermometer. Insert it into the thickest part of the breast (without touching the bone) – it should read 165°F.
If you don’t have a thermometer (though you really should get one!), you can cut into the thickest part. The meat should be white all the way through with no pink spots, and the juices should run clear.
The “Reverse-Sear” Alternative Method
America’s Test Kitchen suggests an interesting alternative called the “reverse-sear” technique:
- Poke holes in the skin to help fat render
- Bake the chicken in a 325°F oven for about 40 minutes
- Finish with a quick sear on the stovetop for crispy skin
This method takes longer but produces incredibly juicy results. I’ve tried it several times and it works beautifully when you’re not in a hurry.
Common Mistakes to Avoid
We all make mistakes, and I’ve certainly made my fair share when cooking chicken! Here are some pitfalls to watch out for:
- Not drying the chicken properly – Excess moisture creates steam, preventing a good sear
- Moving the chicken too soon – Let it sear undisturbed to develop that golden crust
- Overcrowding the pan – Too many pieces close together will steam instead of sear
- Cooking at too high a heat – You’ll burn the outside while the inside stays raw
- Skipping the resting period – Always let your chicken rest for 5-10 minutes after cooking
My Secret Finishing Touch
Want to take your chicken to the next level? Here’s my little secret: add about half a tablespoon of butter per chicken breast during the last minute of cooking. It melts into the pan juices and gives the chicken that rich, restaurant-style finish. This little trick has my family thinking I’m some kind of chicken wizard!
Frequently Asked Questions
Should I cover the pan while cooking bone-in chicken breast?
It depends on your goal. For crispy skin, leave it uncovered during the initial sear. Then cover it for the remaining cooking time to ensure it cooks through evenly without drying out.
Can I cook bone-in chicken breast from frozen?
You can, but I don’t recommend it. The cooking time increases by about 50%, making it difficult to achieve even cooking without drying out the exterior. Better to thaw in the refrigerator overnight for consistent results.
What’s the best pan to use?
A heavy-bottomed skillet or cast-iron pan is ideal because they distribute heat evenly. Non-stick works too, but you won’t get quite the same flavorful crust.
What should I serve with bone-in chicken breast?
The possibilities are endless! My family loves it with roasted potatoes and a simple green salad. It also pairs wonderfully with rice, quinoa, or steamed vegetables. The pan drippings make a fantastic base for a quick sauce, too!
Final Thoughts
Cooking bone-in chicken breasts on the stovetop isn’t complicated once you understand the basics. The key things to remember are:
- Dry the chicken thoroughly before cooking
- Season generously under and over the skin
- Sear skin-side down first
- Lower the heat and cover to finish cooking
- Use a meat thermometer to check doneness
- Let it rest before serving
With these simple steps, you’ll have juicy, flavorful chicken every time. No more dry, bland chicken disasters!
What Pan Should I Use?
Next, you need to decide on what Cookware is best for either method of cooking. For a boneless breast, Ibraheem uses our Stainless Clad Frying Pan. “They offer really even heating, no hot or cold spots,” he says. “I’m mostly partial to dark meat, but when I cook breasts, that’s the way I like to do it. ” When cooking bone-in chicken, he prefers Carbon Steel Roasting Pan. “I love using the Carbon Steel Pan with the rack so then all of the drippings—the juice and the oil—drips away. That leaves you with a nice, crunchy exterior, no soggy skin,” he says.
How to Choose Your Chicken
First, you’ll need a chicken—either breasts or thighs, or if you’re feeling really ambitious, both. For these recipes, you’ll need 1 ½ pounds of either breasts or thighs. Chicken breasts are best suited for quicker cooking dishes made on the stove. This way, it’s also easier to ensure that the meat doesn’t dry out. Bone-in chicken thighs on the other hand can cook longer while retaining their moisture, even if you “overcook” them. The flavor is also more pronounced and the fat content is slightly higher.