There is no question that processing your own birds comes with a learning curve and a couple of seriously challenging hurdles. If you have gotten over the part about having to kill a bird you have raised, then the next challenge is to create a clean bird worthy of the table. Sometimes that is just easier said than done.
I used to prepare my own birds, and sometimes I would get one that plucked perfectly in just a few minutes. Other times, I could spend upwards of an hour pulling feathers and worrying after pin feathers, only to end up disappointed by the results. The skin was pulled and puckered and pock-marked from the effort.
The frustration of struggling to pull out all those stuck feathers was nearly enough to make me give up altogether. A clean pluck vs a difficult pluck seemed random to me at first.
Plucking a chicken is an essential skill for anyone raising backyard chickens. While you can buy pre-plucked chickens from the store, learning how to do it yourself allows you to have full control over the process from start to finish. Plus, it can save you money in the long run.
When you properly pluck a chicken, you get the best meat and the cleanest finish. If you’ve never done it before, it might seem hard, but it’s really not that hard once you know the steps.
Along with this detailed guide, I’ll show you how to pluck a chicken from beginning to end.
Before You Start Plucking
Before you can start removing feathers there are a couple of preparatory steps
-
Harvest – The first step is humanely harvesting your bird. Cutting the neck artery while the chicken is suspended upside down in a cone is the most humane and effective method. This avoids unnecessary stress to the bird.
-
Scald—After you catch the chicken, you need to put it in hot water between 130°F and 170°F for 30 seconds to 2 minutes. This loosens the feathers and makes plucking much easier. Proper scalding is key for easy plucking.
Once your bird is properly harvested and scalded, you’re ready to start plucking
Plucking Methods
There are a few different methods for removing the feathers:
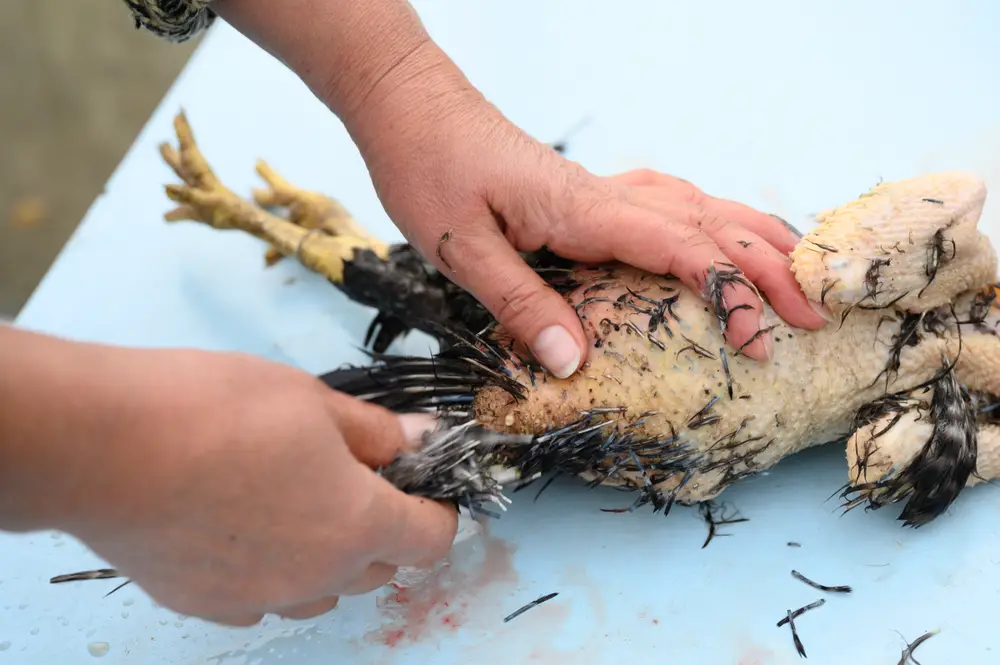
Hand Plucking
This involves manually pulling out feathers by hand. It takes more work and time, but it gives you more control and precision.
- Hang the bird upside down to give both hands access to all areas.
- Start plucking the feathers from the tail up towards the back, breast, and finally the head.
- Pull in the direction they grow to avoid tearing the skin.
- Use plucked feathers to grip and remove pin feathers.
Hand plucking can take 5-20 minutes depending on your speed and the chicken’s size. It gives a very clean finish if done properly.
Mechanical Pluckers
For larger volumes, mechanical pluckers like the Whizbang Plucker can save huge amounts of time. They use rubber “fingers” to quickly remove feathers in 15-30 seconds.
Tub pluckers are ideal for backyard flocks with 10-30 chickens. The high speed ensures a quality processed bird. Just take care not to over-pluck, which can damage the carcass.
Combination Approach
Many people use a hybrid approach – mechanical plucker first to remove the bulk of feathers rapidly, followed by hand plucking for pin feathers and any stubborn quills missed by the machine. This gives you the best of both worlds.
Step-By-Step Plucking Process
Follow these steps for perfectly plucked chickens every time:
-
Harvest and scald the bird as outlined above. Scraping the feet can help the machine grab them.
-
Secure the bird upside down on a shackle or in a cone to keep your hands free.
-
For hand plucking: Start working from the tail up towards the breast. Pull feathers in the direction they grow.
-
For mechanical plucking: Load 1-3 birds in the plucker and run for 15-30 seconds. Add water to help flush feathers.
-
Check for any remaining feathers. Target stubborn spots by hand.
-
Use plucked feathers to grip and remove small pin feathers. Focus on the wings, thighs and body.
-
Avoid over-plucking which can damage the skin. Hand pluck remaining feathers rather than prolonged tumbling.
-
Give a final rinse to remove any down and remaining quills. Air dry before moving to evisceration.
Follow these tips for best results:
- Wear rubber gloves to protect your hands
- Work quickly while the bird is still warm
- Pull feathers along the grain, not against it
- Pluck at least 2 birds together to reduce damage
- Keep plucking time short – quality over speed
That covers the entire process from start to finish! Just remember to focus on a proper scald, avoid over-plucking, and use mechanical pluckers carefully. Follow these best practices and you’ll be rewarded with perfectly plucked chickens every time.
Step 4: Immediately pluck
As soon as I can pull a wing feather easily, I start the Yardbird spinning, remove the cord from the bird’s feet so it doesn’t tangle up in the machine and drop the bird in.
I let it spin until it is about half plucked before I use a hose to spray water in the machine. My Yardbird comes with a hose ring that can spray water, but I just use a garden hose with a spray nozzle to add water. This is just my personal preference and it lets me control the timing of the water.
I spray down the bird while it finishes spinning clean. It rarely takes more than 60 seconds and the bird comes out nice and clean.
Then I created a plan . . . .
After a particularly frustrating morning of poorly plucked birds, I suddenly had a bird that plucked perfectly! This just could not be a coincidence.
As I puzzled over what had gone right, and seriously NOTHING had been going right all morning, I decided there was more to this plucking story. Why was this bird different from all the rest?.
I decided that I would keep closer track of my steps and see if perhaps the random factor in the plucking equation was me, instead of the birds or the machine.
I started to notice some patterns of when a bird plucked well. The first bird was plucking better than the second or third when I was doing a few birds one after another. Or it was the next bird after I had taken a break. Breed didn’t matter. Size didn’t matter. So what was going on?.
Once they had a good thermometer and a few tries to figure out who was responsible, it was clear that the only thing that makes a bird easy to catch is how hot it is.
It felt like a eureka moment, when suddenly, one bird after another, and after another, I could consistently get near perfect results. EVERY time!.
I’ve never had another problem plucking birds ever since.
Backyard Chicken Processing: Hand Plucking Made Easy
FAQ
Can you pluck a chicken without boiling it?
You can pluck them by hand by dipping in a 5 gal bucket 145° water for about 45 sec to a minute until you can pull feathers out with a tug. (They won’t fall out) then sing the hair off the skin by rotating over newspaper lit on fire. Scrub the skin well then open the back end of the chicken and putt the guts.
How long to boil chicken for plucking?
Dunk the bird into the scalding water for 30–60 seconds to loosen the feathers. Check the flight feathers to ensure they come off easily. If they resist, scald for an additional 10 seconds. Things you should avoid: Be careful not to over-scald the bird, as this can hurt the skin and make plucking harder.
How are chickens plucked today?
Step 4: “Evisceration” This begins by putting the chicken through a bath of hot water, which is designed to help loosen feathers. Feather removal is performed by a machine called a “picker,” which includes hundreds of little rubber “fingers” that rotate around to remove the feathers.
Can you dry pluck a chicken?
When dry plucking, the keyword is obviously “dry. “The skin will get wet and gummy if you try to age the birds or leave them out in the cold or in the fridge overnight.” Plucking is absolutely still possible, but will require greater care.