Beef ribs can be incredibly delicious when cooked properly, but they can also easily end up dry and chewy if not prepared correctly. One of the best ways to help ensure your beef ribs turn out juicy, flavorful and tender is to brine them before cooking. Brining is the process of soaking the ribs in a saltwater solution, which allows the salt to penetrate deep into the meat while also helping it retain moisture. While brining is great for leaner meats, it works wonders on fattier cuts like beef ribs too.
In this comprehensive guide, I’ll walk you through everything you need to know about how to properly brine beef ribs to get perfect results every time.
Why Should You Brine Beef Ribs?
There are several key reasons why it’s worth taking the extra time to brine your beef ribs before cooking:
-
Retains Moisture – The salt in the brine helps the meat better retain moisture, resulting in juicier ribs after cooking. The brine essentially re-seasons the meat from the inside out.
-
Infuses Flavor – In addition to the salty flavor, aromatic ingredients like spices, herbs and citrus can penetrate deep into the meat to give the ribs more complex flavors.
-
Tenderizes – The salt works to break down muscle fibers and connective tissues, making the ribs more tender and easier to bite into, especially important for chewy beef ribs
-
Enhances Browning – The salt and sugar in the brine improves browning through the Maillard reaction, leading to better color and caramelization on the exterior of the ribs.
For best results beef ribs should be brined for at least 4 hours, but ideally 12-24 hours if time allows. The longer the ribs brine the more amplified the benefits become.
How to Make a Brine for Beef Ribs
Making a basic brine for beef ribs is easy – it just requires salt, water and time. But you can also add other ingredients to take the flavor up a notch:
- 1 gallon water
- 1 cup kosher salt
- 1/2 cup brown sugar
- 2 tablespoons black peppercorns
- 4 smashed garlic cloves
- 1 tablespoon red pepper flakes (optional)
- Herbs like thyme, rosemary, bay leaves
First, combine the water, salt, sugar and whole spices in a very large container. Stir vigorously until the salt and sugar fully dissolve. Taste the brine – it should taste lightly salty without being overly salty.
Next, add the beef ribs and top off with more water if needed to completely submerge the ribs. Cover and refrigerate for 12-24 hours, flipping halfway through.
Feel free to tweak the salt-to-sugar ratio to suit your tastes. More salt for a stronger brining effect, more sugar for enhanced browning. The spices, garlic and herbs add great complexity. Keep adjusting until you love the overall flavor profile.
Selecting the Best Beef Ribs for Brining
For brining, the best beef rib options are plate ribs, also called short ribs. Look for racks of meaty ribs around 5-7 inches long without too much connective tissue between the bones. Well-marbled ribs with ample fat distribution will end up most flavorful and moist after brining and cooking.
Boneless beef ribs are not great for brining since the salt can’t penetrate as effectively without the bone. Other bone-in ribs like back ribs or chuck short ribs will also benefit from brining, just monitor cook times.
How to Dry Brine Beef Ribs
A quick alternative to a full wet brine is to dry brine the ribs. Simply coat the ribs all over with a salt-sugar rub, let rest for 1-2 hours, then rinse off any excess cure and pat the ribs completely dry before cooking.
To make a basic dry brine, combine:
- 1/4 cup kosher salt
- 2 tablespoons brown sugar
- 1 tablespoon black pepper
- 1 teaspoon garlic powder
The salt will initially draw moisture out of the ribs, then allow reabsorption of the salty liquid which helps tenderize and boost flavor right on the surface.
Step-by-Step Brining Method
Follow these simple steps for flawless brined beef ribs every time:
-
Mix the brine – Combine 1 gallon water, 1 cup kosher salt, 1/2 cup brown sugar, peppercorns, garlic and any other flavors. Stir to fully dissolve.
-
Submerge the ribs – Place ribs in the container, adding more water to completely cover if needed. Weight down ribs with a plate if they float.
-
Refrigerate – Cover and refrigerate for 12-24 hours, flipping ribs halfway through brining.
-
Remove from brine – Take ribs out of the brine, rinse under cold water and pat dry.
-
Apply rub – Coat ribs all over with your favorite barbecue dry rub, pressing in the seasoning.
-
Rest – Let ribs rest for about 30 minutes to form a tacky surface before smoking or grilling.
-
Cook as desired – Smoke low and slow or grill for maximum flavor and tenderness!
And that’s all it takes – perfectly brined and ready for cooking juicy, beefy ribs.
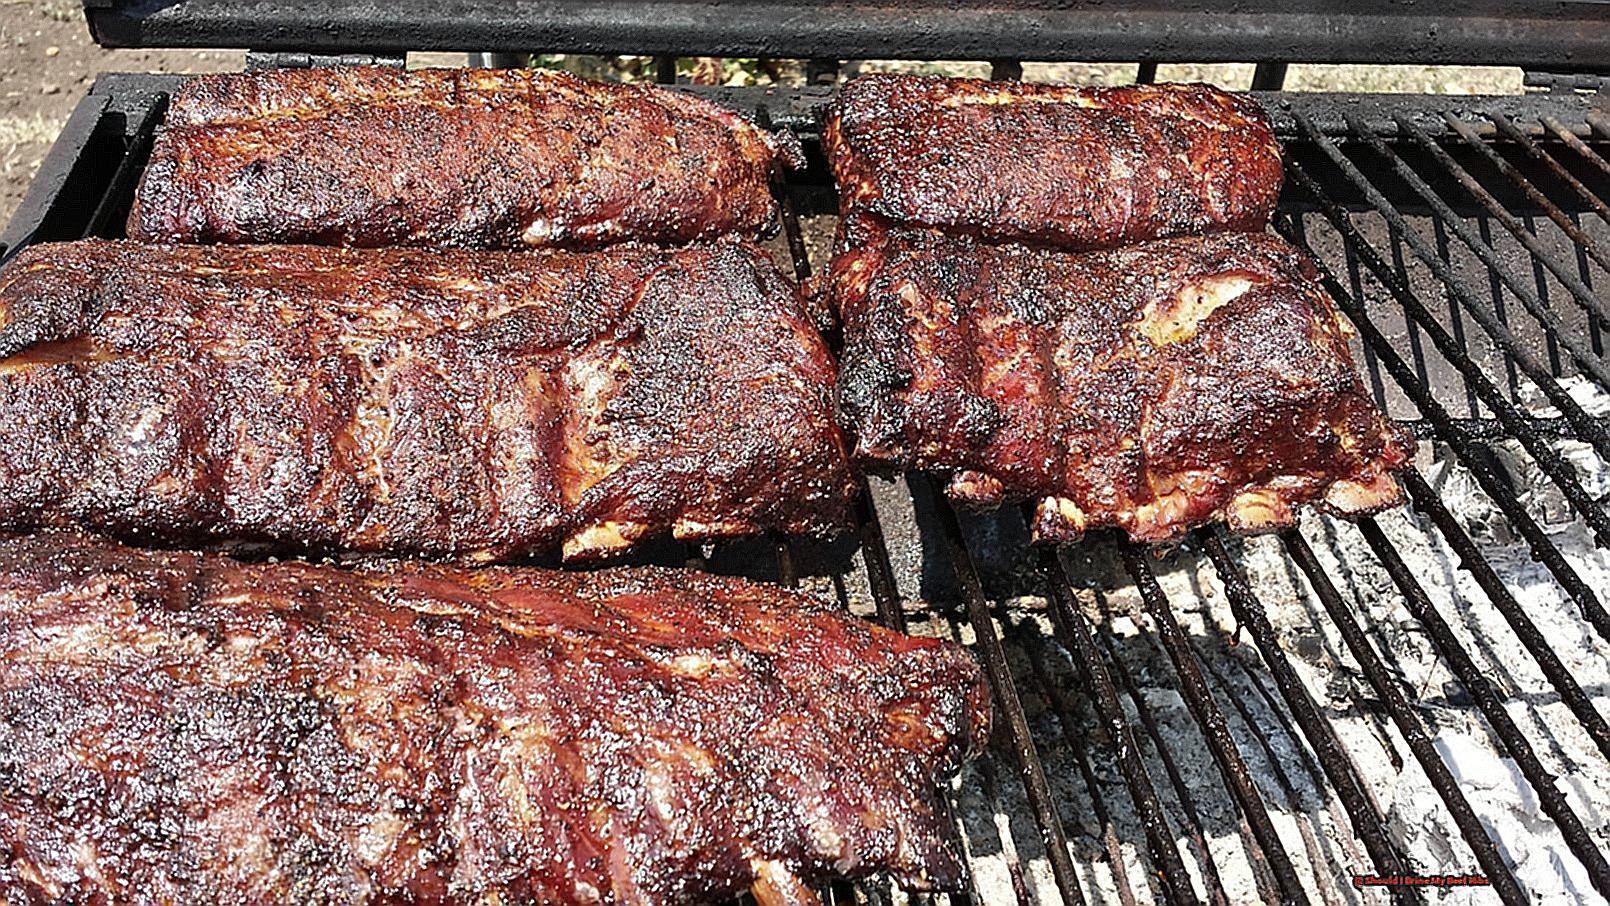
How to Smoke Brined Beef Ribs
Low and slow smoking is ideal for cooking brined beef ribs to fall-off-the-bone doneness. Follow these tips:
-
Temp: Maintain a steady 225-250°F smoker temperature.
-
Wood: Use milder wood like oak or pecan to complement the beef.
-
Time: Expect at least 5-6 hours for beef plate ribs, up to 8-10 hours for huge dino ribs.
-
Wrap: Wrap in butcher paper at 160°F internal temp to help power through the stall.
-
Finish temp: Cook until tender and bones wiggle easily, around 203°F internal.
-
Rest: Let rest 15-30 minutes before slicing for serving.
Feel free to experiment with different wood smoke, rubs and sauces to customize your ideal beef rib recipe.
How to Grill Brined Beef Ribs
You can also achieve wonderful charcoal-grilled flavor with brined beef ribs using indirect heat:
-
Temp: Maintain a steady 250-275°F grill temperature, higher for pellet grills.
-
Time: Grill approximately 3-4 hours until fork tender.
-
Flip and rotate: Flip ribs every 30 minutes for even cooking. Rotate to prevent hot spots.
-
Wrap: Wrap in foil with broth or juice if ribs look dried out to steam and tenderize.
-
Char: Unwrap and grill another 5-10 minutes to char the outside.
-
Rest: Allow to rest for 10-15 minutes before cutting ribs for serving.
Top Tips for Brined Beef Ribs
-
Chill brine before adding ribs so it stays cold during brining.
-
Weigh down ribs to keep fully submerged in the brine.
-
Rinse and thoroughly pat dry ribs after brining for proper smoke penetration.
-
Apply a bold barbecue rub right before smoking.
-
Use milder wood chunks to avoid overpowering smoke flavor.
-
Spray with apple juice or broth if looking dry during smoking.
-
Wrap at 160°F internal temperature to push through the stall.
-
Cook until 203°F internal temperature for fall-off-the-bone texture.
-
Let ribs fully rest before slicing or bones may slip right out.
Brined Beef Ribs Recipe
This straightforward recipe produces tender, juicy and beefy smoked ribs every time. The overnight brine is the key!
Brine
- 1 gallon water
- 3⁄4 cup kosher salt
- 1⁄2 cup brown sugar
- 8 smashed garlic cloves
- 2 tablespoons black peppercorns
- 3 bay leaves
5 lbs beef plate ribs
Rub
- 2 tablespoons kosher salt
- 2 tablespoons black pepper
- 1 tablespoon garlic powder
- 1 tablespoon paprika
- 1 teaspoon onion powder
- 1 teaspoon oregano
Instructions
-
Combine brine ingredients until salt and sugar dissolve. Add ribs and refrigerate 12-24 hours.
-
Remove ribs, rinse and pat very dry. Coat with rub.
-
Smoke at 225-250°F for 5-6 hours until tender, wrapping at 160°F internal temp.
-
Rest for 15 minutes before slicing into ribs for serving.
Get Perfectly Juicy, Beefy Ribs Every Time
Taking the extra time to brine your beef ribs is guaranteed to reward you with the most incredibly moist, beefy and flavorful ribs imaginable after smoking or grilling. While brining does require some advance planning, the wait is well worth it when you bite into tender, juicy brined beef ribs. The simple salt and sugar brine works wonders to season the meat while tenderizing and locking
Explore More Delicious Recipes with Brined Beef Short Ribs
You now know how to brine beef short ribs, so it’s time to test your newfound knowledge with a number of delicious recipes. Discover Smoky Ribs has strong flavors, while Savor Red Wine Ribs has more delicate ones. There is a dish for every taste. I suggest starting with the Taste Grilled Ribs because it is a fresh and herbaceous take on the traditional rib dish. There are also the Try Asian Glazed Ribs, which are great for people who like a mix of sweet and savory foods with an Asian twist. These recipes not only broaden your culinary repertoire but also showcase the versatility of brined beef short ribs. Share your tips and experiences with brining beef short ribs in the.
Brining Beef Short Ribs: A Delicious and Easy Process
When cooked right, beef short ribs are a hearty and flavorful cut of meat that can be a real hit with everyone. One method that can elevate the flavor and tenderness of beef short ribs is brining. Brining involves soaking the meat in a saltwater solution, which helps to infuse it with moisture and flavor. If you’re looking to take your beef short ribs to the next level, brining is definitely worth considering. Here’s how to do it:
- Beef short ribs
- Kosher salt
- Water
- You can add any herbs, spices, or aromatics you like, like garlic, peppercorns, bay leaves, or thyme.
- Start by preparing the brine. In a large container, mix together water and kosher salt. For every gallon of water, you should use one cup of kosher salt. You can also add herbs, spices, and aromatics to the brine to give the meat more flavor if you’d like.
- Put the beef short ribs in the container and make sure they are fully submerged in the brine once the brine is ready. To keep the ribs under water, you can put a heavy plate on top of them if you need to.
- Cover the container and put it in the fridge for the time that was given for brining. Different beef short ribs need different amounts of brining time, but as a general rule, they should be brined for at least 8–12 hours, or overnight for the best results.
- When the time for brining is up, take the beef short ribs out of the brine and rinse them well under cold water to get rid of any extra salt.
- Your beef short ribs are now ready to be cooked in any way you like, whether that’s BBQ, smoking, or braising. The brining process will have added flavor and moisture to the meat, making beef short ribs that are tender and delicious that are sure to impress.
Brining beef short ribs is a simple yet effective way to enhance their flavor and texture. By brining your beef short ribs before cooking them, you can be sure that they will be juicy, tender, and full of great flavor. The next time you cook beef short ribs, try brining them. You’ll be amazed at how much better they taste!
Ribs that have been brined will be a hit whether you’re having a backyard barbecue or making a special meal for your family. To take your beef short ribs to the next level, why not try this simple and tasty method?
Brining Beef Ribs
FAQ
Should you brine beef ribs?
Should you soak ribs in brine?
What is the best way to brine beef?
Should you soak beef ribs before cooking?