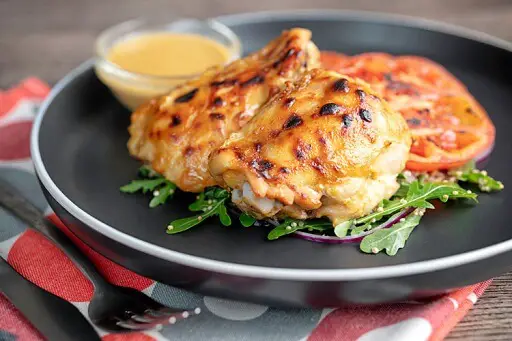
Chicken thighs are a delicious and versatile protein option that can be enjoyed in a variety of dishes. But if you have extra chicken thighs that you need to reheat, you should do it the right way to keep their taste, texture, and safety. This article will talk about how to properly reheat chicken thighs in the microwave, including why it’s important to do it right, how to prepare them, a step-by-step guide, tips for keeping their flavor and juiciness, and important safety precautions.
If you’re hungry after a long day and think, “Could I just throw those chicken thighs in the microwave?” I know the feeling! Microwaving chicken thighs is a quick way to get them ready when you’re in a hurry, but you have to do it right to avoid the horrible “rubber chicken syndrome” or, even worse, food poisoning.
I’m going to tell you everything you need to know about how to safely microwave chicken thighs in this article.
The Short Answer: Microwave Time for Chicken Thighs
For those who just want the quick facts here’s what you need to know
- Boneless chicken thighs: About 6-8 minutes for 3 thighs
- Bone-in chicken thighs: Approximately 8-10 minutes for 3 thighs
- Always check internal temperature: Must reach 165°F (74°C)
But wait! Don’t just set your timer and walk away. There’s more to it than that.
Is Microwaving Chicken Thighs Even a Good Idea?
To be honest, microwaving chicken thighs isn’t the best way to cook them. Food heats up unevenly in the microwave, and chicken thighs aren’t all the same size or shape. But sometimes we’re in a pinch, right?.
Microwaving has some pros:
- Super fast compared to conventional methods
- Doesn’t require preheating
- Minimal cleanup
And some definite cons:
- Can dry out the meat easily
- Often results in rubbery texture
- Doesn’t create that yummy crispy skin
- Uneven cooking can be a food safety risk
Step-by-Step Guide to Microwaving Chicken Thighs
If you’re committed to the microwave method, here’s how to get the best results:
What You’ll Need:
- 3 chicken thighs (bone-in or boneless)
- Microwave-safe dish with lid or microwave-safe plastic wrap
- Meat thermometer
- Salt, pepper, and your favorite seasonings
- Optional: 2-3 tablespoons of broth or water
Preparation Steps:
-
Prepare the chicken thighs
Remove the chicken from packaging and pat dry with paper towels. This helps reduce steam which can make the chicken rubbery. -
Season generously
Season both sides with salt, pepper, and any other seasonings you like. The microwave can diminish flavors, so don’t be shy! -
Arrange properly
Place the thighs in a microwave-safe dish in a single layer, with the thickest parts facing outward. If using bone-in thighs, position the bones toward the center. -
Add moisture
Sprinkle 2-3 tablespoons of chicken broth, water, or even a little lemon juice in the dish to help prevent drying. -
Cover the dish
Use a microwave-safe lid or cover with microwave-safe plastic wrap, leaving a small vent for steam to escape.
Cooking Process:
-
Start with a medium power setting
Using 70-80% power instead of full power helps cook the chicken more evenly. -
Initial cooking time
- For 3 boneless thighs: Start with 4 minutes
- For 3 bone-in thighs: Start with 5 minutes
-
Flip and rotate
Stop the microwave, carefully flip each thigh, and rotate the dish. This helps with even cooking. -
Continue cooking
- For boneless: Cook for another 2-4 minutes
- For bone-in: Cook for another 3-5 minutes
-
Check temperature
Use a meat thermometer to check that the internal temperature has reached 165°F (74°C) in the thickest part. This is SUPER important! Don’t skip this step unless you enjoy trips to the emergency room. -
Rest the meat
Let the chicken rest for 2-3 minutes before serving. This allows the juices to redistribute throughout the meat.
Troubleshooting Common Problems
What if my chicken is still raw in some areas?
If you find some parts are still under 165°F, continue microwaving in 1-minute increments, checking after each interval. Focus the thermometer on the thickest parts.
My chicken turned out dry and rubbery!
Next time:
- Don’t overcook (use a thermometer!)
- Add more liquid to the dish
- Use a lower power setting
- Consider using the microwave just to partially cook, then finish in a pan
The outside is cooked but the inside is still raw
This is a common microwave issue. Try:
- Cutting the thighs into smaller, more uniform pieces
- Using a lower power setting for longer time
- Letting the chicken come to room temperature before microwaving (but don’t leave it out for more than 20 minutes for safety)
Alternative Quick-Cooking Methods for Chicken Thighs
If you’ve got a few extra minutes, consider these alternatives that produce way better results:
- Pan-searing: Takes about 12-15 minutes total and gives you crispy skin
- Air fryer: 18-20 minutes at 380°F for bone-in (less for boneless)
- Instant Pot: About 10 minutes on high pressure plus release time
- Broiler: 6-8 minutes per side for a quick char
Food Safety Reminders
When your dealing with chicken, food safety ain’t optional:
- Always verify the internal temperature reaches 165°F
- Don’t leave raw chicken at room temperature for more than 20 minutes
- Clean all surfaces that touched raw chicken with hot, soapy water
- Don’t reuse plates or utensils that touched raw chicken without washing
My Personal Experience
I’ve tried microwaving chicken thighs a few times when I was in a major hurry. Honestly? It works in a pinch, but I wouldn’t recommend it as your go-to method. The texture just ain’t the same as properly cooked chicken.
One time I was running super late for a potluck and tried to microwave some thighs. They came out… edible. But my friends definitely noticed the difference between those and the ones I usually bring that are oven-roasted. Let’s just say I haven’t lived that down yet!
Bottom Line: Is It Worth It?
Microwaving chicken thighs can save you time in a pinch, but at a cost to flavor and texture. If you absolutely must use the microwave:
- Keep the pieces similar in size
- Use medium power
- Add moisture
- Check temperature in multiple spots
- Be prepared for less-than-ideal results
In my humble opinion, if you can spare just 10-15 minutes more, alternative methods like pan-searing will give you dramatically better results. Your taste buds (and dinner guests) will thank you!
But hey, we all have those days where time is just not on our side. On those days, at least now you know how to microwave chicken thighs without poisoning yourself or chewing on rubber!
Have you tried microwaving chicken thighs before? What was your experience like? I’d love to hear your microwave cooking adventures in the comments below!
Cooling and Storing Chicken Thighs
After cooking and enjoying your chicken thighs, its crucial to properly cool and store any leftovers. Simply leaving them out on the countertop can expose them to harmful bacteria and compromise their quality.
Allow the chicken thighs to cool completely at room temperature for no more than two hours. This time frame is important because it falls within the safe zone, where bacteria growth is minimal.
Once cooled, transfer the chicken thighs to an airtight container or resealable plastic bag. This step is vital to prevent any cross-contamination with other foods in your refrigerator. Make sure the container is tightly sealed to maintain freshness.
Refrigerate the chicken thighs immediately after storing them. The cold temperature of the refrigerator slows down bacterial growth and helps preserve the quality of the meat. Properly cooled and stored chicken thighs can be safely reheated within 3-4 days.
The Role of Moisture in Reheating
Adding moisture to your reheated chicken thighs can help prevent dryness. To achieve this, consider drizzling a small amount of chicken broth or sauce over the chicken before reheating. This added moisture can enhance the flavor and juiciness of the chicken thighs.
Putting a damp paper towel over the chicken thighs before putting a microwave-safe cover on top of them is another way to add moisture. When the food is heated again, the damp paper towel will release steam, making a moist space that helps the chicken thighs stay tender and juicy.
Its important to note that the type of sauce or broth you choose to use can greatly impact the flavor of the reheated chicken thighs. Consider using a sauce that complements the flavors of the original dish or experiment with different marinades to add a new twist to your reheated chicken thighs.
Also, you can reheat the chicken thighs in the microwave with a small amount of the gravy or pan drippings if you have any left over from cooking the chicken thighs the first time. This not only adds moisture but also infuses the chicken with the rich flavors of the original cooking liquid.
By following these tips and techniques, you can ensure that your reheated chicken thighs remain flavorful and juicy, making them a delicious and convenient option for your next meal.
How to Bake Chicken Thighs: Temperature, Baking Time & Recipe | How to Cook Chicken by MOMables
FAQ
How long does it take to cook raw chicken thighs in the microwave?
All You Need to Know About Microwaving Chicken Thighs It typically takes around 3-5 minutes to cook bone-in chicken thighs in the microwave. To tell when the chicken is cooked through, look for white (not pink) meat that is cooked through. The chicken should be juicy with no pink areas.
How long to microwave cooked chicken thighs?
Cover with a damp paper towel or loosely cover your microwave-safe container with a lid. Set the oven to medium-high and cook the chicken for three minutes. After that, check the chicken to make sure it’s piping hot. If necessary, continue to microwave in 30 second bursts, until ready.
How long does it take to cook a chicken leg in a microwave?
It typically takes around 3-5 minutes to cook chicken drumsticks in the microwave. To tell when this part of the chicken is cooked through, look for white (not pink) meat. The chicken should be juicy with no pink areas.