If you don’t have a grill or it’s too cold or rainy outside, these tips will help you cook recipes like kabobs in the oven.
One thing that’s important to me when I’m making our Prep Dish meal plans is that they don’t need any special cooking tools. I want our meal plans to be accessible to everyone – regardless of how well their kitchens are equipped or how much cooking experience they have.
That said, I sure do love the grill. You can’t beat the flavor! But I know some of you don’t have a grill or want to make burgers when it’s too cold or wet to grill. This post is for you. Im sharing techniques for cooking kabobs in the oven, how to make burgers without a grill, and many more tips on how convert recipes meant for the grill to indoor cooking.
Pro Tip: I love adding smoked paprika when Im converting a recipe from the grill to indoor cooking. This is a great way to get some of that smokey flavor!
Don’t have a grill but want juicy, flavorful chicken kabobs? Don’t worry! You can make delicious chicken kabobs without going outside. Don’t worry if it’s too cold or raining outside; I have several great ways to cook inside that will still get the job done.
As someone who loves entertaining year-round, I’ve perfected these indoor techniques through years of trial and error. Today I’m sharing my favorite methods for making chicken kabobs that are just as delicious as their grilled counterparts.
Why Cook Chicken Kabobs Indoors?
Before diving into the methods, let’s address why you might want to cook kabobs inside:
- No grill access or ownership
- Bad weather (rain, snow, or extreme cold)
- Apartment living with restrictions on outdoor grilling
- Year-round kabob cravings regardless of season
- More consistent cooking temperatures (especially for beginners)
Essential Preparation Tips (For All Methods)
Regardless of which cooking method you choose, these preparation steps remain the same
Chicken Preparation
- Choose the right cut: Boneless, skinless chicken breasts or thighs work best. Thighs tend to stay juicier!
- Cut size matters: Cut into uniform 1-inch cubes for even cooking
- Marinate well: At least 30 minutes, ideally 2-4 hours (overnight for maximum flavor)
Skewer Tips
- For wooden skewers: Soak in water for at least 30 minutes to prevent burning
- For metal skewers: No soaking needed, but remember they conduct heat (careful handling!)
- Thread technique: Leave small spaces between pieces for even cooking
Vegetable Suggestions
Mix and match these vegetables for colorful, flavorful kabobs:
- Bell peppers (any color)
- Red onions
- Zucchini chunks
- Cherry tomatoes
- Mushrooms
- Pineapple chunks (for a sweet touch)
Method 1: Baking Chicken Kabobs in the Oven
Baking is perhaps the most accessible method and provides consistent, reliable results. It’s my go-to when cooking for a larger group.
Equipment Needed:
- Baking sheet
- Parchment paper or aluminum foil
- Cooking spray
- Skewers (wooden or metal)
Baking Instructions:
- Preheat your oven to 450°F (232°C)
- Line a baking sheet with parchment paper or foil and lightly spray with cooking spray
- Arrange kabobs on the baking sheet, ensuring they don’t touch
- Bake for 20-25 minutes, turning once halfway through
- Check for doneness – chicken should reach 165°F (74°C) internal temperature
Pro Tips for Oven Baking:
- For extra browning, switch to broil mode for the final 2-3 minutes (watch carefully!)
- Elevate kabobs on a wire rack over the baking sheet for more air circulation
- If using wooden skewers, cover exposed ends with foil to prevent burning
Method 2: Broiling Chicken Kabobs
Broiling gives you that wonderful charred flavor that comes closest to grilling. It’s quick but requires more attention.
Equipment Needed:
- Broiler pan or baking sheet with wire rack
- Aluminum foil (for easier cleanup)
- Skewers (preferably metal)
Broiling Instructions:
- Position oven rack about 4-6 inches from broiler element
- Preheat broiler on high for 5 minutes
- Line broiler pan with foil and place kabobs on top
- Broil for 8-10 minutes, turning every 2-3 minutes for even browning
- Watch carefully to prevent burning!
Pro Tips for Broiling:
- Keep the oven door slightly ajar to monitor browning
- Use tongs to turn kabobs, never your hands
- Metal skewers work best for this method as they conduct heat
- Slightly larger vegetable chunks help prevent overcooking
Method 3: Stovetop Grill Pan Method
A grill pan gives you those nice grill marks and a hint of the real grilled taste.
Equipment Needed:
- Cast iron grill pan or ridged grill pan
- Oil for coating
- Tongs
- Skewers
Grill Pan Instructions:
- Heat grill pan over medium-high heat until very hot (about 5-7 minutes)
- Lightly brush with oil to prevent sticking
- Place kabobs on pan, being careful not to overcrowd
- Cook for 4-5 minutes per side, rotating to get grill marks on all sides
- Total cooking time: approximately 15-20 minutes
Pro Tips for Grill Pan Method:
- Ensure proper ventilation – this method can produce smoke
- Cook in batches rather than overcrowding the pan
- A splatter guard helps contain any mess
- Let the pan reheat between batches for consistent grill marks
Method 4: Air Fryer Magic
The air fryer is now my secret weapon for quick kabobs during the week. They cook faster and develop a wonderful crispy exterior.
Equipment Needed:
- Air fryer
- Air fryer-safe skewers (or cut standard skewers to fit)
Air Fryer Instructions:
- Preheat air fryer to 375°F (190°C)
- Cut ingredients into slightly smaller pieces than usual
- Arrange kabobs in air fryer basket without overcrowding
- Cook for 12-15 minutes, turning halfway through
- Work in batches if necessary
Pro Tips for Air Fryer Method:
- You may need to cut skewers to fit your air fryer model
- Slightly smaller chicken pieces (about ¾-inch) work better in air fryers
- A light spray of oil helps with browning
- This method works best with shorter kabobs or fewer items per skewer
Best Marinades for Indoor Chicken Kabobs
Since you’re missing that smoky grill flavor, marinades become even more important for indoor kabobs. Here are three of my favorites:
1. Mediterranean Marinade
- ¼ cup olive oil
- 3 tablespoons lemon juice
- 4 garlic cloves, minced
- 2 teaspoons dried oregano
- 1 teaspoon smoked paprika (critical for that “grilled” flavor!)
- 1 teaspoon salt
- ½ teaspoon black pepper
2. Honey-Soy Marinade
- 3 tablespoons soy sauce
- 2 tablespoons honey
- 1 tablespoon rice vinegar
- 2 teaspoons sesame oil
- 2 garlic cloves, minced
- 1 teaspoon grated ginger
- ½ teaspoon red pepper flakes
3. Yogurt-Based Marinade
- ½ cup plain Greek yogurt
- 2 tablespoons olive oil
- 3 garlic cloves, minced
- 1 tablespoon lemon juice
- 1 teaspoon ground cumin
- 1 teaspoon smoked paprika
- ½ teaspoon turmeric
- Salt and pepper to taste
Troubleshooting Common Indoor Kabob Problems
Problem: Dry Chicken
Solution:
- Don’t overcook! Use a meat thermometer
- Marinate longer (at least 2 hours)
- Consider using chicken thighs instead of breasts
- Slightly larger chicken pieces retain moisture better
Problem: Vegetables Cook Unevenly
Solution:
- Group similar vegetables together on separate skewers
- Par-cook harder vegetables like potatoes before skewering
- Cut denser vegetables slightly smaller than softer ones
Problem: Skewers Burning
Solution:
- Soak wooden skewers longer (1-2 hours ideally)
- Cover exposed ends with foil
- Switch to metal skewers
- Consider removing kabobs from skewers for cooking (especially in air fryer)
Serving Suggestions
Complete your indoor kabob meal with these perfect sides:
- Fluffy rice pilaf or couscous
- Warm pita bread
- Tzatziki sauce or garlic yogurt dip
- Fresh Mediterranean salad
- Hummus and olives
- Lemon wedges for squeezing
FAQ: Everything You Need to Know About Indoor Chicken Kabobs
Q: Can I use frozen chicken for kabobs? A: For even cooking and better marinade absorption, let the chicken thaw all the way.
Q: How long should I marinate the chicken?
A: At least 30 minutes, but 2-4 hours is ideal. You can marinate overnight in the refrigerator for maximum flavor.
Q: Can I make kabobs ahead of time?
A: Yes! You can prep and marinate kabobs up to 24 hours in advance. Just keep refrigerated until ready to cook.
Q: What’s the best way to know when chicken kabobs are done?
A: Use a meat thermometer – chicken should reach 165°F (74°C) internally. The meat should be opaque with no pink showing.
Q: Can I cook different meats and vegetables together?
A: It’s better to separate them for optimal cooking times. Vegetables and chicken often cook at different rates.
Final Thoughts
See? No grill, no problem! With these methods, you can enjoy delicious chicken kabobs any time of year, regardless of weather or equipment limitations. My personal favorite is the broiling method when I want that charred flavor, but the air fryer is my go-to for busy weeknights.
Remember, the key to great indoor kabobs is proper marination, even cutting, and careful attention to cooking times. Add a bit of smoked paprika to your marinade for that hint of outdoor grilled flavor, and no one will miss the grill!

Cooking Excellent Steak Without a Grill
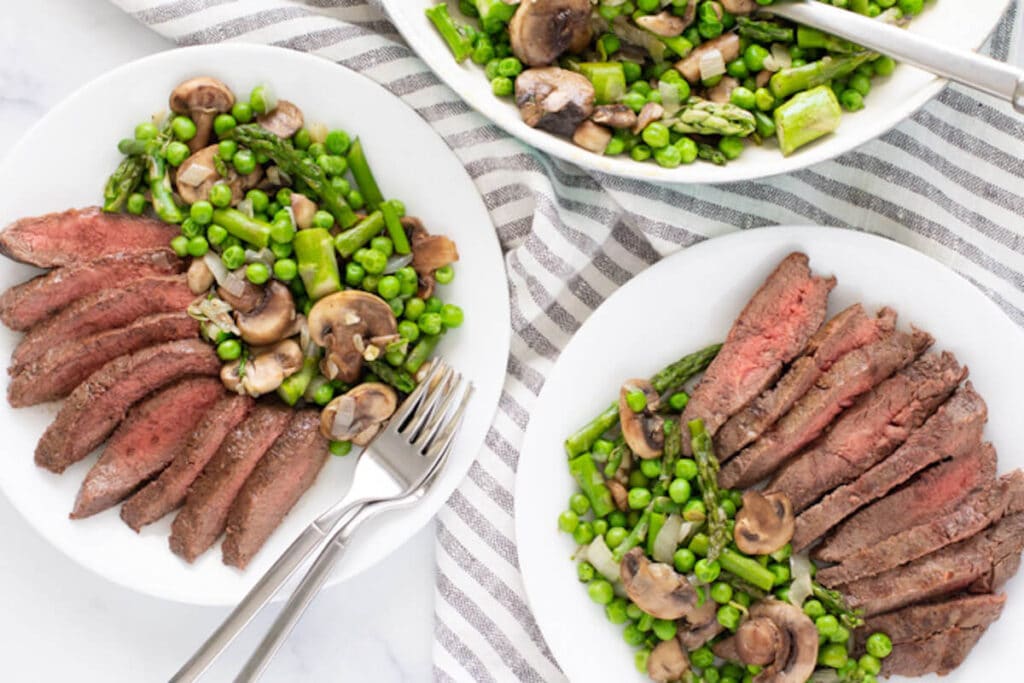
The key to good steak cooked off the grill is searing. This adds a ton of flavor and helps to seal in the juices so you dont wind up with dry steak.
Preheat your oven to 425F and season your steaks with salt and pepper, or whatever seasoning your recipe calls for. Heat a large, oven-proof saute pan over medium-high heat. Add steak and sear for about 4 minutes per side, until it reaches a deep brown color. Transfer the steak to the oven and cook for another 4-8 minutes, until desired doneness. Remove the steak and allow it to rest for about 10 minutes.
Thats all there is to it!
Cooking Kabobs in the Oven
If youd like to make kabobs without a grill, cooking kabobs in the oven is an excellent choice.
Simply preheat your oven to 450F. If youre using wooden skewers, make sure to soak them in water for at least 30 minutes, just as you would for outdoor grilling. Then skewer your meat and veggies.
For steak kabobs, cook for 8-10 minutes (for medium rare) and check for desired doneness. Chicken kabobs will take closer to 20-30 minutes. The exact cooking time will depend on the size of your chicken pieces, so please check with a meat thermometer to ensure the inside has reached 165F.