I’ve got a crazy, easy recipe for you today! This stupid simple rotisserie chicken recipe is so easy to make that I just like to call it “stupid simple. ” Know what I mean? So simple that it’s almost stupid to talk about it. But talk about it, I shall!!.
Kitchen gadgets excite me. Kitchen supply stores are my favorite places on the planet. It’s so much fun to get new kitchen toys, but I’m on a budget, so I can’t buy kitchen tools for every task I want to do. I was so excited to find out that the toaster oven I bought last year (affiliate link) has a rotisserie function!! I couldn’t believe it! (And no, I didn’t read the manual.) ).
And it just so happened I had defrosted a whole chicken! So the timing of this discovery could not have been more perfect. I think I may have actually skipped from the toaster oven to the refrigerator. But we’ll keep that between you and me, mmmkay? Anyhoooooo….
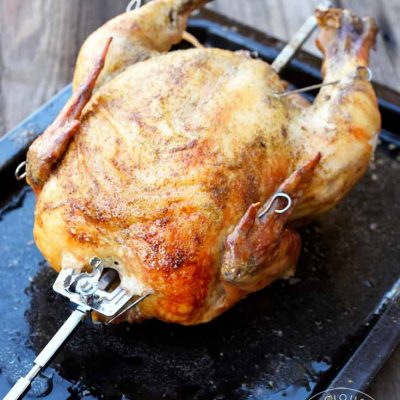
Since this was really my first time cooking a rotisserie chicken myself, I had to figure out a few things. Like how to get the chicken on the skewer and how to secure it there so it would rotate. I also had to figure out how to pin the chicken so that the legs didn’t flop all over the place while the chicken rotated in the rotisserie. It was a little adventure on a bright, sunny Saturday morning. But I was up for it!.
I kept the recipe stupid simple simply because it was my first time. In fact, I kept it so simple that a recipe really isn’t needed. But I’m going to give you one anyway because that’s what I do here. So please don’t expect a mile-long list of ingredients because you won’t get one. In fact, I did this with two ingredients. Two.
Ever stood in your kitchen wondering how to recreate that juicy perfectly seasoned rotisserie chicken from the store? I’ve been there! After years of trial and error (and some seriously dried-out birds), I’ve finally mastered the home-cooked rotisserie chicken. Today I’m sharing everything you need to know about cooking times, temperatures, and techniques to achieve rotisserie perfection in your home oven.
The Perfect Cooking Time: How Long Does It Really Take?
The easy answer is to cook your rotisserie chicken at 350°F (175°C) for 13 to 15 minutes per pound. With this timing, the meat will be just the right amount of juicy, and the skin will be just the right amount of crispy.
For example:
- A 3-pound chicken will need about 39-45 minutes
- A 4-pound chicken needs roughly 52-60 minutes
- A 5-pound chicken requires approximately 65-75 minutes
- A 6-pound chicken takes around 78-90 minutes
But wait! Don’t just set your timer and walk away. The weight is just one factor that affects cooking time. Let’s dig deeper into what makes the perfect oven-roasted rotisserie chicken.
Key Factors That Affect Your Chicken’s Cooking Time
1. Chicken Weight Matters Most
As I mentioned, the weight of your chicken is the primary determiner of cooking time. Smaller chickens cook faster than larger ones, obviously! Always have your chicken’s weight handy before you start cooking.
2. Oven Temperature: Finding the Sweet Spot
You might want to turn up the heat to cook the food faster, but don’t! 350°F (175°C) is the best temperature for rotisserie-style chicken. It allows the meat to cook evenly without drying out.
Some cooks (including me sometimes!) prefer starting with a blast of high heat – like 450°F (232°C) for the first 15-20 minutes – to get that skin extra crispy, then reducing to 350°F for the remainder of cooking time.
3. Is Your Oven Telling the Truth?
I found out the hard way that ovens can lie about their temperature. A difference of only 25 degrees can make a big difference in how long your food takes to cook. Get an oven thermometer to make sure the temperature in your oven is correct. Your chicken will thank you.
4. Stuffed or Not?
You’ll need to add more cooking time if you’ve put lemons, herbs, or something else inside the chicken. The stuffing also needs to reach 165°F (74°C). I cook the stuffing separately so that the chicken doesn’t get too done while I wait for the stuffing to reach a safe temperature.
Essential Tools You’ll Need
Before you start, make sure you have:
- A reliable meat thermometer (absolute must-have!)
- A roasting pan with rack to elevate the chicken for even heat circulation
- An oven thermometer to confirm your oven’s accuracy
- Kitchen twine (optional but helpful for tying legs together)
Step-by-Step: How to Make Rotisserie-Style Chicken in Your Oven
1. Prep Your Bird
Remove giblets and neck from the cavity and pat the chicken completely dry with paper towels. This step is crucial for achieving crispy skin!
2. Season Generously
This is where the magic happens! Season your chicken inside and out with:
- Salt and pepper
- Garlic powder
- Paprika
- Onion powder
- Any other herbs and spices you love
Try placing lemon wedges and fresh herb sprigs (rosemary works beautifully) inside the cavity for extra flavor. I also like to mix softened butter with lemon zest and chopped rosemary to smear under the skin and all over the chicken.
3. Preheat and Position
Preheat your oven to 350°F and place your roasting rack inside the roasting pan.
4. Roast to Perfection
Place the chicken on the rack, breast side up. Roast for the calculated time (remember: 13-15 minutes per pound), or until the internal temperature in the thickest part of the thigh reaches 165°F (74°C).
5. Rest Before Carving
This step is non-negotiable! Let your chicken rest for at least 15 minutes before carving. This allows the juices to redistribute throughout the meat, resulting in a more tender and flavorful bird.
FAQ: Everything Else You Need to Know
How do I make sure the chicken skin gets crispy?
Dry skin = crispy skin. Pat the chicken dry before seasoning and consider leaving it uncovered in the refrigerator for a few hours before cooking. Using a rack allows hot air to circulate underneath, promoting even crisping. I sometimes brush the chicken with butter during the last 30 minutes of cooking for extra crispiness.
What if my chicken is browning too quickly?
If your chicken is browning faster than it’s cooking through, loosely tent it with aluminum foil. This protects the skin from burning while allowing the chicken to continue cooking.
Can I use a convection oven?
Absolutely! Convection ovens are actually ideal for rotisserie-style chicken. Just reduce the temperature by 25°F and check for doneness a bit earlier, as convection ovens cook faster than conventional ones.
How do I prevent my chicken from drying out?
The #1 culprit of dry chicken is overcooking. Use that meat thermometer! Also, roasting breast-side up helps retain moisture in the breast meat, which is more prone to drying out. And don’t skip the resting period after cooking.
What’s the ideal internal temperature for fully cooked chicken?
The USDA recommends 165°F (74°C) measured in the thickest part of the thigh, without touching the bone.
Can I brine my chicken before roasting?
Yes! Brining is a fantastic way to ensure a moist, flavorful bird. A simple brine of salt, sugar, and water works wonders. Soak your chicken for several hours or overnight, then rinse thoroughly and pat dry before seasoning.
Is it safe to eat the chicken if it’s still slightly pink near the bone?
As long as the internal temperature has reached 165°F, it’s safe to eat, even with a slight pinkish tinge near the bone. This is due to the myoglobin in the muscle tissue and doesn’t necessarily mean it’s undercooked. When in doubt, cook it a bit longer.
Storing and Using Leftover Rotisserie Chicken
Your beautifully roasted chicken can be stored in the refrigerator for 3-4 days. If you want to extend its life, you can freeze it for 2-3 months. Just remove the meat from the bones and store in airtight containers or freezer bags.
Leftover rotisserie chicken is incredibly versatile! Use it in:
- Chicken salad sandwiches
- Tacos or quesadillas
- Soups and stews
- Casseroles
- On top of salads
- In pasta dishes
The Perfect Side Dishes for Your Rotisserie Chicken
A delicious rotisserie chicken deserves equally delicious sides! Here are some classic pairings:
- Roasted vegetables (potatoes, carrots, broccoli)
- Mashed potatoes
- Buttery crash hot potatoes
- Fresh garden salad
- Coleslaw
- Cornbread stuffing
Final Thoughts
Mastering the art of rotisserie chicken at home might seem intimidating at first, but with the right timing and techniques, you’ll be amazed at what you can create in your own oven! The key is paying attention to cooking time based on weight, maintaining the right temperature, and using a meat thermometer to ensure perfect doneness.

More Healthy Chicken Recipes