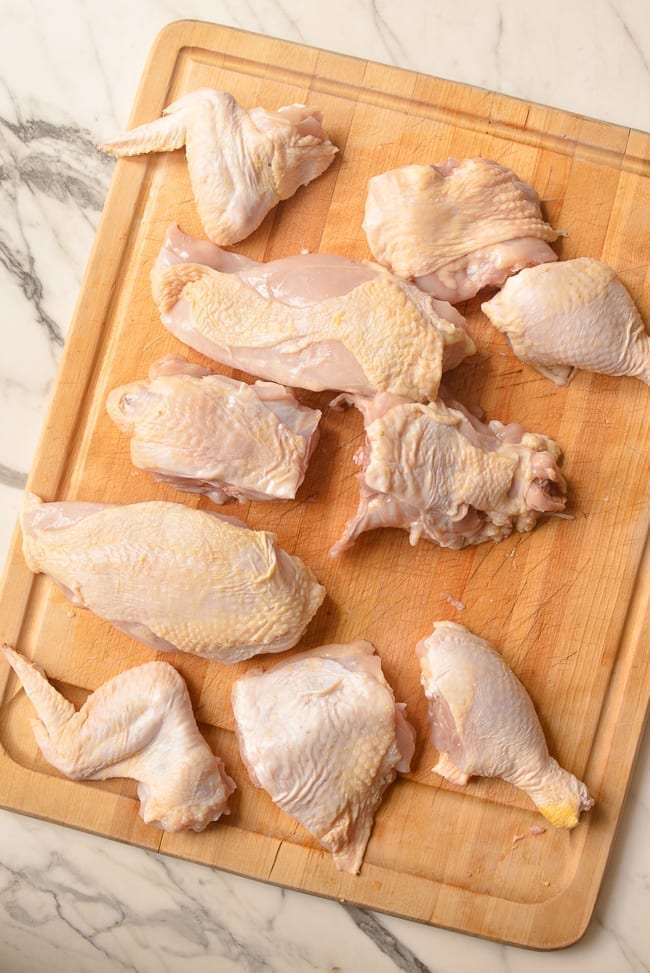
In this post, we’ll show you how to break down a chicken into wings, leg quarters (or thighs and drumsticks), and chicken breast. We’ll also show you how to de-bone chicken breasts to create boneless skinless chicken breasts and tenderloins.
In addition to step-by-step photos and instructions, we also have a video showing the entire process!
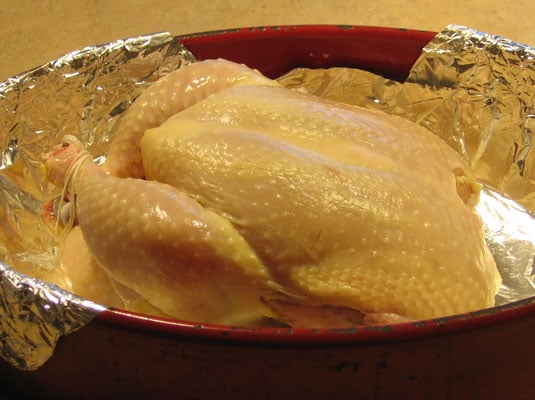
Chicken is a versatile protein enjoyed around the world. When roasting or grilling whole chickens, one important question is what it means for the breast side to be up. Knowing the anatomy of the chicken and how to position it correctly will ensure even cooking, great presentation, and great flavor.
Chicken Breast Anatomy
The pectoralis major muscles, which are used for flight, are in the chicken breast. Through selective breeding, the breast has grown bigger. This fan-shaped group of muscles makes up the biggest part of the meat.
The breast has two distinct sides:
-
Smooth, shiny skin side
-
Rough porous side with connective tissue
These are referred to as the presentation side and cooking side, respectively.
Why Cook Breast Side Up?
Cooking the chicken breast side up offers several advantages:
Even Cooking
The breast meat tends to cook faster than dark meat. Placing it upwards exposes it directly to the heat source for consistent cooking.
Optimized Crisping
Putting the cooking side up lets the fat drain away and the skin get a uniform crisp. The porous connective tissue promotes browning reactions.
Moisture Retention
Breast side up enables seasonings and pan juices to collect in the breast area rather than run off, keeping the lean meat moist.
Visual Appeal
The plump breast is the focal point. Facing it upwards displays this appetizing centerpiece.
Ease of Carving
The anatomical landmarks are clearly visible for proper carving. The breast slices cleanly away from the bone.
Basting, Brining and Beyond
Special techniques like brining, basting, spatchcocking, and stuffing complement breast side up cooking:
-
Brining infuses flavor and moisture
-
Basting prevents the lean breast meat from drying out
-
Spatchcocking exposes the interior fully while keeping skin up
-
Stuffing adds flavor beneath the skin
Step-by-Step Breast Side Up Cooking
Follow these tips for ideal results:
-
Prep the bird – Remove giblets, rinse, pat dry. Truss legs and wings.
-
Season well – Rub salt, pepper, herbs over and under the skin.
-
Preheat properly – Allow oven to fully preheat before roasting.
-
Use a rack – Elevates the bird for air circulation.
-
Roast breast up – Consistent browning, even cooking, great presentation.
-
Baste periodically – Spoon juices over breast to prevent drying.
-
Let rest – Carryover cooking continues after removing from oven.
Serving Suggestions
A beautifully roasted chicken served breast side up makes a dramatic table centerpiece. Garnish with fresh herbs or edible flowers. Accompany with suitable sides like roasted potatoes, bread for dipping juices, and a fresh salad or vegetable medley.
Provide sharp knives and poultry shears for easy carving. Begin by removing the legs and thighs, then slicing the breast away from the bones.
For casual meals, simply cut or tear into portions. Offer sauces like chimichurri or mole on the side.
Breast Side Up for Optimal Outcomes
Cooking poultry breast side up is the preferred method for whole chickens and turkeys. With the breast meat facing upwards, the bird cooks evenly, browns perfectly, locks in moisture, and looks appetizing. While cultural or regional variations exist in preparation techniques, breast side up remains the standard for achieving the ideal texture, flavor, and presentation. Experiment with special seasonings or sauces, but respect the basic principles. It’s a simple way to get delicious, juicy results every time.
Why Learn How to Break Down a Chicken?
A whole chicken is great for roasting, but you can also cut it up and use the pieces for other things. Wings, thighs, and drumsticks are great for braised and stewed dishes, as well as for frying and roasting. Then, you can use the remaining chicken breasts for stir-fries, and the chicken back/carcass for stock!.
Also, you might be wondering why you would bother cutting up a whole chicken when you can buy all of these parts at the store.
Often, whole chickens are cheaper per pound than individual pieces. If you like to buy organic, you know that whole organic chickens are expensive, but organic chicken parts can be even more costly. Sometimes organic chicken leg quarters, thighs, or wings aren’t even available!.
Buying a whole chicken is also more flexible for the home cook. You break down a whole chicken, use what you need, and freeze the rest.
When you buy and cook a whole chicken, save the bones, backs, and other parts to freeze. Soon, you’ll have enough parts for the meal you want to make. See the end of this post for ideas on how to use your whole chicken—whether you like it bone-in or boneless—including recipes!.
It takes some planning, but this is a skill worth learning, especially if you’re an avid cook, so let’s get started!
How to Break Down a Whole Chicken: Instructions
Before you start, make sure you have a sharp chef’s knife or Chinese cleaver.
Rinse the chicken inside and out, and clean out the cavity (there may still be some organs remaining, depending on how the chicken was processed).
Pat the chicken dry with a paper towel so the chicken is easier to grip. Be sure to thoroughly disinfect all your kitchen surfaces afterward.
Split whole chicken in half #butcher #chicken #splitchicken #quick #easy #sharpknives #butchering
FAQ
What does “chicken breast side up” mean?
Chicken roasted breast side up. Simply Recipes / Elise Bauer. I roast my chicken breast-side up, as the vast majority of recipes suggest. This gives the skin maximum exposure to heat, rendering a golden, crispy bird.
What side goes up when cooking a whole chicken?
When roasting a chicken, it’s generally best to start with the breast side facing up. This allows the breast meat to cook evenly and stay juicy. Here are some tips for roasting a chicken:After roasting, let the chicken rest for about 10-15 minutes before carving to retain its juices. Enjoy your meal!.