In Absolute Best Tests, Ella Quittner breaks the rules in her own kitchen to find the truth. Shes boiled dozens of eggs, mashed a concerning number of potatoes, and seared more Porterhouse steaks than she cares to recall. Today, she tackles chicken cutlets.
Most chicken cutlets one encounters in the wild are pretty good. For the most part, they have a layer of crunch that is well-seasoned enough to hide any dryness inside. Usually doused in a sauce, or pressed between two halves of an Italian roll, or blanketed by melted American cheese, breaded chicken is the form of cooked poultry Most Likely To Be Fine, whatever the circumstance.
I can count on one hand the number of cutlets I would betray a close family member for, cutlets I fall asleep thinking about, cutlets I would board planes to pursue. This new episode of Absolute Best Tests is a tribute to that—to finding the recipe for a cutlet that is so good it’s not even close to being amazing. ” It’s an exercise in small tweaks, in hot pursuit of perfection. Ready those forks:
For each test, I used boneless, skinless chicken breasts, sliced and pounded into cutlets. I seasoned with Diamond Crystal kosher salt and freshly ground black pepper.
I let each piece of breaded chicken rest at room temperature for 15 to 30 minutes before frying for two reasons. Primarily, it helps the breading adhere, probably because the crumbs have more time to absorb the egg from the dredging process. And it also allows the chicken to come to a less frigid temperature, which means it won’t have as crazy an effect on the oil when you drop it in.
Cast-Iron Skillet: Fabulous for ensuring maximum crunch on a breaded cutlet (or on a breaded anything, really).
Breaded chicken is a delicious and versatile ingredient that can be used in everything from chicken parmesan to chicken fingers. However, the biggest frustration when working with breaded chicken is getting the coating to adhere properly without falling off. If the breading separates from the chicken, you end up with soggy, bare spots that ruin the texture.
There are some easy tricks and ways to prepare the chicken that will make the breading stick to it like glue every time, making it perfectly crispy every time. The best ways for me to get breadcrumbs to stick to chicken are in this article.
Start with Very Cold Chicken
The first step is to make sure your chicken is as cold as possible before breading I like to prepare my chicken the night before and let it chill uncovered in the fridge which helps dry out the exterior a bit Starting with cold chicken helps the breading adhere better since there is less moisture on the surface for it to slide off of.
Before you coat fresh chicken in breadcrumbs, make sure to freeze the raw chicken pieces for 15 to 30 minutes until they are very cold and firm. The colder the chicken, the better the breading will cling.
Pat the Chicken Dry Thoroughly
It’s likely that there is still some surface moisture on chicken that has been chilled. This moisture is the enemy of crisp breading.
So before coating be sure to pat the chicken pieces very thoroughly with paper towels to soak up as much residual moisture as possible. Really press and blot the chicken to get it as dry as you can.
Getting rid of extra water on the surface helps the breading stick to the chicken skin better.
Use Buttermilk or Eggs as a Sticky Base
Usually a standard breading method involves dredging chicken first in flour, then egg wash, then finally the breadcrumb coating
However, instead of plain eggs which can sometimes slide off, I like to use a soak in buttermilk or beaten eggs as the sticky base layer.
The acids in the buttermilk help break down the proteins on the surface of the chicken skin, allowing the breading to grip on better. Beaten eggs also contain proteins that help the breading adhere more tenaciously.
Let the chicken pieces soak in the buttermilk or beaten egg mixture for at least 5 minutes on each side to really saturate the surface before transferring to the breadcrumb coating.
Press the Breading into the Chicken
Rather than just letting the breading loosely coat the chicken, press and pack it on firmly so it really sticks.
I like to place the breasted chicken pieces one at a time into a gallon size zip top bag along with some flour or breadcrumbs. Seal the bag and then shake vigorously to distribute the coating evenly and press it into all the nooks and crannies.
You can also use your hands to firmly press and pack on the breadcrumbs over every surface. Smoothing the breading onto the chicken helps create a unified coating that will hold together better.
Allow the Breading to Sit and Hydrate
After coating the chicken pieces with breadcrumbs, transfer them to a baking sheet or plate and allow to air dry uncovered in the fridge for at least 20-30 minutes.
Letting the breaded chicken pieces rest gives time for the coating to hydrate slightly and further meld with the chicken skin. This helps seal the breading on securely.
The resting time also allows any wet patches to air dry so the coating doesn’t slide off.
Double Bread For Extra Coverage
For even more armored and shatterproof breading, you can double bread the chicken.
After the initial breading, return the chicken to the buttermilk or egg wash for another quick soak. Then transfer back to the breadcrumbs for a second round of packing on the coating.
Two layers of adhered breading is extremely secure and unlikely to separate or fall off during cooking.
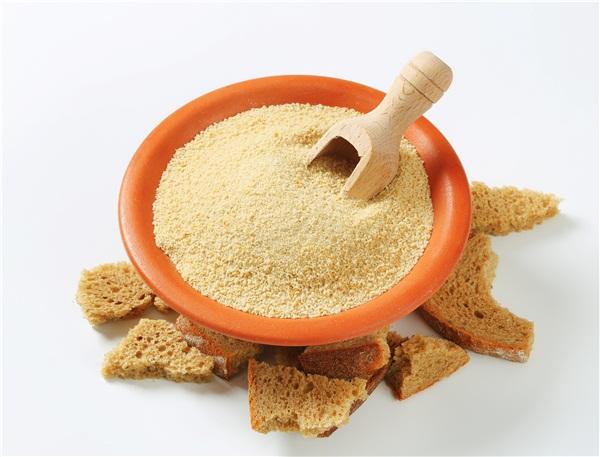
Use Sturdy Breadcrumbs
The type of breadcrumbs you use will also affect how well they stick. Dried out, fine breadcrumbs are more likely to detach than fresh crumbs with more substance.
I prefer to use panko breadcrumbs which have a courser, crisper texture that clings well. Or make your own fresh crumbs from crusty artisanal bread for a heartier coating.
A mix of flour and coarse cornmeal can also create a durable, crunchy breading shell.
Mist the Breading with Oil
Right before cooking, you can further reinforce the breading by misting the coated chicken pieces very lightly with cooking oil. This extra bit of oil helps seal and “glue” the crumbs in place.
Just spray or brush a thin sheen over the surface. You don’t need a heavy coating of oil which can make the breading greasy.
Cook at High Heat
Finally, use high heat to cook the breaded chicken whether pan-frying, baking, or air frying. The initial blast of heat will quickly set the breading and prevent it from absorbing too much oil or moisture during cooking.
Maintain the temperature throughout cooking for the crispiest, most intact breading possible.
Let the Chicken Rest Before Serving
After cooking, resist the urge to immediately start cutting or serving the chicken. Let it rest on the plate or cooling rack for 5-10 minutes first.
This brief resting period allows any steam or moisture to escape rather than getting trapped under the breading, which would cause it to become soggy.
Letting the chicken pieces sit keeps that breading ultra crisp!
With these tips, you’ll be able to achieve perfectly golden, crunchy breaded chicken every time without any naked spots. Your chicken parm and chicken fingers will stay crispy from cooking through serving for superior texture and flavor.
Crispy, clingy breading takes a little extra effort but it’s worth it for the mouthwateringly juicy chicken enclosed within that shatteringly crispy crust. Now go forth and bread away for the crispiest chicken possible!
So, What’s the Best Way to Bread Chicken?
Marinate your chicken in lemon juice and crushed garlic for maximum flavor and the most tender meat.
For the biggest (and most consistent) crunch, dredge in flour, then dip in egg, then coat in crumbs. If you want a battered cutlet but don’t want to go all the way, mix the flour and egg together and then coat the cutlet in crumbs.
When it comes to breading, it’s tough to go wrong. If you’re a big fan of the flavor of any specific cracker or chip (like Ritz or Saltine or Cheez-Its), use those. For a classic, extra-crunchy boy, use panko or panko-Parm. For something nuttier, try fresh bread crumbs made from whole wheat or multigrain. What should Ella test in a future column? Share requests in the comments!.
The Dynamite Chicken cookbook is here! Get ready for 60 brand-new ways to love your favorite bird. There are a lot of great ideas in this book by Food52 and chef Tyler Kord. It has everything from quick dinners for the week to warm treats.
The Standard Breading Process in 3 Easy Steps – Kitchen Conundrums with Thomas Joseph
FAQ
What makes breading stick to chicken better?
Use an Egg Wash: Dip the chicken in an egg wash (beaten eggs) before coating it with breadcrumbs. This helps the breading adhere better. Coat Evenly: Make sure to coat the chicken evenly with breadcrumbs. Press the breadcrumbs onto the chicken firmly to ensure they stick.
How to keep bread crumbs from falling off?
15 minutes in the fridge helps the breadcrumbs to set The chilling stage helps to ensure that the flour absorbs this additional moisture, which comes from both the egg and the chicken itself, so that the crumbs stick better to the pieces of chicken, almost cementing them in place before they’re cooked.
What can I use to get breadcrumbs to stick?
The egg not only adds moisture, but it also holds the breadcrumbs together. Grated parmesan mixed with flour can achieve a similar effect. For a breadcrumb coating with a kick, try replacing the egg with mustard.